
Tahoe 4WD V8-393 6.5L DSL Turbo VIN S (1995)
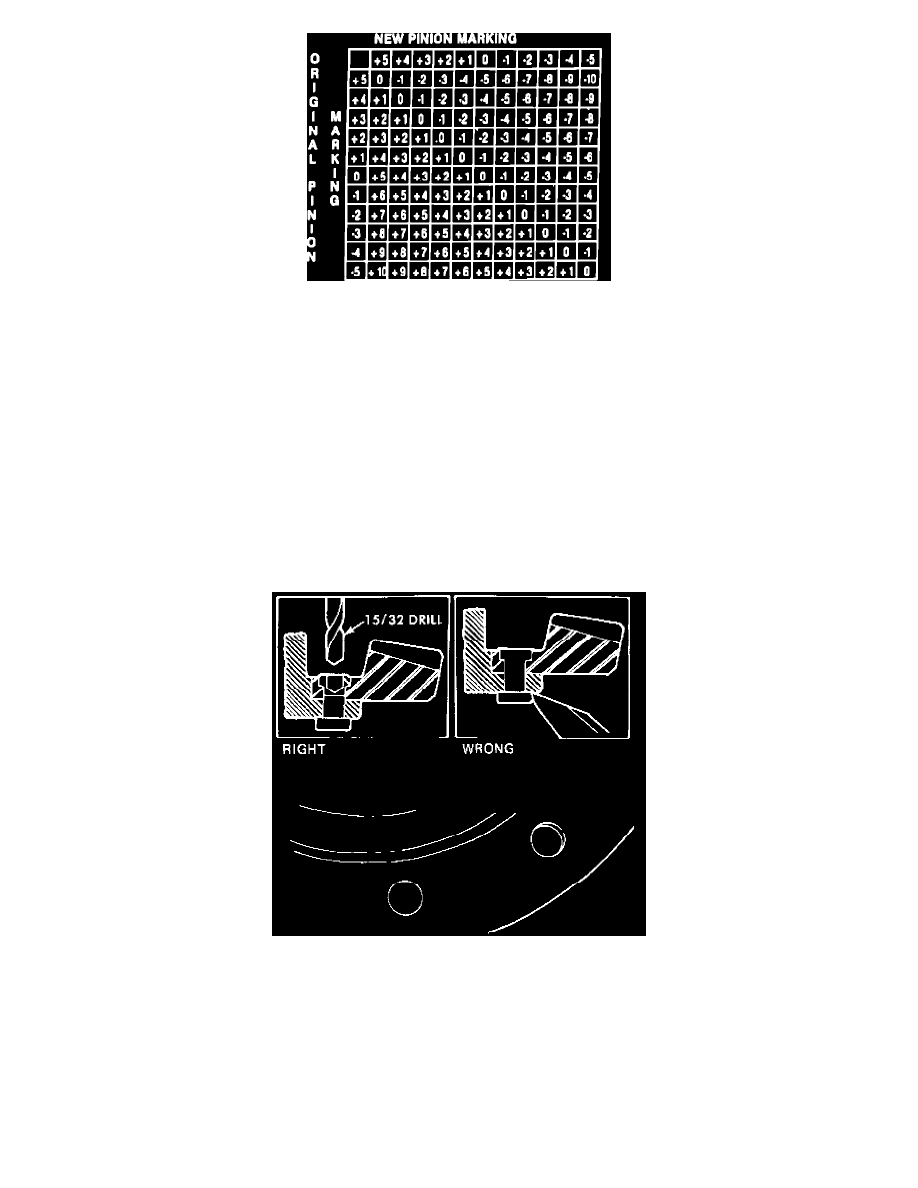
Fig. 7 Pinion Shim Pack Thickness Chart
In addition, each pinion has a Pinion Code (P.C.) Variation Number which indicates variations in thousandths of an inch from the nominal pinion
depth setting. This number must be used to modify the Nominal Pinion Gauging Number when calculating shim pack thickness to set pinion depth. This
variation number is stamped as either a plus (+) or minus (-) value, and is located adjacent to the matching number,
Fig. 6.
When a new pinion is installed, shim pack thickness can be determined using the pinion code numbers and chart,
Fig. 7.
Overhaul
DISASSEMBLE
1. If original matching marks are not clear, scribe matching marks between differential case halves to aid assembling.
2. Remove differential case bolts, noting position for assembling, then separate case halves.
3. Remove differential pinion spider, along with pinions and thrust washers, keeping components in order.
4. Remove side gear and thrust washer from each case half.
5. Remove case side bearings, as needed, using suitable puller.
6. If ring gear is to be replaced, proceed as follows:
a. Carefully center punch center of each rivet head.
Fig. 3 Ring Rear Removal.
b. Using drill 1/32 inch smaller than body of rivet, drill completely through each rivet securing ring gear,
Fig. 3.
c. Press out rivets and remove ring gear.
7. Inspect components as outlined and replace as needed.
ASSEMBLE
1. Install ring gear as follows:
a. Immerse ring gear in water heated to 160-180°F. for approximately 10 minutes.
b. Align gear over case pilot and install ring gear on differential case.
Gear should not be driven or pressed onto case as metal particles may
become lodged between gear and case causing excessive runout.