
Tahoe 4WD V8-393 6.5L DSL Turbo VIN S (1995)
5.
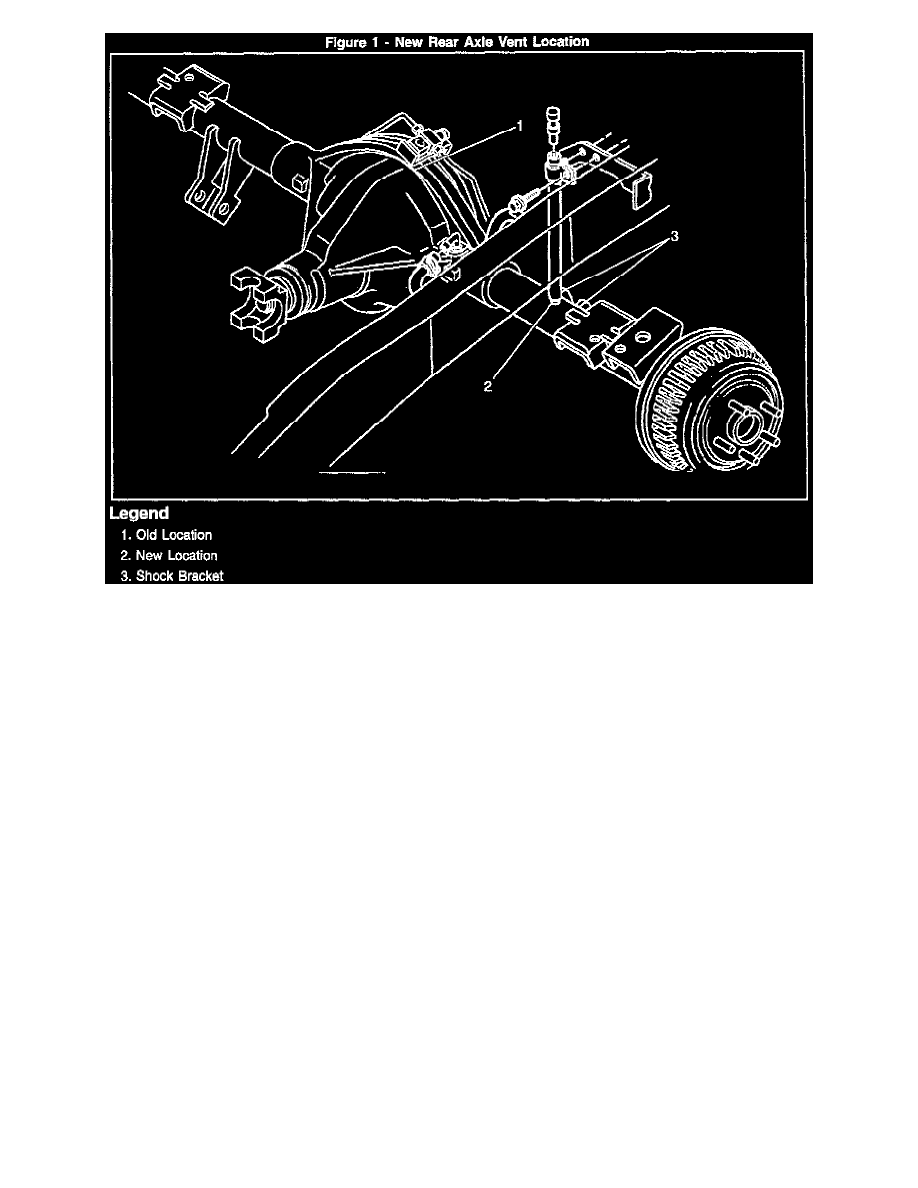
Locate the shock mount bracket on the driver's side axle tube (Figure 1). At the top of the axle tube, parallel to the center of the shock bracket,
drill a 3/8" hole in the axle tube.
Notice:
Precaution should be taken to ensure that no metal fragments enter the axle tube. Use a magnet when drilling to lift and catch the metal filings. Apply
wheel bearing grease to the drill bit before breaking through the axle tube.
6.
Using a 12 mm socket, drive a new vent tube (P/N 14072930) into the axle tube at the location drilled in step 5. Seal the base of the vent tube with
RTV sealant (P/N 12345739).
7.
Use an extendable magnet tool to capture any metal fragments that may have fallen into the axle tube and then re-install the driver's side axle shaft
following the procedure in Section 4B1 of the appropriate year Service Manual.
8.
Cut approximately 8.5" (216 mm) off the existing vent hose and discard after verifying that enough vent hose will remain to allow for axle
movement. Clamp the remaining hose onto the new axle vent tube installed in step 7.
9.
Check the rear axle fluid level. Add fluid if necessary (P/N 1052271 80W-90 GL-5).
10.
Lower the vehicle and test drive.
Parts Information
P/N
Description
Qty
14072930
Vent Tube
1
12345739
RTV Sealant
As Required
1052271
Rear Axle
As Required
Lubricating Oil
Parts are currently available from GMSPO.