
Tahoe 4WD V8-393 6.5L DSL Turbo VIN S (1995)
^
Tools Required:
-
J 36600 Seal Installer
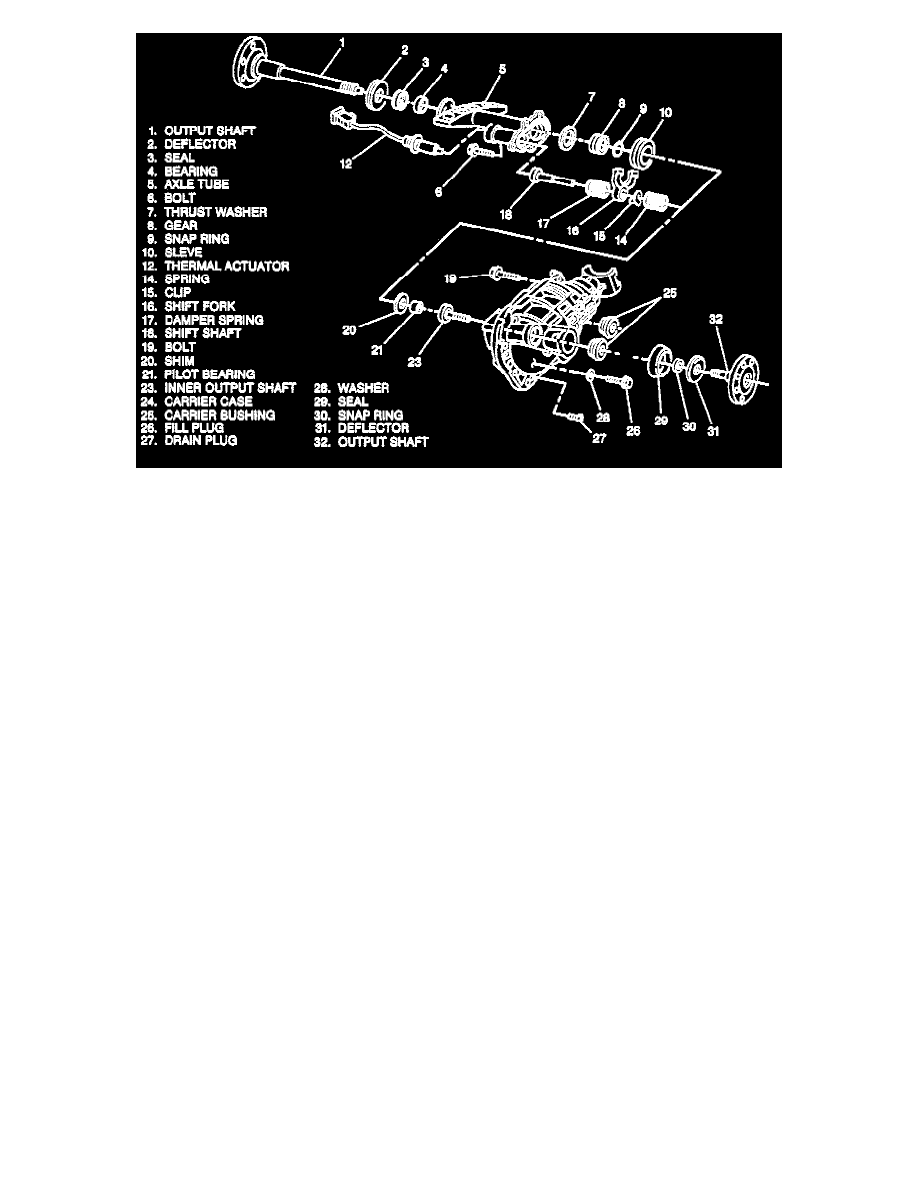
REMOVE OR DISCONNECT
^
Raise the vehicle. Support with jack stands.
1. Drain front axle.
2. Drive axle (halfshaft).
3. Axis shaft (output shaft) (32). Attach a slide hammer with adapter to the axle shaft (output shaft) and pull it from the carrier case. Take care not to
damage the case.
4. Deflector (31).
5. Seal (29). Pry out with a screwdriver.
6. Bearing using slide hammer J 23907.
INSTALL OR CONNECT
NOTICE: Always use the correct fastener in the proper location. When you replace a fastener, use ONLY the exact part number for that application.
The manufacturer will call out those fasteners that require a replacement after removal. The manufacturer will also call out the fasteners that require
thread lockers or thread sealant. UNLESS OTHERWISE SPECIFIED, do not use supplemental coatings (paints, greases, or other corrosion inhibitors
on threaded fasteners or fastener joint interfaces. Generally, such coatings adversely affect the fastener torque and joint clamping force, and may
damage the fastener. When you Install fasteners, use the correct tightening sequence and specifications. Following these instructions can help you
avoid damage to parts and systems.
^
It may be necessary to attach a 1/2 inch by 13 inch long extension handle onto the slide hammer for easier pulling of the bearing.
1. Bearing (square shoulder in) using J 22761
2. New seal (29). Using J 36600 to install. Lubricate the seal lips with grease prior to installation.
3. Deflector (31).
4. Axle shaft (output shaft) (32). Carefully tap the axle shaft (output shaft) into place with a soft mallet.
5. Drive axle (halfshaft).
6. Fill front axle.