Tahoe 4WD V8-6.2L (2009)

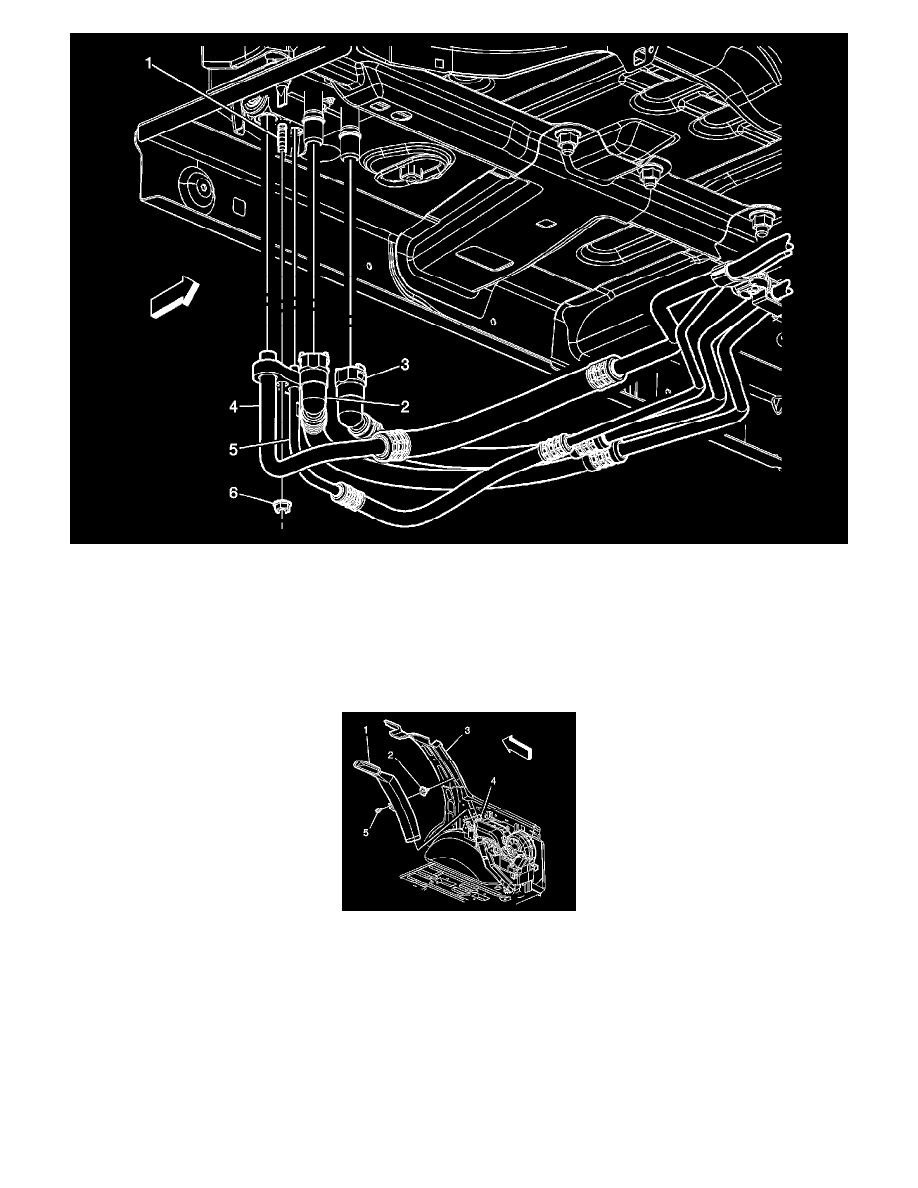
4. Disconnect the heater lines (2, 3) from the auxiliary HVAC module at the underside of the vehicle.
5. Disconnect the air conditioning lines (4, 5) from the auxiliary HVAC module at the underside of the vehicle.
6. Remove the nuts (6) from the studs (1) that secure the auxiliary HVAC module to the underside of the vehicle.
7. Lower the vehicle.
8. Remove the right rear quarter trim panel. Refer to Rear Quarter Trim Panel Replacement - Right Side (Standard Wheelbase) (See: Body and
Frame/Interior Moulding / Trim/Trim Panel/Service and Repair)Rear Quarter Trim Panel Replacement - Right Side (Extended Wheelbase) (See:
Body and Frame/Interior Moulding / Trim/Trim Panel/Service and Repair).
9. Disconnect the electrical connectors from the Auxiliary HVAC module.
10. Remove the fastener (5) for the upper auxiliary air duct (1). Carefully slide the duct up, into the headliner, until the bottom edge of the duct is
above the air distributor duct.
