
Tahoe 4WD V8-6.2L (2009)
Fuel Injector: Removal and Replacement
Fuel Injector Replacement
Removal Procedure
Caution: Use care in removing the fuel injectors in order to prevent damage to the fuel injector electrical connector pins or the fuel injector nozzles. Do
not immerse the fuel injector in any type of cleaner. The fuel injector is an electrical component and may be damaged by this cleaning method.
Note:
*
An 8-digit identification number is located on the fuel rail. Refer to this identification number when servicing or when part replacement is
required.
*
The engine oil may be contaminated with fuel if the fuel injectors are leaking.
1. Remove the air cleaner outlet duct. Refer to Air Cleaner Resonator Outlet Duct Replacement (See: Air Cleaner Housing/Air Cleaner Fresh Air
Duct/Hose/Service and Repair).
2. Relieve the fuel system pressure. Refer to Fuel Pressure Relief (With CH-48027) (See: Fuel Filter/Fuel Pressure Release/Service and Repair/Fuel
Pressure Relief (With CH-48027))Fuel Pressure Relief (Without CH-48027) (See: Fuel Filter/Fuel Pressure Release/Service and Repair/Fuel
Pressure Relief (Without CH-48027)).
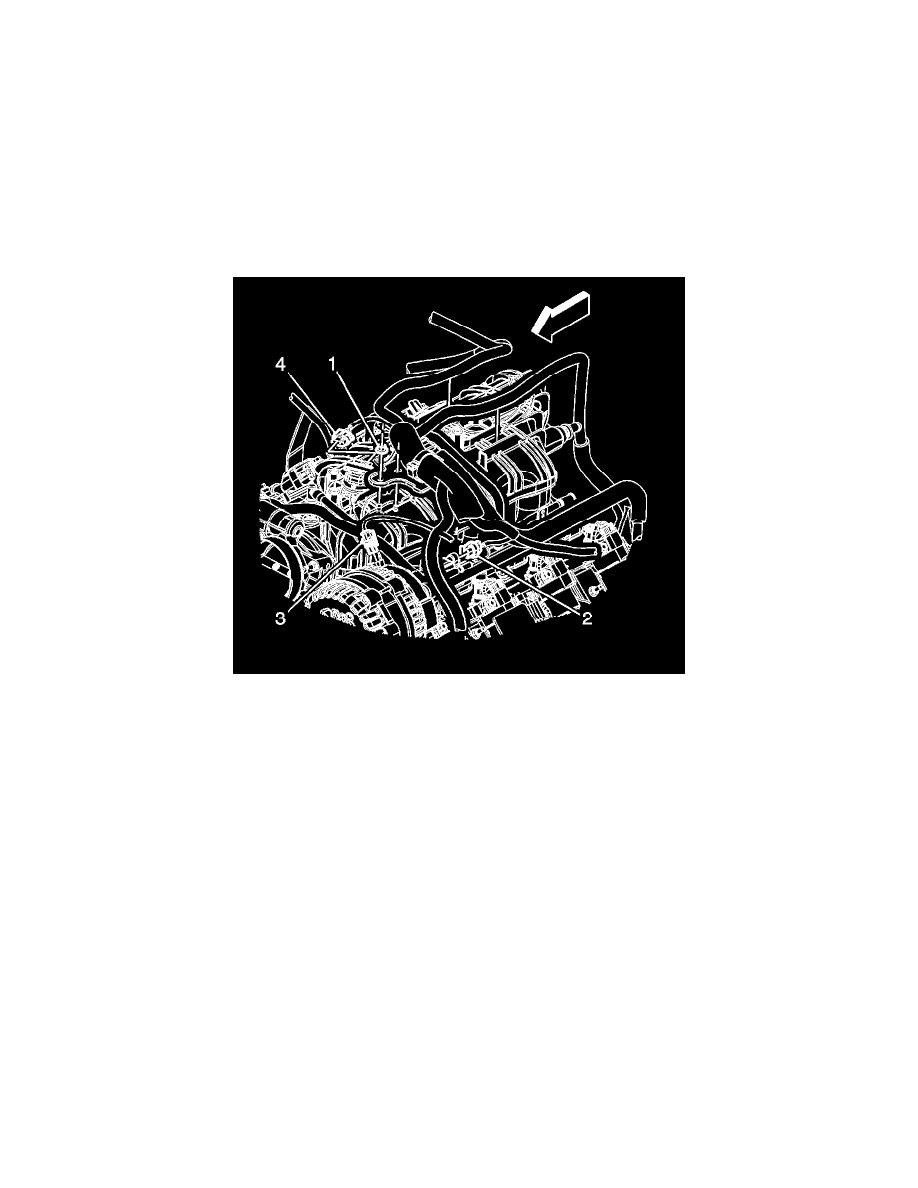
3. Remove the engine wiring harness bracket nut (1).
4. Disconnect the engine wiring harness electrical connector (2) from the evaporative emission (EVAP) purge solenoid.
5. Disconnect the engine wiring harness electrical connector (3) from the generator.
6. Disconnect the engine wiring harness electrical connector (4) from the manifold absolute pressure (MAP) sensor.