
Tracker 2WD L4-1.6L VIN 6 (2000)
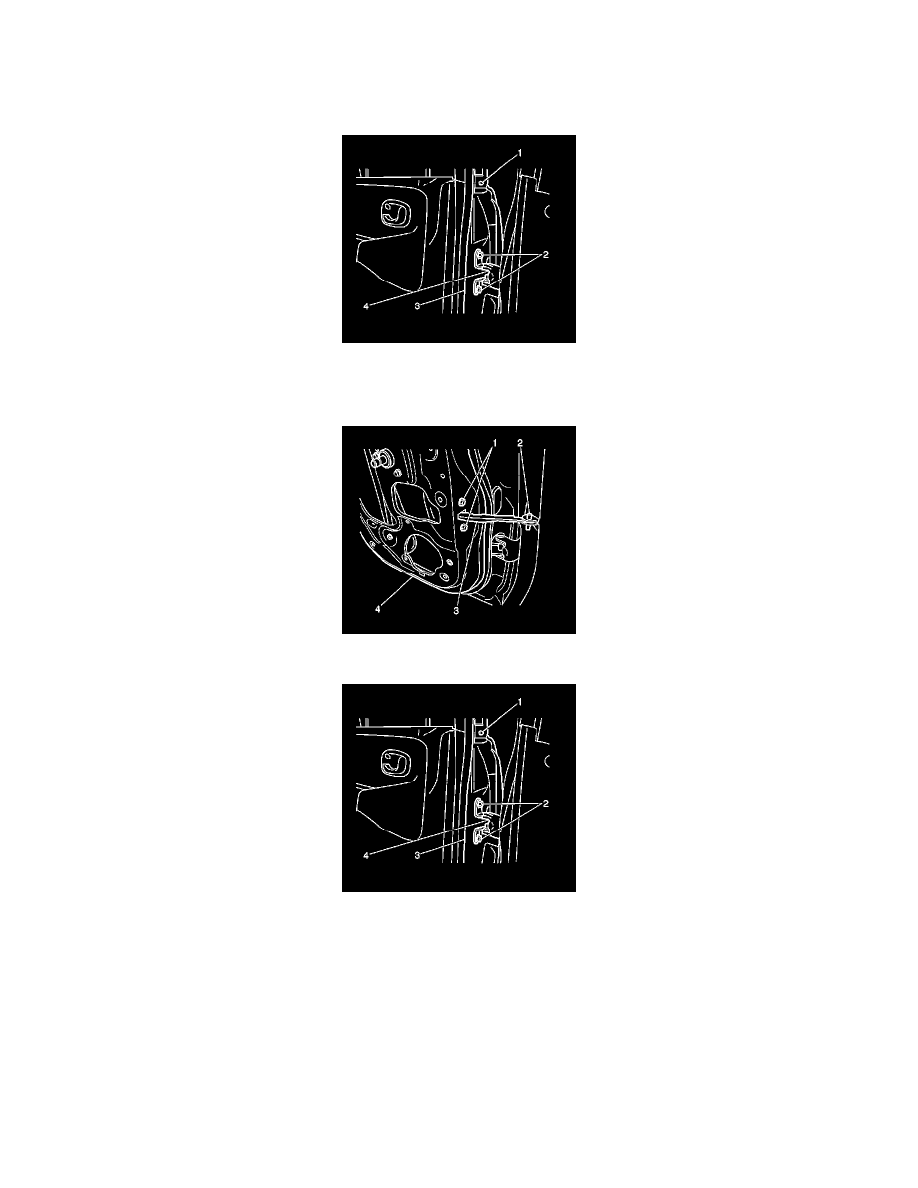
9. Remove the 2 bolts which secure the lower hinge to the door (3).
10. Slide the rear side door (3) away from the door jamb in order to gain the necessary clearance to remove the upper hinge (4).
11. Remove the upper hinge (4) from the vehicle.
Installation Procedure
1. Install the rear side door upper hinge (4) to the door jamb by aligning the hinge with the marks made during the removal procedure. Secure the
hinge with the 2 bolts and the nut. Do not tighten fully at this time.
2. Position the rear side door (3) to the hinges by aligning the hinges with the marks made during the removal procedure.
3. Install the rear side door check pin (2).
4. Install the 2 bolts which secure the lower hinge to the door (3). Do not tighten fully at this time.
Notice: Refer to Fastener Notice in Cautions and Notices.
5. Install the 2 bolts (2) which secure the upper hinge (4) to the door (3).
Tighten the rear side door hinge bolts to 27 N.m (19 lb ft) and the rear side door upper hinge nut to 23 N.m (17 lb ft).
6. Install the lower center pillar trim. Refer to Center Pillar Lower Trim Panel Replacement (4 Door) (See: Interior Moulding / Trim/Trim
Panel/Service and Repair/Center Pillar Lower Trim Panel Replacement (4 Door)) in Interior Trim.