
Tracker 4WD V6-2.5L VIN 4 (2001)
Powertrain Control Module: Service and Repair
Powertrain Control Module (PCM) Replacement
REMOVAL PROCEDURE
NOTE:
^
Check the resistance values of all PCM relays, solenoids, and other output controls before replacing or substituting the Powertrain Control Module
(PCM). Check all the sensor wiring and the PCM output control circuits for a short to ground before replacing or substituting the PCM. Perform
all circuit repairs or malfunctioning component part replacements before installing a replacement or substitute PCM. This will prevent damage to
the replacement or substitute PCM.
^
In order to prevent possible Electrostatic Discharge damage to the PCM, Do Not touch the connector pins or the soldered components on the
circuit board.
IMPORTANT: When replacing the production Powertrain Control Module (PCM) with a service PCM, transfer the broadcast code and production
PCM number to the service PCM label. This will allow for positive identification of the PCM throughout the service life of the vehicle.
CAUTION: Refer to Battery Disconnect Caution in Service Precautions.
1. Disconnect the negative battery cable.
2. Disable the SIR system. Refer to Disabling the SIR System in Restraint Systems.
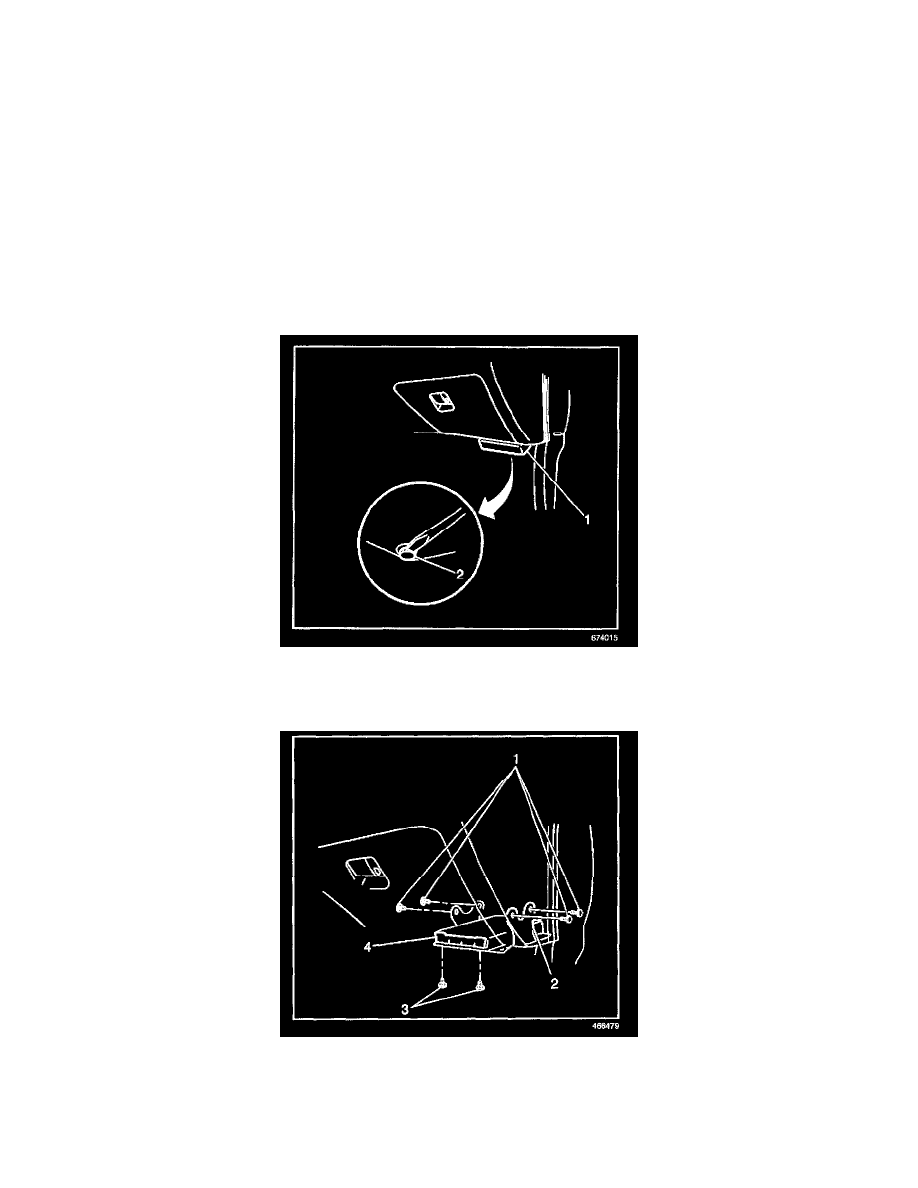
3. Release the two plastic retainers (2) with the blade of a screwdriver and remove the PCM cover (1).
4. Disconnect the four PCM electrical connectors.
5. Remove the two PCM retaining bolts (3).
6. Slide the PCM (4) forward and out from the PCM bracket.
7. Remove the four PCM bracket bolts (1).
8. Remove the PCM bracket (2) from underneath the instrument panel.