
Tracker 4WD V6-2.5L VIN 4 (2001)
12. Remove the right fuel rail (3) and fuel injectors. Use a shop towel in order to catch any remaining fuel that may leak.
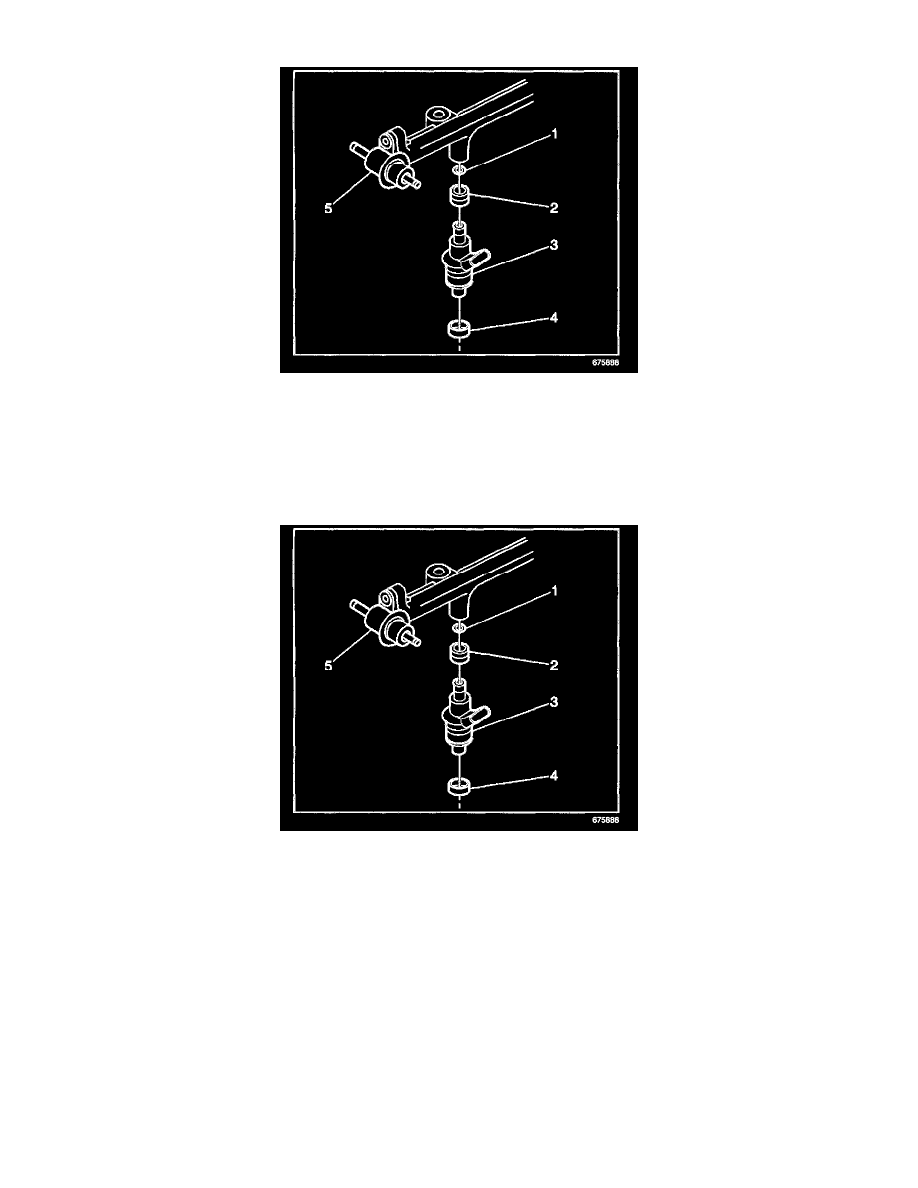
13. Remove the fuel injectors (3) from the fuel rail as necessary.
14. Remove the two bolts and the fuel pressure regulator (5) from the left fuel rail.
INSTALLATION PROCEDURE
IMPORTANT: Always replace the fuel injector O-rings with new O-rings when servicing the fuel injectors. Do not damage the O-rings during the
installation.
1. Apply a thin coat of motor oil to the fuel injector O-rings (1).
2. Install a fuel injector O-ring (1) with a spacer (2) to each fuel injector (3).
3. Install each fuel injector (3) to the fuel rail.
4. Apply a thin coat of motor oil to the fuel pressure regulator O-ring.
NOTE: Refer to Fastener Notice in Service Precautions.
5. Install the fuel pressure regulator (5) to the left fuel rail and secure with two bolts.
Tighten
Tighten the bolts to 10 N.m (89 lb in).
IMPORTANT: Inspect the fuel injector cushions for scoring or for damage. Before installing the fuel injectors to the intake manifold, replace any
faulty injector cushions.
6. Prepare each fuel rail assembly for installation to the intake manifold, by ensuring that a cushion (4) is present in the seat location of each fuel
injector. Replace any missing or damaged cushions as necessary.