
Tracker 4WD V6-2.5L VIN 4 (2001)
17.
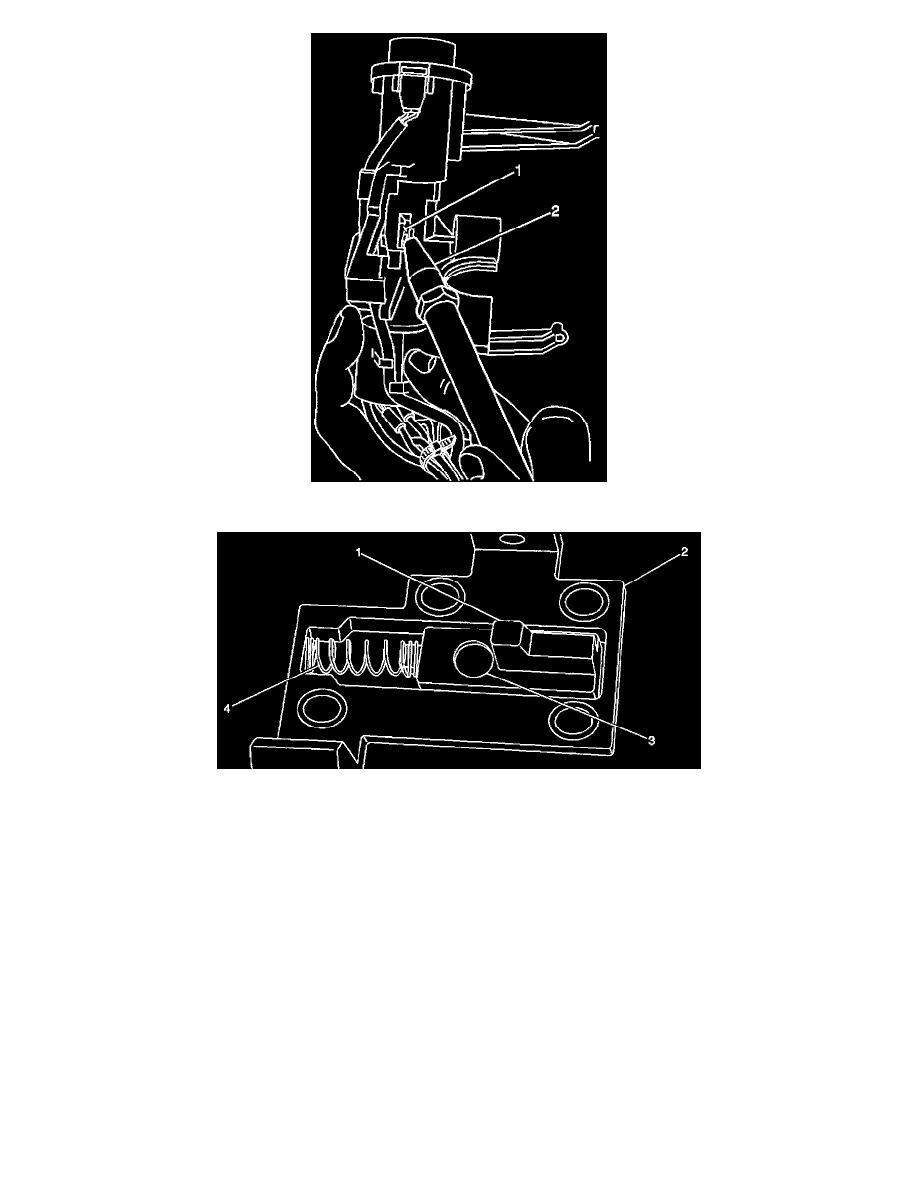
Using compressed air and a blow gun (2), remove any debris from the hole (1) in the lock cylinder that was covered by the AT cover.
IMPORTANT
Do NOT discard the small plastic bag after removing the slider from it in the next step. The small amount of grease remaining in the bag will
be used later in this procedure. Also, do not install the spring in the AT cover until instructed.
18.
Remove the AT slider (1) from the small bag making sure it is WELL GREASED and install it in the opening in the underside of the new AT
cover (2) as shown. When properly installed, the SMALL CIRCLE MARK (3) ON THE SLIDER MUST BE VISIBLE. If installed with the small
circle mark NOT visible, (upside down), the repair procedure will NOT work.
IMPORTANT
To keep the spring operating smoothly in cold weather, keep the amount of grease on the spring to a minimum.
19.
Install the spring (4) in the AT cover (2) as shown, keeping the amount of grease that gets on it to a minimum. Then, set the assembled AT cover
aside.
20.
Turn the ignition key to the LOCK position to expose the leading edge of the internal cam in the opening in the lock cylinder housing.