
Tracker 4WD V6-2.5L VIN 4 (2001)
Automatic Transmission Dipstick - Dipstick Tube: Service and Repair
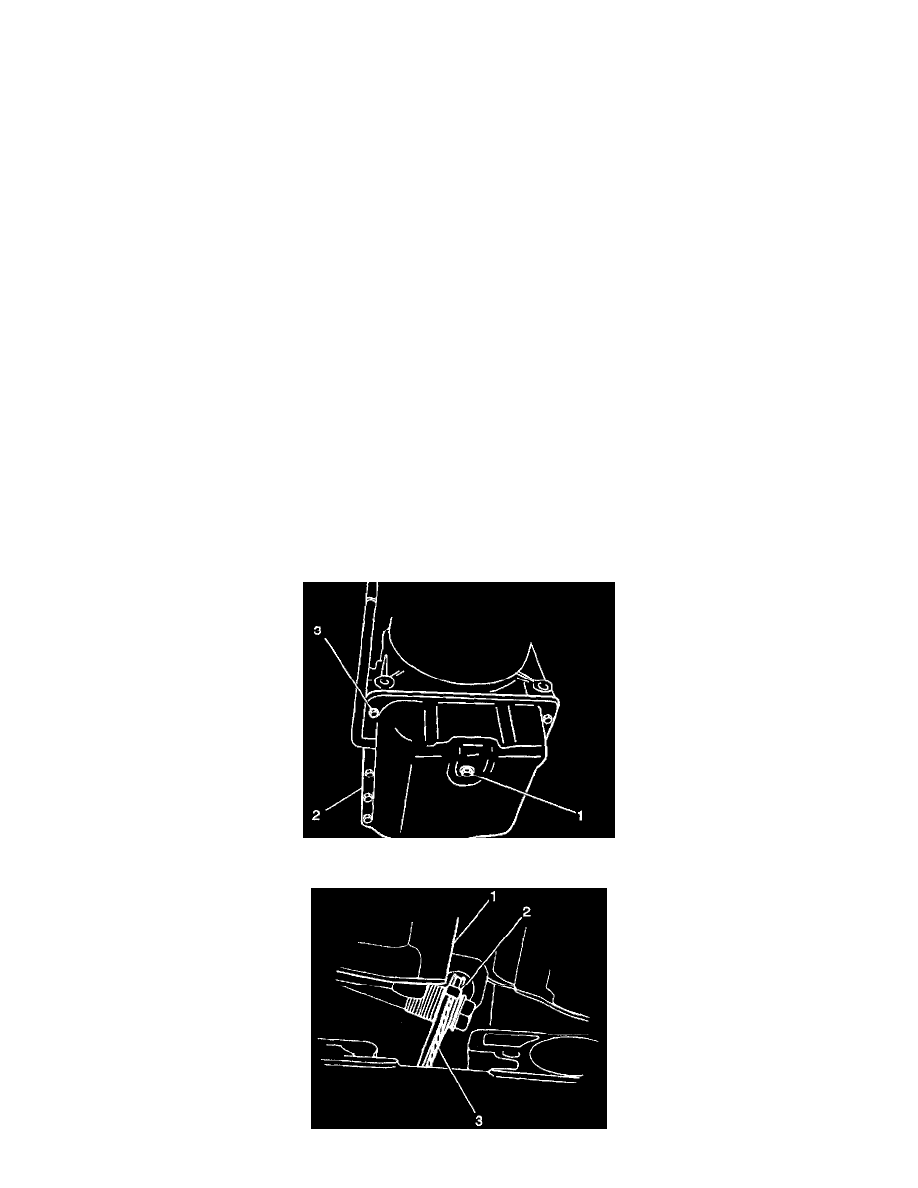
Filler Tube Replacement
^
Tools Required
-
J36850 Transjel (R) Transmission Assembly Lubricant
Removal Procedure
1. Remove the fluid level indicator.
2. Raise and suitably support the vehicle. Refer to Vehicle Lifting.
3. Remove one bolt and the fluid filler tube from the transmission case.
4. Remove the O-ring seal.
5. Inspect the fluid filler tube O-ring for cuts or other damage.
6. Replace as necessary.
Installation Procedure
1. Apply J36850 to the fluid filler tube O-ring.
2. Install the filler tube into the transmission case.
Notice: Refer to Fastener Notice in Service Precautions.
3. Secure the filler tube with one bolt.
^
Tighten the fluid filler tube bracket bolt to 23 Nm (17 ft. lbs.).
4. Lower the vehicle.
5. Install the fluid level indicator.
6. Refill as necessary.
Valve Body and Accumulator Pistons Removal
1. Remove the fluid level indicator.
2. Disconnect the TV cable from the throttle body.
3. Raise the vehicle. Support the vehicle. Refer to Vehicle Lifting.
4. Remove the front propeller shaft.
5. Remove the fluid pan bolts (3) the fluid pan and the gasket (2).