TrailBlazer 2WD V8-6.0L VIN H (2006)

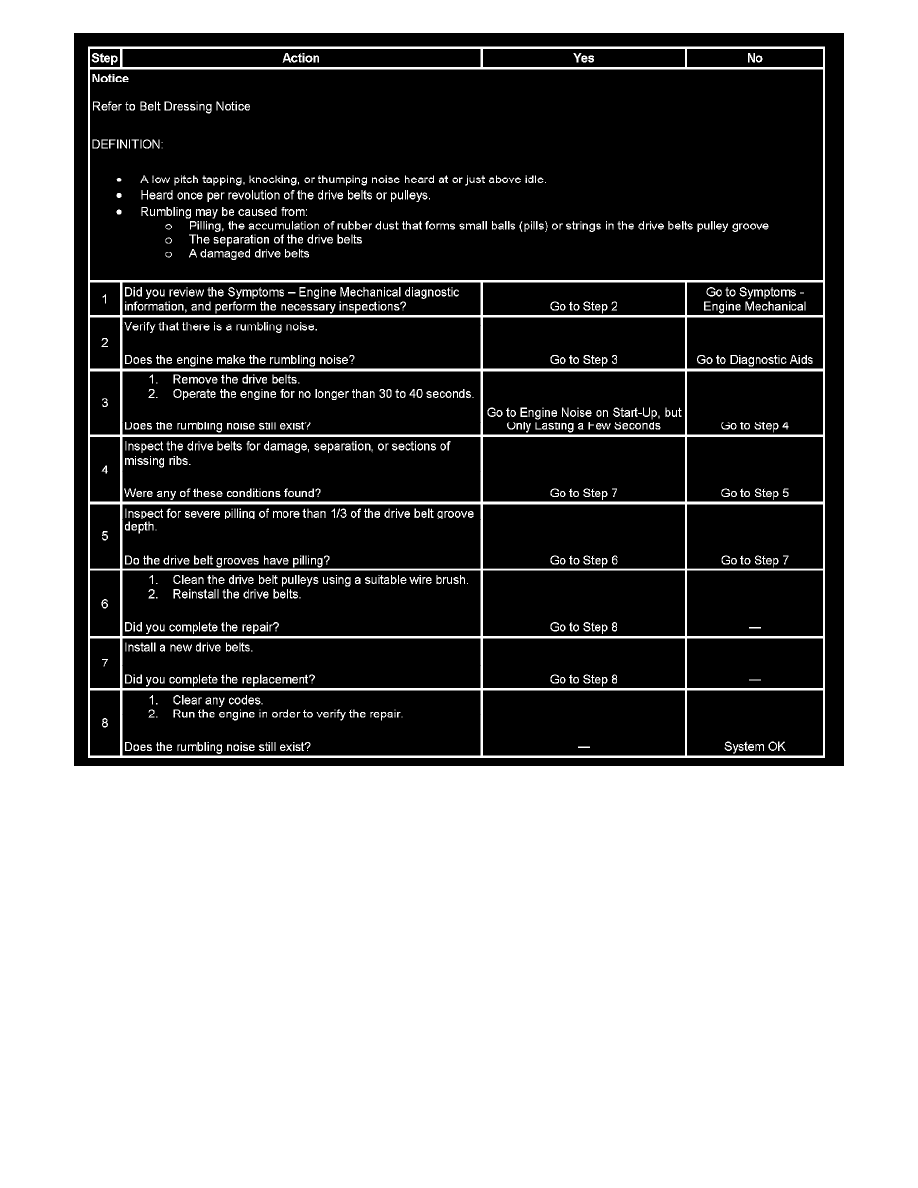
Step 1 - Step 8
The numbers below refer to the steps in the diagnostic table.
2. This test is to verify that the symptom is present during diagnosing. Other vehicle components may cause a similar symptom.
3. This test is to verify that the drive belts is causing the rumbling. Rumbling may be confused with an internal engine noise due to the similarity in
the description. Remove only one drive belt at a time if the vehicle has multiple drive belts. Operate the engine for a few seconds, this will verify if
the rumbling noise is related to the drive belts or not. With the drive belts removed the water pump will not operate and the engine may overheat.
Also diagnostic trouble codes (DTC's) may set when the engine is operated with the drive belts removed.
4. Inspect the drive belts to ensure that the drive belts is not the cause of the noise. Small cracks across the ribs of the drive belts will not cause the
noise. Belt separation is identified by the plies of the belt separating, this may be seen at the edge of the belt or felt as a lump in the belt.
5. Small amounts of pilling is a normal condition and acceptable. When the pilling is severe the drive belts does not have a smooth surface for proper
operation.
