
TrailBlazer 2WD V8-6.0L VIN H (2006)
Installation Procedure
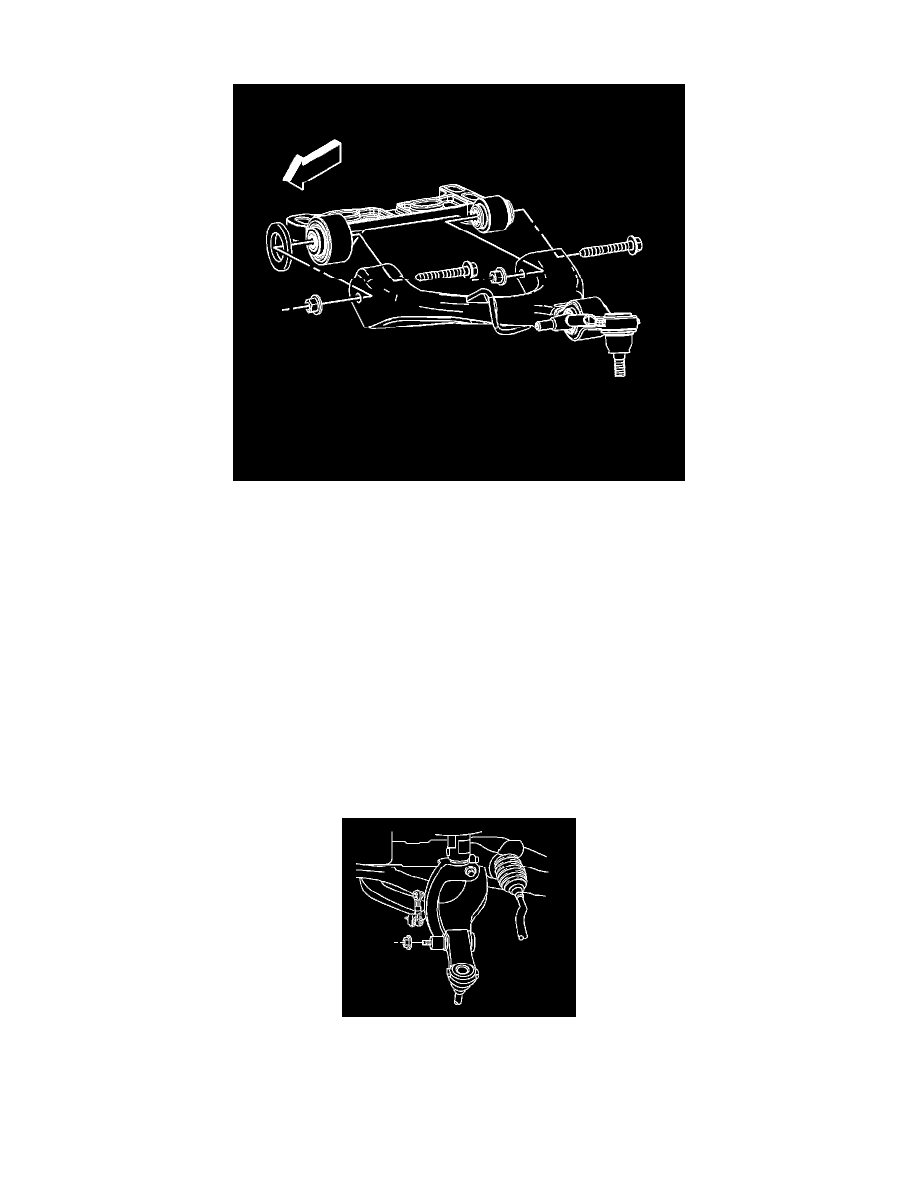
1. Position the lower control arm ball joint stud to the steering knuckle.
Important: Take care not to disengage the axle shaft from the transmission.
2. Pivot the lower control arm outward and upward in order to connect the lower control arm to the lower control arm bracket.
Important: Ensure that the spacer stays in position on the front control arm bracket front bushing.
3. Install the lower control arm to lower control arm bracket mounting bolts.
4. Install the lower control arm to lower control arm bracket mounting nuts.
Tighten the nuts to 130 Nm (96 ft. lbs.).
Notice: Refer to Fastener Notice in Service Precautions.
Important: Ensure that the lower control arm is parallel to the lower control arm bracket during the installation and tightening of the lower
control arm mounting bolts and nuts. This will ensure correct alignment of the lower control arm bushings.
5. Connect the shock module yoke to the lower control arm.
6. Install the shock module yoke lower mounting nut.
Tighten the nut to 110 Nm (81 ft. lbs.).