
TrailBlazer 2WD V8-6.0L VIN H (2006)
Pressure Regulating Solenoid: Service and Repair
Pressure Regulator Replacement
Removal Procedure
1. Raise and support the vehicle.
2. Remove the transmission oil pan and filter.
3. Compress the reverse boost valve sleeve into the bore of the oil pump to release tension on the reverse boost valve retaining ring.
4. Remove the reverse boost valve retaining ring, then slowly release tension on the reverse boost valve sleeve.
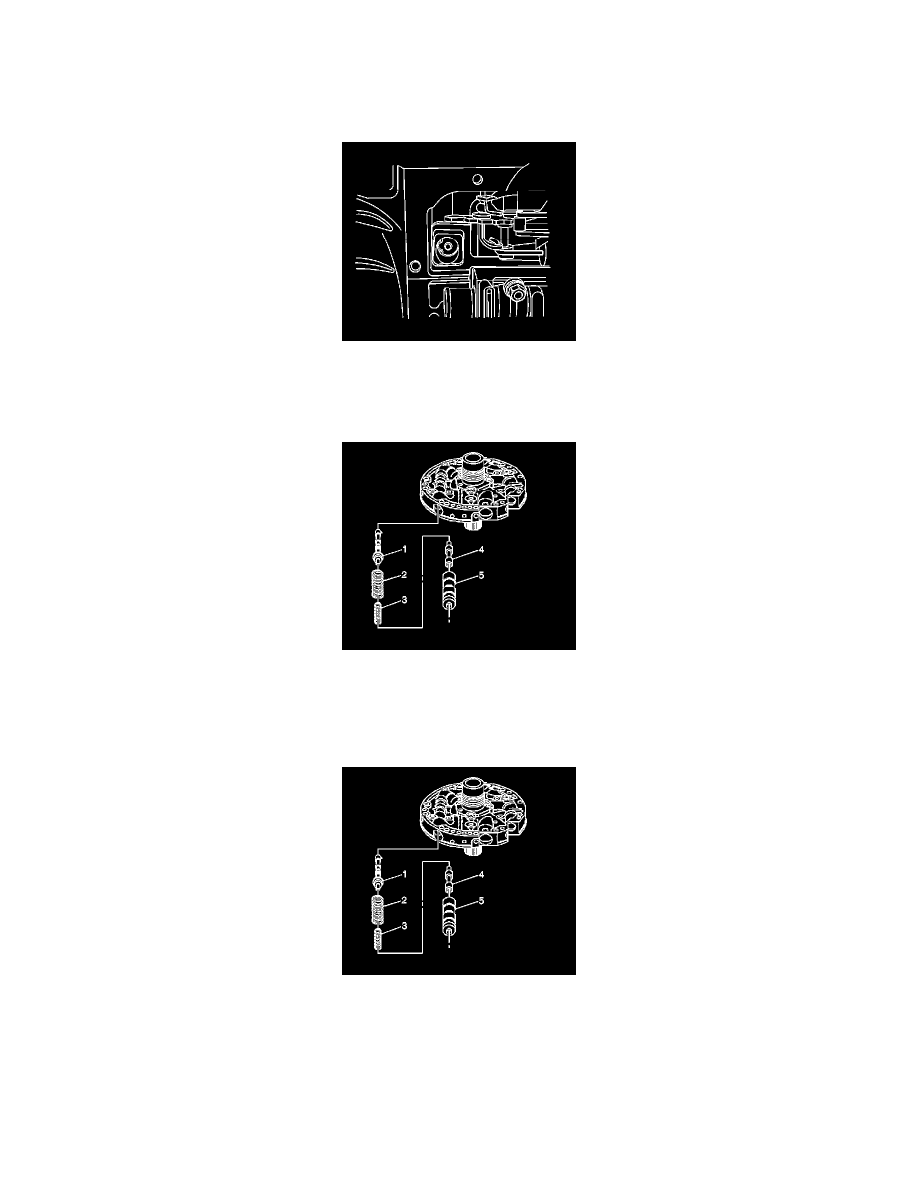
5. Remove the reverse boost valve sleeve (5) and the reverse boost valve (4).
6. Remove the pressure regulator isolator spring (3) and the pressure regulator valve spring (2).
7. Remove the pressure regulator valve (1).
Installation Procedure
1. Install the pressure regulator valve (1).
2. Install the pressure regulator isolator spring (3) and the pressure regulator valve spring (2).
3. Install the reverse boost valve (4) in the reverse boost valve sleeve (5).
4. Install the reverse boost valve (4) and sleeve (5) in the oil pump cover.