TrailBlazer 4WD L6-4.2L VIN S (2002)

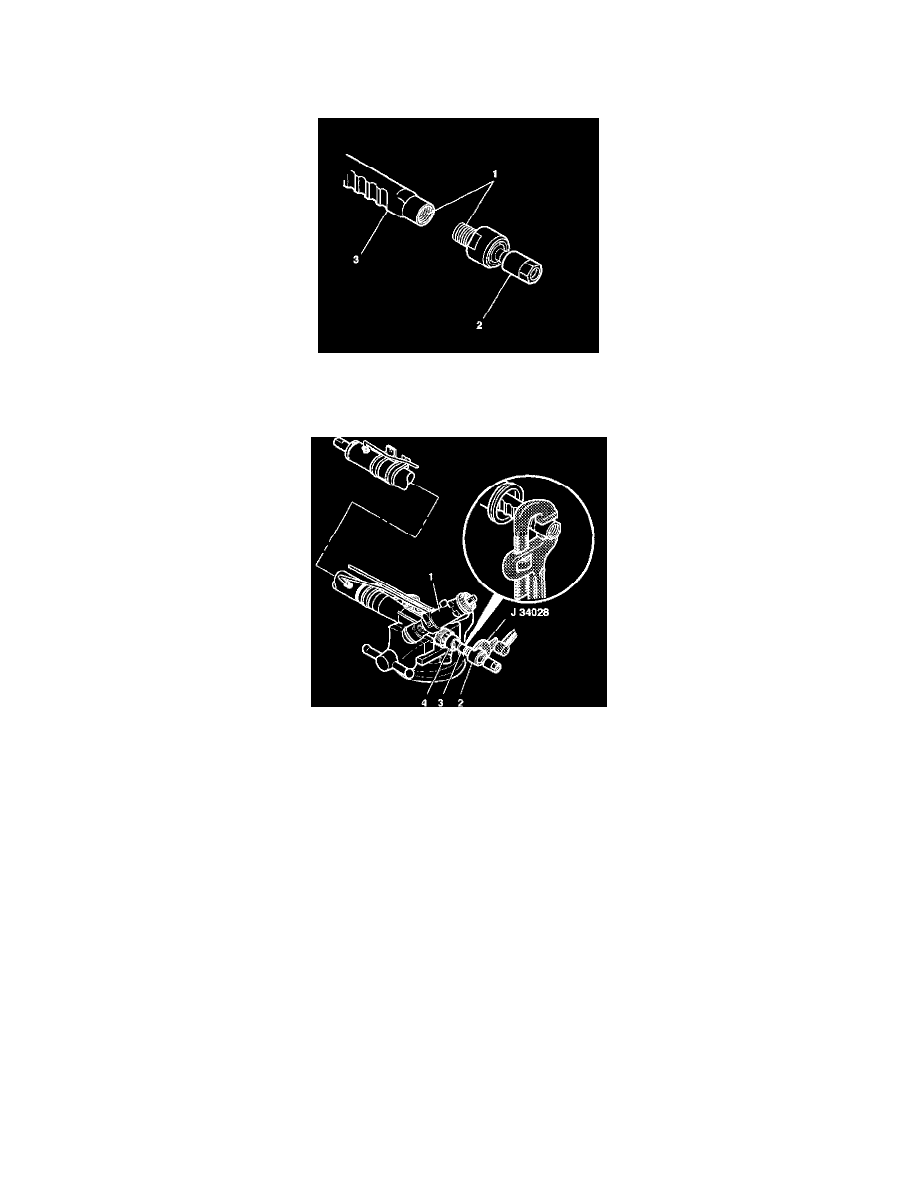
10. Maintain the pipe wrench on the opposite end of the rack (6).
11. Place a wrench on the flats of the inner tie rod housing (2).
12. Rotate the inner tie rod housing (2) counterclockwise until the inner tie rod separates from the rack (4).
13. Remove old LOCTITE from the threads (1) of the rack (3) and inner tie rod (2).
Installation Procedure
1. Slide the shock dampener (4) forward onto the rack (3).
Important: Threads must be clean prior to LOCTITE application. Check the LOCTITE (or equivalent) container expiration date. Use only enough
LOCTITE to evenly coat threads.
2. Apply LOCTITE 262 (or equivalent) to the inner tie rod threads (2).
3. Attach the inner tie rod (2) onto the rack (3).
4. Place a pipe wrench on the rack (3) next to the inner tie rod housing (2).
Notice: Refer to Fastener Notice in Service Precautions.
Important: The pipe wrench must be placed at the valve end of the steering gear (1) and positioned up against the inner tie rod housing. Placing the
pipe wrench in any other location will cause damage to the steering gear (1).
5. Place a torque wrench and J34028 on the flats of the inner tie rod housing (2).
Tighten the inner tie rod housing to 100 Nm (74 ft. lbs.).
