
Traverse AWD V6-3.6L (2011)
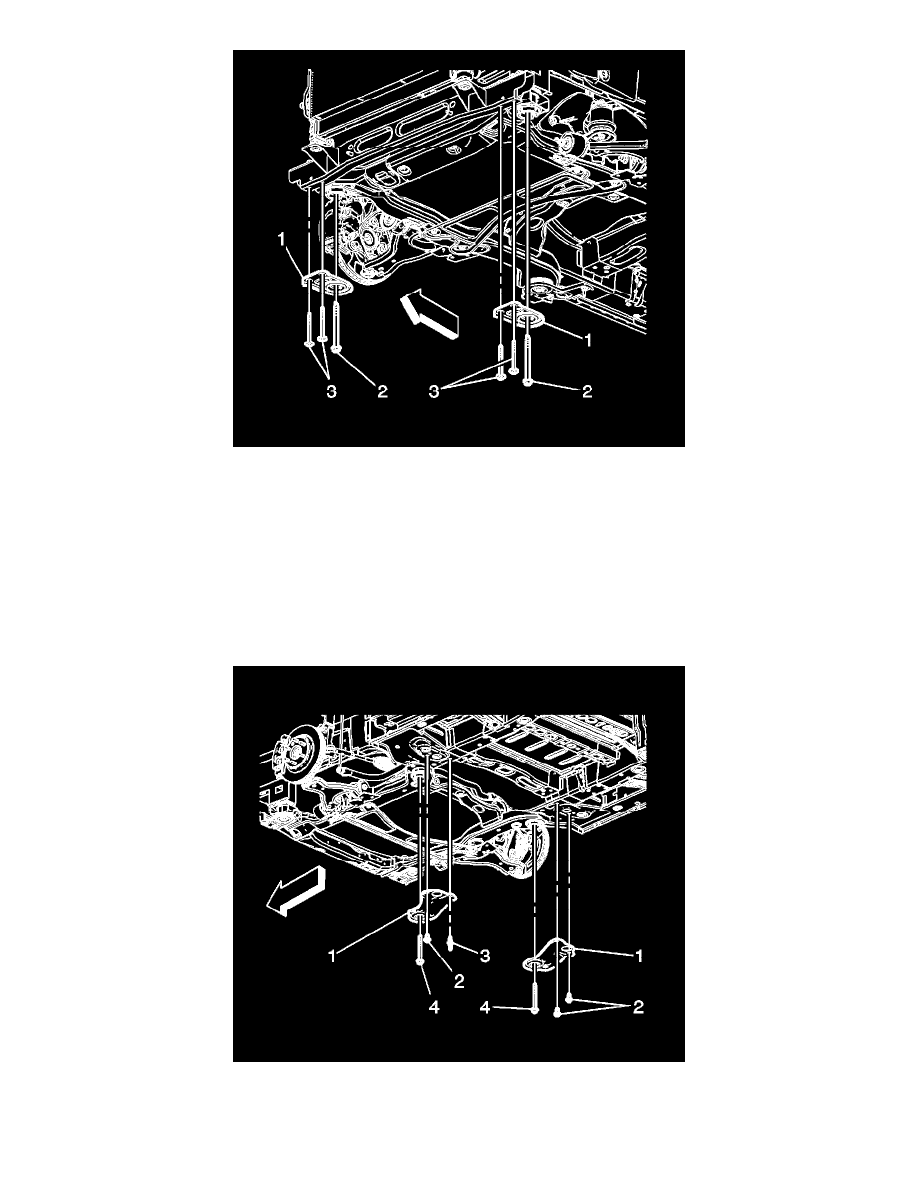
9. Install the front crossmember brace (1).
Note: If the frame insulator bolt does not screw in smoothly, run a tap through the frame nut in the body in order to remove foreign material.
Ensure the tap does not punch through the underbody.
Do not over tighten the insulator. Over tightening may collapse a spacer or strip a bolt.
Note: The frame to body bolts are Torque-to-Yield fasteners and MUST be replaced after one use.
10. Install the NEW front frame to body bolts (2) and tighten to 110 Nm (81 lb ft) plus 90 degrees.
11. Install the front crossmember brace bolts (3) and tighten to 50 Nm (37 lb ft).
12. Install the reinforcements (1).
13. Install the NEW rear frame to body bolts (4) and tighten to 110 Nm (81 lb ft) plus 90 degrees.
14. Install the reinforcement bolts (2) and tighten to 60 Nm (44 lb ft).
15. Install the reinforcement studs (3) and tighten to 60 Nm (44 lb ft).