
Uplander AWD V6-3.5L VIN 8 (2005)
Lower Side Moulding / Trim: Service and Repair
Molding Replacement - Body Side Door (Lower Front)
Molding Replacement - Body Side Door (Lower Front)
Tools Required
*
J 25070 Heat Gun
*
J 38778 Door Trim Pad Clip Remover
Removal Procedure
1. Use aJ 38778 to disengage the push-in retainers at the center front and center rear of the lower door molding.
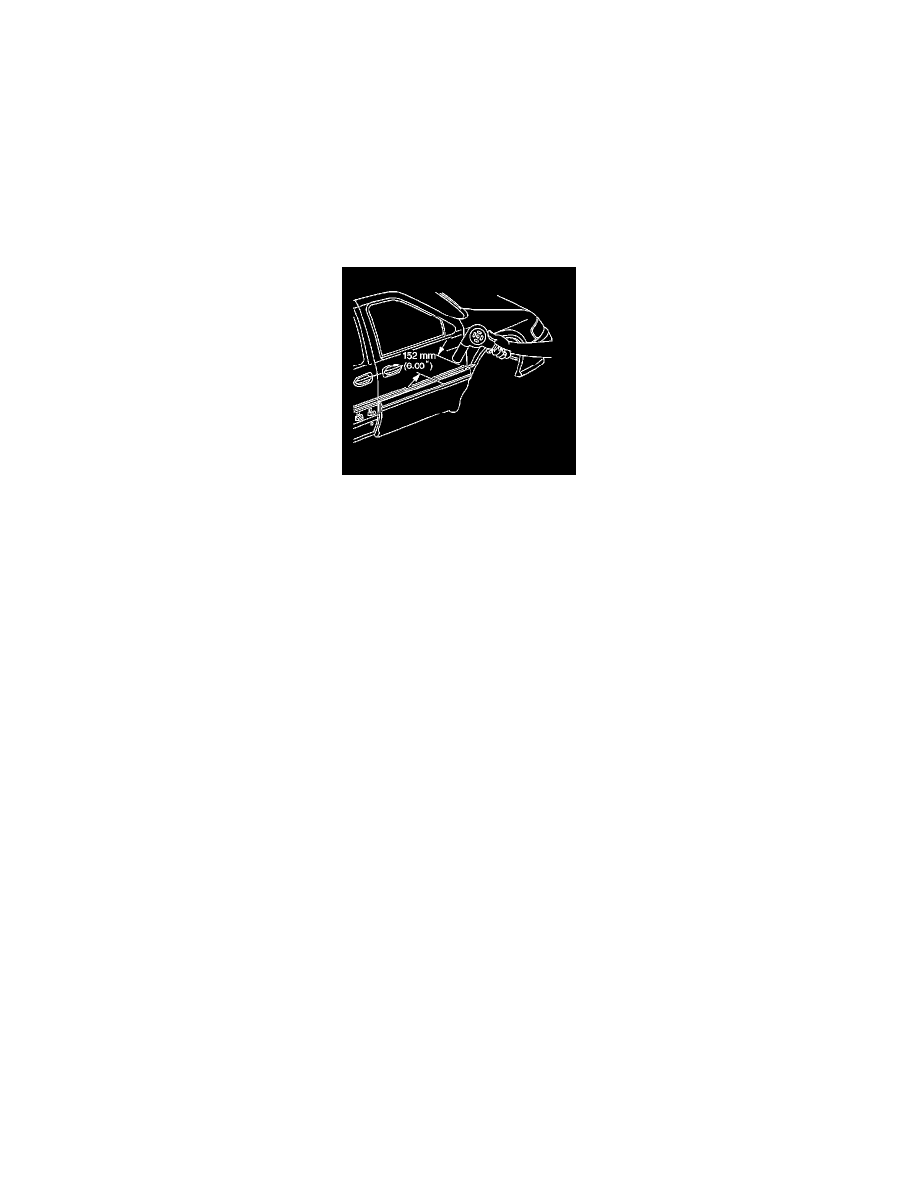
2. Use aJ 25070 152 mm (6 in) from the surface to heat the lower edge of the door molding.
Use a circular motion for 30 seconds when applying the heat.
Notice: Refer toExterior Trim Emblem Removal Notice in Cautions and Notices.
3. Use a plastic flat-bladed tool to remove the lower edge of the door molding adhesive tape from the body panel.
4. Pull the lower edge of the door molding out to release the adhesive tape.
5. Pull the upper edge of the door molding up to release the adhesive tape from the top edge.
6. Remove the door molding from the door.
7. Use oil-free naphtha or alcohol to clean the body panel.
8. Remove all traces of adhesive from the body panel.
9. Dry the surface thoroughly before apply the new lower door molding.
Installation Procedure
1. Ensure the 2 retainers in the lower body side molding are secured to the new molding.