
Uplander AWD V6-3.5L VIN 8 (2005)
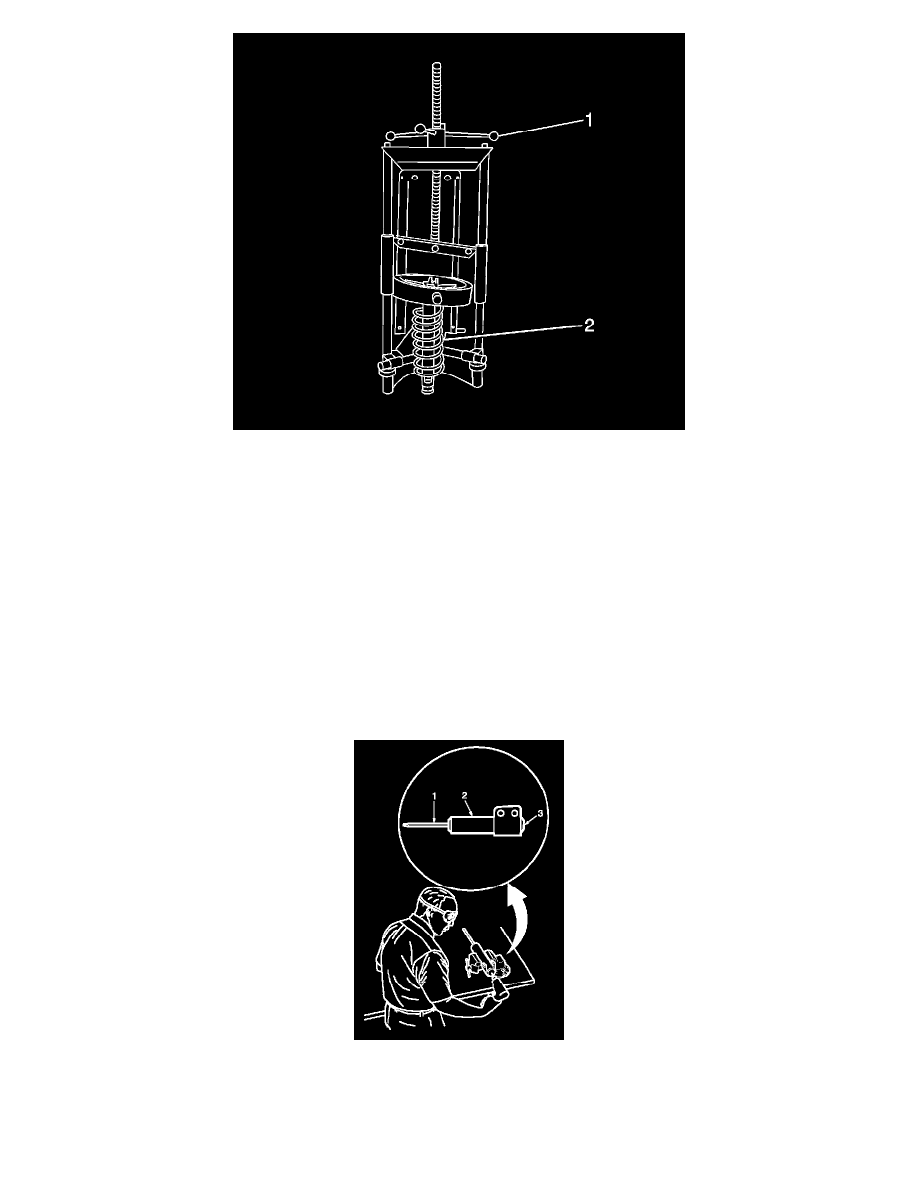
2. Turn the spring compressor forcing screw (1) until the coil spring is compressed.
3. Install the strut to the coil spring and upper strut mount.
4. Loosely install the strut retaining nut.
Notice: Refer to Fastener Notice in Service Precautions.
5. Use a 45 TORX® socket in order to hold the strut shaft. Use the J 42991 to install the upper strut mount nut.
^
Tighten the strut mount nut to 85 Nm (63 ft. lbs.).
6. Remove the strut from the J 45400.
7. Install the strut to the vehicle.
Suspension Strut Disposal
Suspension Strut Disposal
Caution: Use the proper eye protection when drilling to prevent metal chips from causing physical injury.
1. Clamp the strut in a vise horizontally with the rod (1) completely extended.
2. Drill a hole in the strut at the center of the end cap (3) using a 5 mm (3/16 inch) drill bit. Gas or a gas/oil mixture will exhaust when the drill bit
penetrates the strut. Use shop towels in order to contain the escaping oil.
3. Remove the strut from the vise.
4. Hold the strut over a drain pan vertically with the hole down.