
W 3500 L4-4.8L DSL Turbo (1999)
Fuel Tank: Service and Repair
FUEL TANK REPLACEMENT
NOTICE: To prevent possible accident when working on fuel system, disconnect the vehicle battery ground (-) cable(s) and provide the appropriate fire
fighting and safety equipment in accordance with local fire and safety regulations.
Before removing the fuel tank to correct a leak, a careful inspection of the tank should be made to determine the actual source of the leak. "Seam leaks"
often turn out to be leaks at the filler neck, fuel line connections, or at the tank sending unit seal. In such cases, fuel runs down the side of the tank to the
flanges and drips off at points along the seam giving a false indication of leaking seams. If careful inspection reveals that the tank is actually leaking,
remove the tank for repairs as required.
A leaking fuel tank must be repaired or replaced immediately. In addition to increased operating expense, leaking fuel tanks represent a serious fire
hazard. No leakage is allowed anywhere in the fuel system lines or tank.
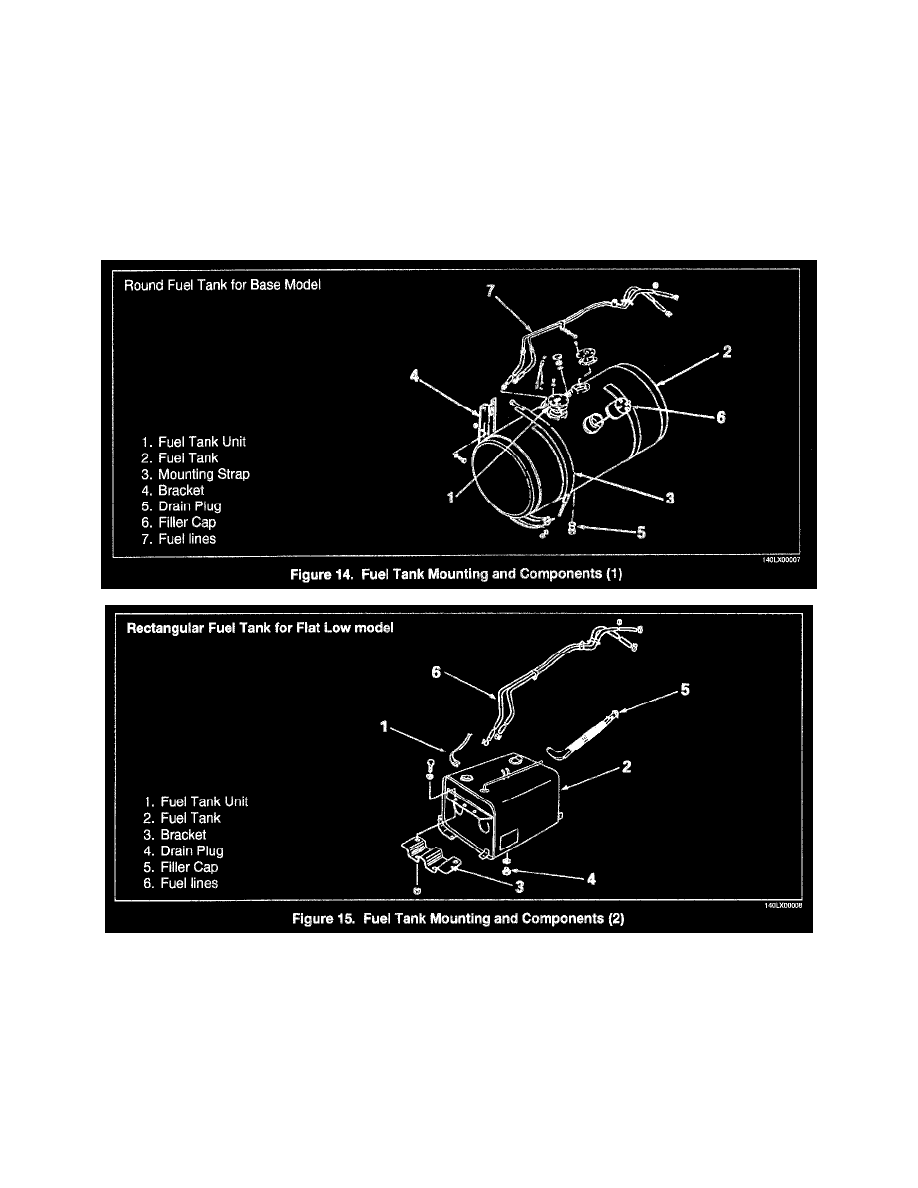
Remove or Disconnect (Figures 14 and 15)
1. Battery negative cable.
2. Drain plug (5)
-
Place a container under the drain plug to catch the fuel.
3. Fuel lines (7).
4. Wires from the fuel tank unit (1).
-
On vehicles where the top of the tank is not easily accessible, loosen the mounting strap (3) enough to rotate the tank and disconnect The fuel
lines and wires.
-
Place a jack or suitable support under the fuel tank