
200 L4-2.4L (2011)
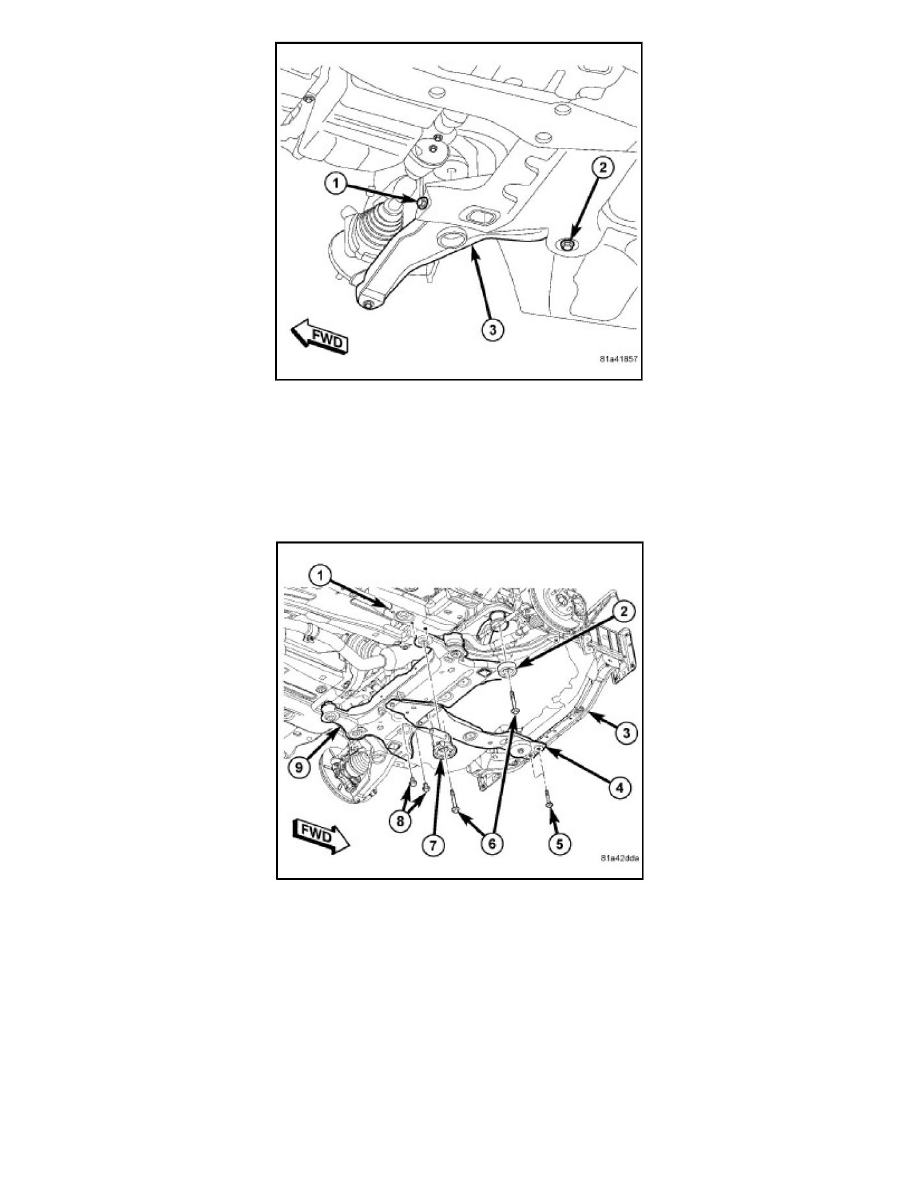
2. To install each lower control arm on the crossmember:
a. Place the lower control arm (3) into the front suspension crossmember.
b. Insert the rear bolt (2) up through the crossmember and lower control arm (3). Install the nut on the top-end of the bolt, but do not tighten it at
this time.
c. Install, but do not fully tighten, the front bolt (1) attaching the lower control arm (3) to the crossmember.
d. With no weight or obstruction on the lower control arm, tighten the lower control arm front mounting bolt (2) to 145 N.m (107 ft. lbs.).
e. With no weight or obstruction on the lower control arm, tighten the lower control arm rear mounting bolt nut to 145 N.m (107 ft. lbs.).
3. Slowly raise the crossmember (9) into mounted position using the transmission jack matching the crossmember to the marked locations on the
body made during removal. As the crossmember is raised, guide the lower ball joints into the mounting holes in the lower control arms. Also,
make sure the stabilizer bar is properly positioned on the crossmember.
4. Position the front crossmember reinforcement brackets (7) (one each side of vehicle) over the crossmember rear mounting bushings and install the
mounting screws (8), but do not tighten at this time.
5. Install the four mounting bolts (6) securing the front crossmember (1) to the body. Tighten the crossmember mounting bolts to 135 N.m (100 ft.
lbs.).
6. Tighten the crossmember reinforcement bracket mounting screws (8) to 50 N.m (37 ft. lbs.).
7. Remove the transmission jack.