
300 V6-3.5L (2008)
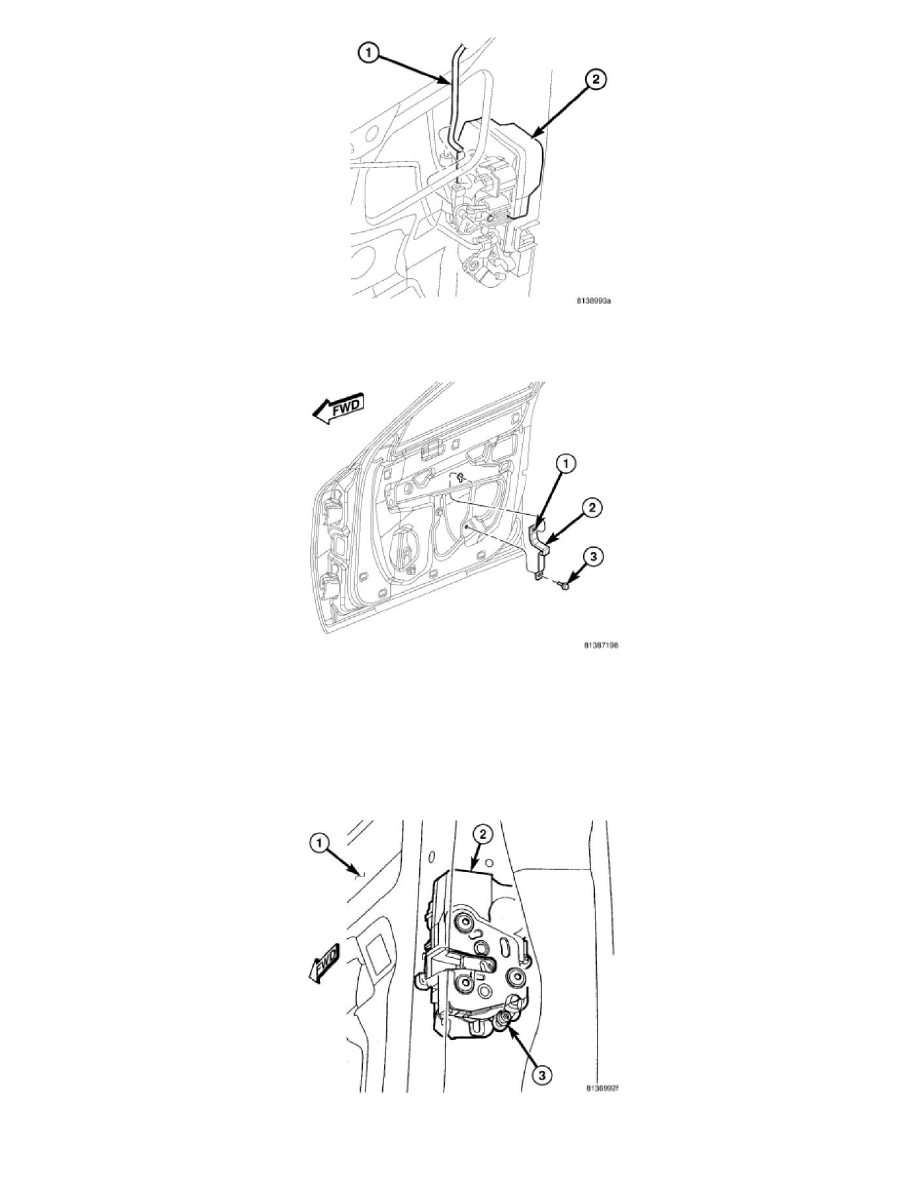
8. Reach into the back of the door shell to engage the end of the interior door latch lock link (1) to the latch lever and snap the plastic clip over the
link to secure it to the latch (2).
9. With the upper screw (1) hand-started into the pull cup bracket (2), position the screw into the keyed hole on the inside of the front door.
10. Install and tighten the screw (3) that secures the bottom of the pull cup bracket and the bottom of the window regulator rear rail to the inside of the
front door. Tighten the screw to 11 Nm (100 in. lbs.).
11. Tighten the screw that secures the top of the pull cup bracket to the inside of the front door. Tighten the screw to 10 Nm (90 in. lbs.).
12. Reinstall the watershield onto the inside of the front door. See: Front Door Panel/Service and Repair/Front Door Watershield/Installation.
13. Reinstall the speaker onto the inside of the front door. See: Accessories and Optional Equipment/Radio, Stereo, and Compact
Disc/Speaker/Service and Repair/Speaker - Installation.
14. Reinstall the trim panel onto the inside of the front door. See: Front Door Panel/Service and Repair/Front Door Trim Panel/Installation.
15. Use a wrench inserted through the access slot on the outer latch face of the front door shell (1) to loosen the hex socket latch release adjusting
screw (3) on the latch (2).