
300 V6-3.5L (2008)
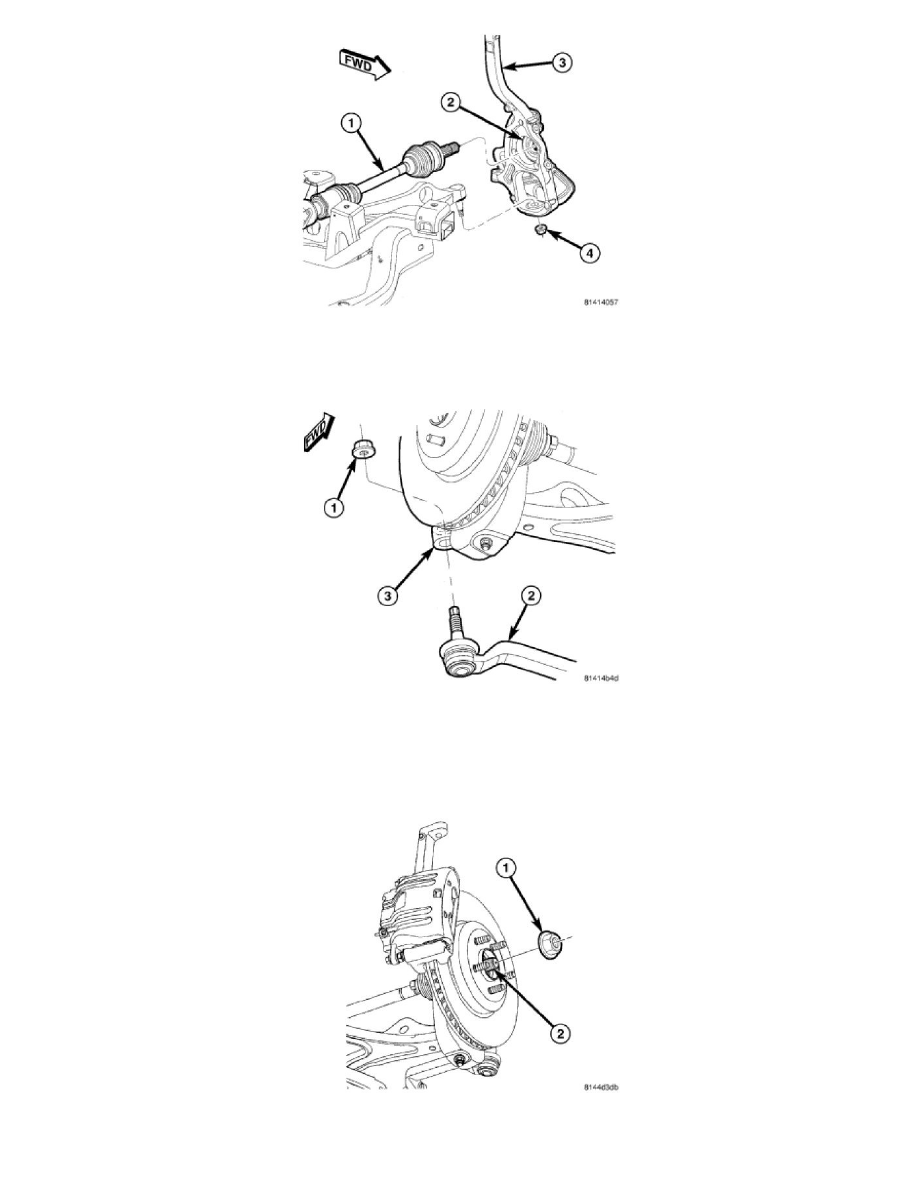
CAUTION: It is important to tighten nut as described in following step to avoid damaging ball stud joint.
5. Tighten lower ball joint nut (4) by holding ball joint stud with a hex wrench while turning nut with a wrench. Tighten nut using crow foot wrench
on torque wrench to 68 Nm + 90° turn (50 ft. lbs. + 90° turn).
CAUTION: It is important to tighten nut as described in following step to avoid damaging ball stud joint.
6. Place outer tie rod stud through hole in knuckle (3) and install nut (1). Tighten nut by holding stud with a wrench while turning nut with another
wrench. Tighten nut using crow foot wrench on torque wrench to 85 Nm (63 ft. lbs.).
7. Install brake rotor, then disc brake caliper and adapter assembly. See: Brakes and Traction Control/Disc Brake System/Brake Rotor/Disc/Service
and Repair/Removal and Replacement/Brake Rotor - Installation
8. Install hub nut (1) on end of axle half shaft (2). While a helper applies brakes to keep hub from turning, tighten hub nut to 213 Nm (157 ft. lbs.).