
300 SRT-8 V8-6.1L (2008)
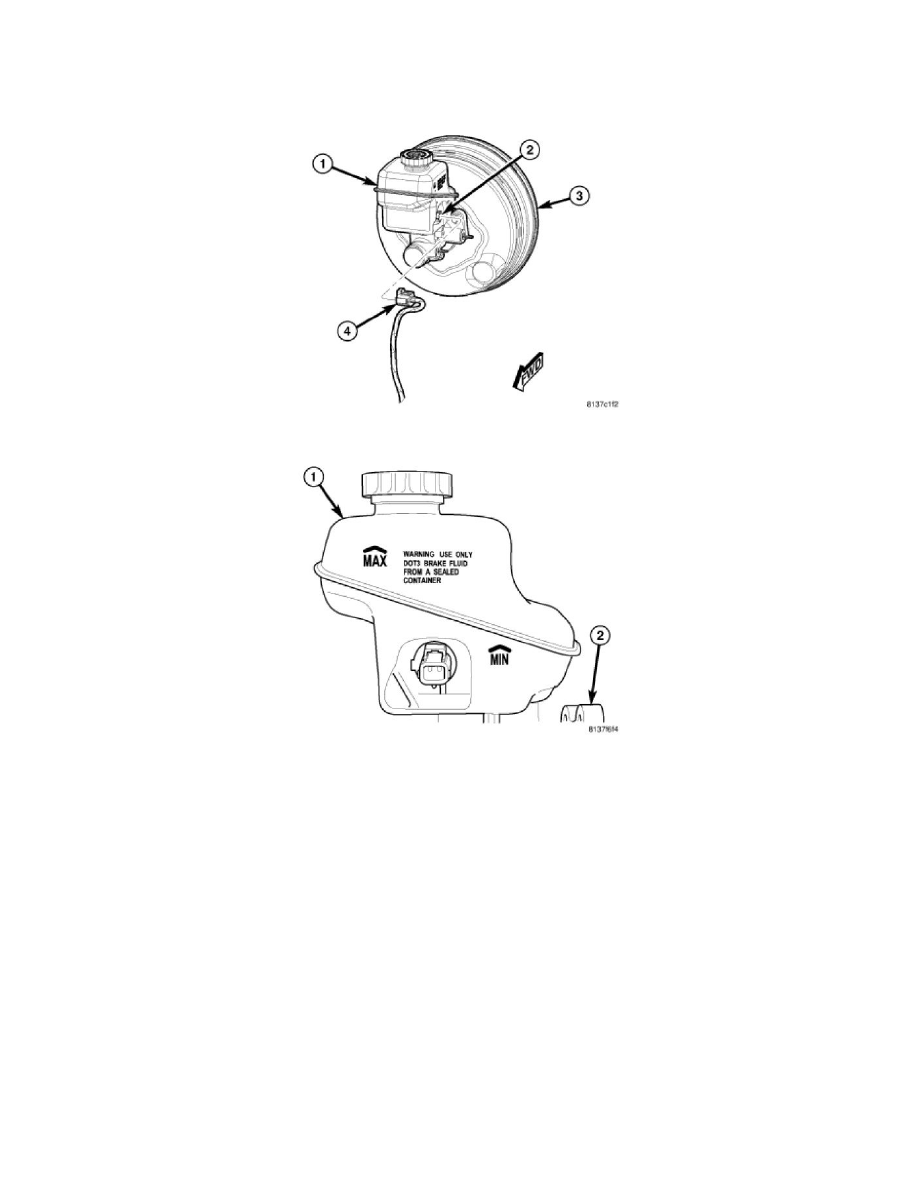
2. Lubricate reservoir mounting area with fresh clean brake fluid. Place reservoir in position over sealing grommets. Seat reservoir into sealing
grommets using a rocking motion while firmly pressing down on fluid reservoir. Once installed, make sure fluid reservoir is touching the top of
both sealing grommets (2) or reservoir is not properly installed.
3. Install fluid reservoir mounting screw (3). Tighten screw to 28 Nm (250 in. lbs.) torque.
4. Connect wiring harness connector (4) to brake fluid level sensor (2) mounted in brake fluid reservoir (1).
5. Fill master cylinder fluid reservoir (1) with clean, fresh Mopar(R) Brake Fluid or equivalent.
6. Install access panel in cowl area.
WARNING: Be certain a firm brake pedal is achieved prior to attempting vehicle operation. If a firm brake pedal cannot be achieved,
bleed entire brake hydraulic system and check for leaks. See: Brake Bleeding
7. Road test vehicle to ensure proper operation of brakes.
Master Cylinder - Removal
MASTER CYLINDER
CAUTION: Vacuum in power brake booster must be pumped down (removed) before removing master cylinder from power brake booster.
This is necessary to prevent power brake booster from sucking in any contamination as master cylinder is removed. This can be done simply by
pumping brake pedal, with vehicle's engine not running, until a firm feeling brake pedal is achieved.
1. With engine not running, pump brake pedal until a firm pedal is achieved (4-5 strokes).