
300 SRT-8 V8-6.1L (2008)
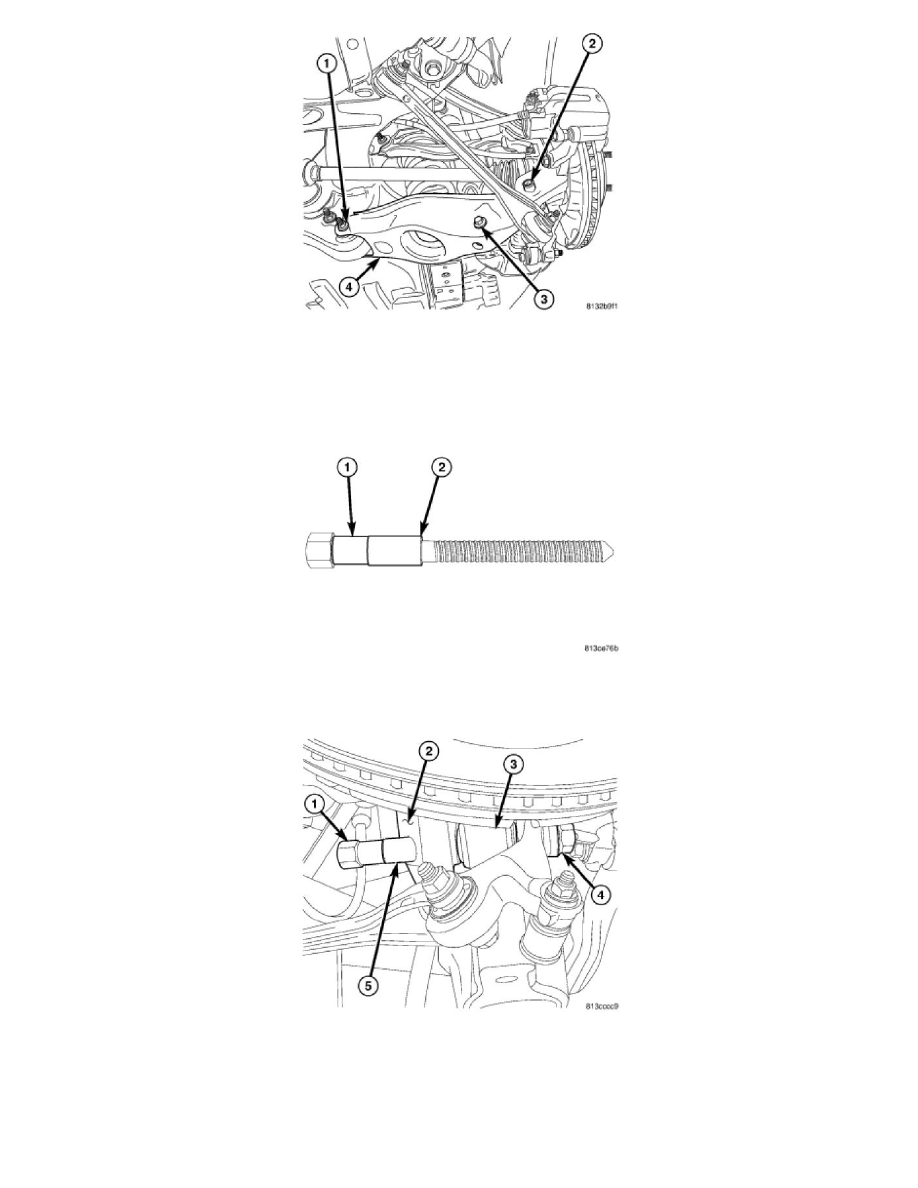
1. Guide ball joint end of spring link (4) into mounting pocket of knuckle, then swing opposite end up to bushing in crossmember and install bolt and
nut (1) fastening spring link (4) to crossmember. Do not tighten bolt at this time.
NOTE: Prior to using Special Tool 9361, lubricate bolt (1) threads to provide ease of use and promote tool longevity.
2. Place NEW knuckle sleeve (2) onto Installer Bolt 9361-12 (1), and slide it up to Bolt's head.
3. Starting from knuckle forward end, slide Bolt 9361-12 (1) with sleeve (5) through knuckle (2) and spring link ball joint (3).
4. Install Installation Thrust Bearing (around 3/8 inch thick) and special flange nut (4) on end of Bolt. When installing thrust bearing on Installer,
be sure to place hardened side against nut. Place bearing outer cage against stationary component.
5. While holding Bolt head (1) stationary, rotate Nut (4) (using hand tools) installing sleeve in knuckle. Install sleeve until Nut stops turning. Do not
overtighten Nut.
6. Remove special tool.