
300 SRT-8 V8-6.1L (2008)
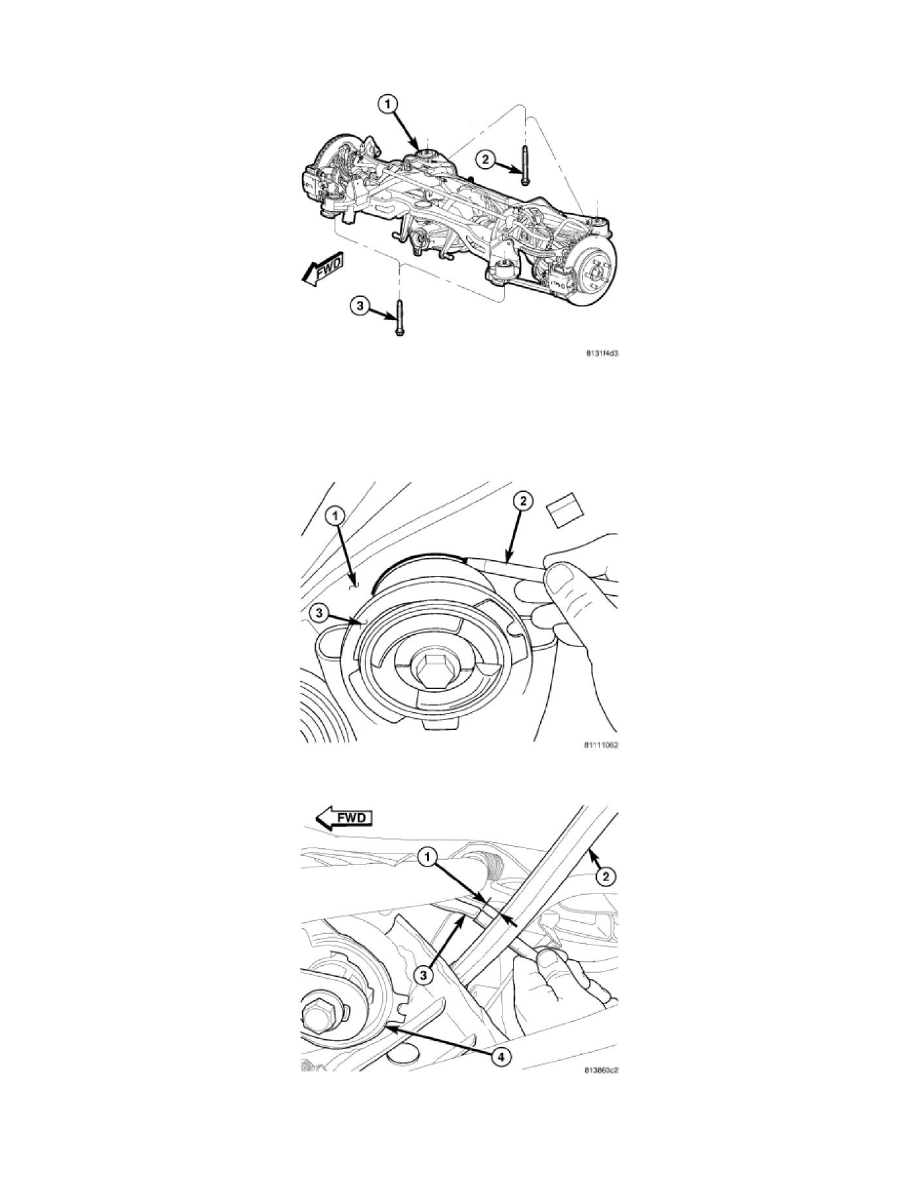
20. If vehicle is equipped with AWD, insert spacers (1) on top of left crossmember mount bushings (2) before crossmember is raised into place.
NOTE: There are four crossmember mounting bolts. Rear mounting bolts (2) are longer than front mounting bolts (3). Do not interchange
mounting bolts.
21. Raise left side of crossmember (1) into mounted position. Install left side crossmember mounting bolts (2 and 3). Snug, but do not fully tighten
bolts at this time.
22. Shift crossmember as necessary to line up mounts (3) with location marks drawn on body (1) before removal.
23. Once mounts are lined up with location marks, on both sides of vehicle, measure distance (1) between the tension link (2) and weld flange (3) on
body directly in front of it, just outboard of the front mount bushing (4). This distance must be at least 12 mm to allow proper clearance for
suspension movement. If distance is less than 12 mm on either side of vehicle, shift that side of rear crossmember directly rearward until distance