300M V6-3.5L VIN G (2000)

Hose/Line HVAC: Service and Repair
A/C Liquid Hose/Line Replacement
REMOVAL
1. Remove refrigerant from the A/C system using a refrigerant recovery machine.
2. Remove engine air inlet tube and the air distribution duct.
3. Remove A/C plumbing to expansion valve fastener using a M13 Hex wrench. Remove suction line block from expansion valve, cap and swing out
of the way.
CAUTION: Cap off all lines that are not being replaced. Cap/plug the expansion valve and condenser fittings.
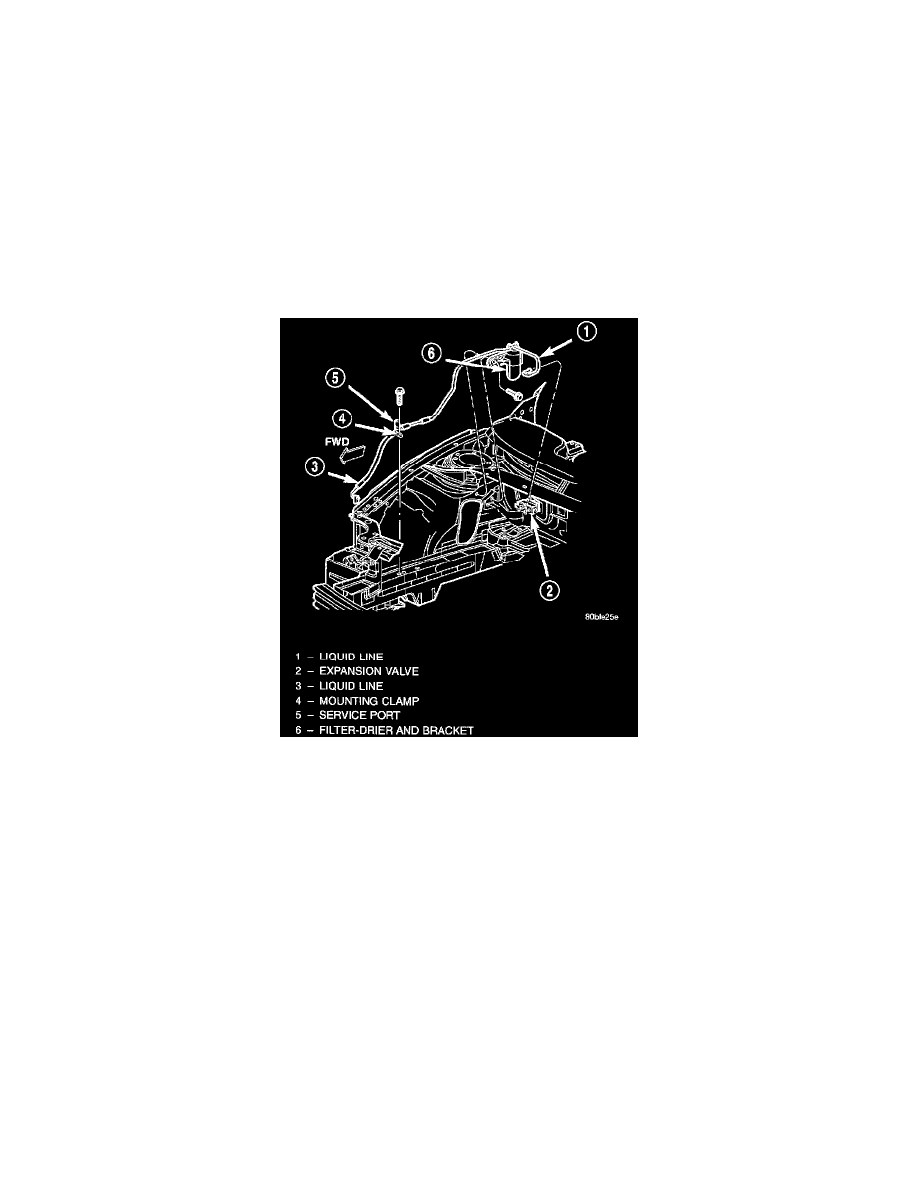
4. Disconnect liquid line fastener at filter-drier (short filter-drier to evaporator line may be removed at this step).
5. Disconnect filter/drier bracket fastener and separate bracket from strut panel (there are two hidden plastic fasteners to pry out).
6. Disconnect liquid line fastener at condenser (M13 Hex).
NOTE: Radiator upper crossmember must be removed to access the liquid line fastener.
Liquid Lines
7. Remove liquid line mounting clamp fastener located near service port.
8. Disconnect liquid line fastener at filter-drier. Remove liquid line from vehicle. Cap off all fittings if reusing to prevent moisture from entering
system.
INSTALLATION
For installation, reverse the above procedures. Torque liquid line fasteners as follows: TXV and condenser: 20.3 N.m (15 ft. lbs.). Filter-drier line
fasteners 13.6 N.m (10 ft. lbs.). Plastic bracket and screws: 6.8 N.m (5 ft. lbs.).
