
300M V6-3.5L VIN G (2000)
axle shaft.
2. Position cable in vehicle and connect cable end to the transaxle shift lever (Fig. 49).
3. Verify that the washer (Fig. 49) is still in place on the cable mounting stud. Install cable to transaxle and tighten nut to 28 Nm (250 inch lbs.).
4. Rotate fill tube to original location. Install and tighten fill tube bracket bolt.
5. Install cable "push pin" into bracket as shown in (Fig. 48).
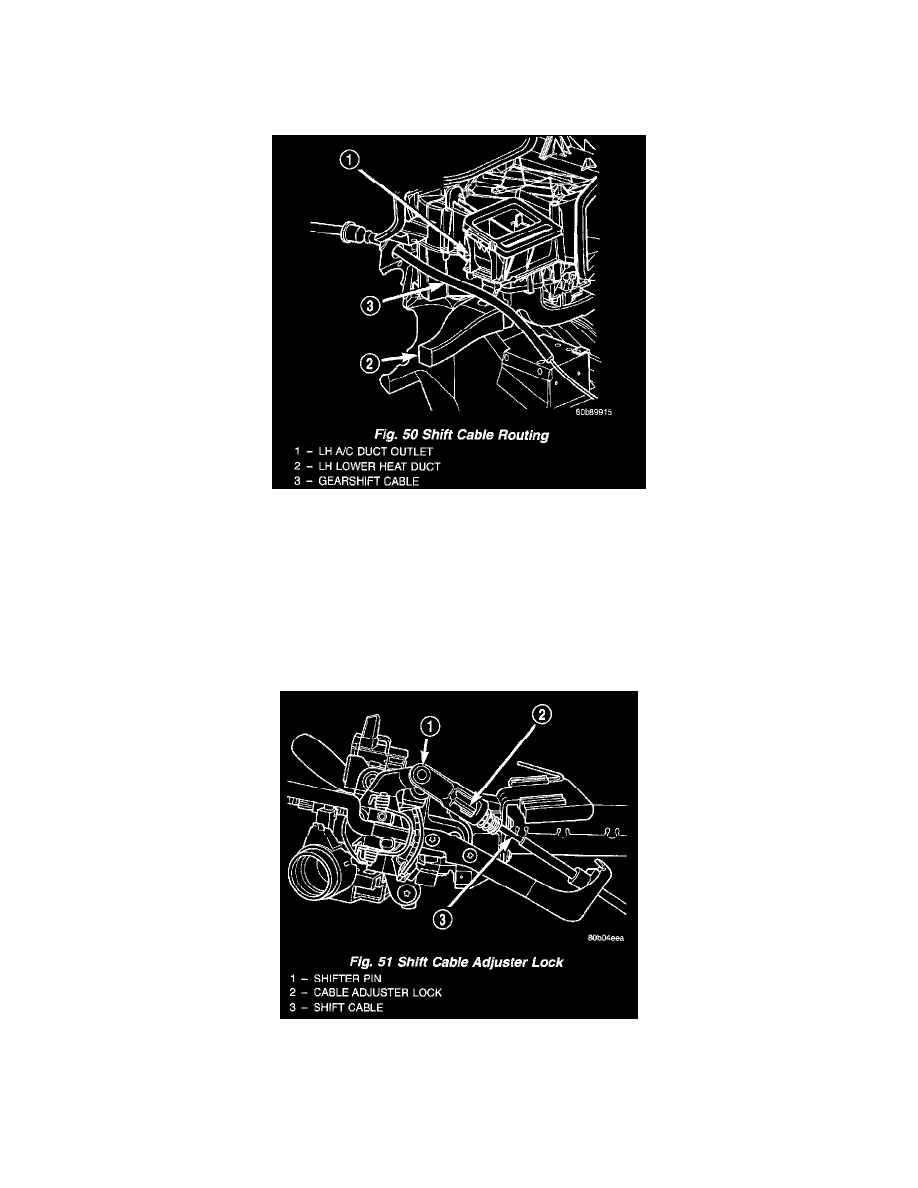
Fig. 50
6. Route transaxle shift cable through hole in dash panel (Fig. 49) (Fig. 50).
7. Lubricate cable grommet with a synthetic lubricant (or equivalent) and secure to hole. Verify that it is seated by pulling outward on cable.
8. Install cable into throttle/gearshift cable bracket (Fig. 47).
9. Inside the vehicle, route the gearshift between the left a/c duct and the left lower heat duct (Fig. 50) and up to the steering column.
10. Tilt steering column all the way up and make sure shift lever is still in "park."
11. Connect transaxle shift cable to shift cable conduit bracket and secure with new clip (Fig. 46).
12. Attach shift cable to attaching stud (pin) (Fig. 46) by snapping into place.
13. Move the steering column to full tilt downward. Put the column shifter in park with key removed.
Fig. 51
14. Adjust cable by rotating the adjuster into lock position (Fig. 51). The adjuster will click when lock is fully adjusted.
15. Reinstall upper and lower steering column shrouds (Fig. 43) (Fig. 45). Then install underpanel silencer/duct.
16. Check shifter for proper operation. It should operate smoothly without binding. The engine starter should crank in park or Neutral positions only.