
Aspen 2WD V8-4.7L (2007)
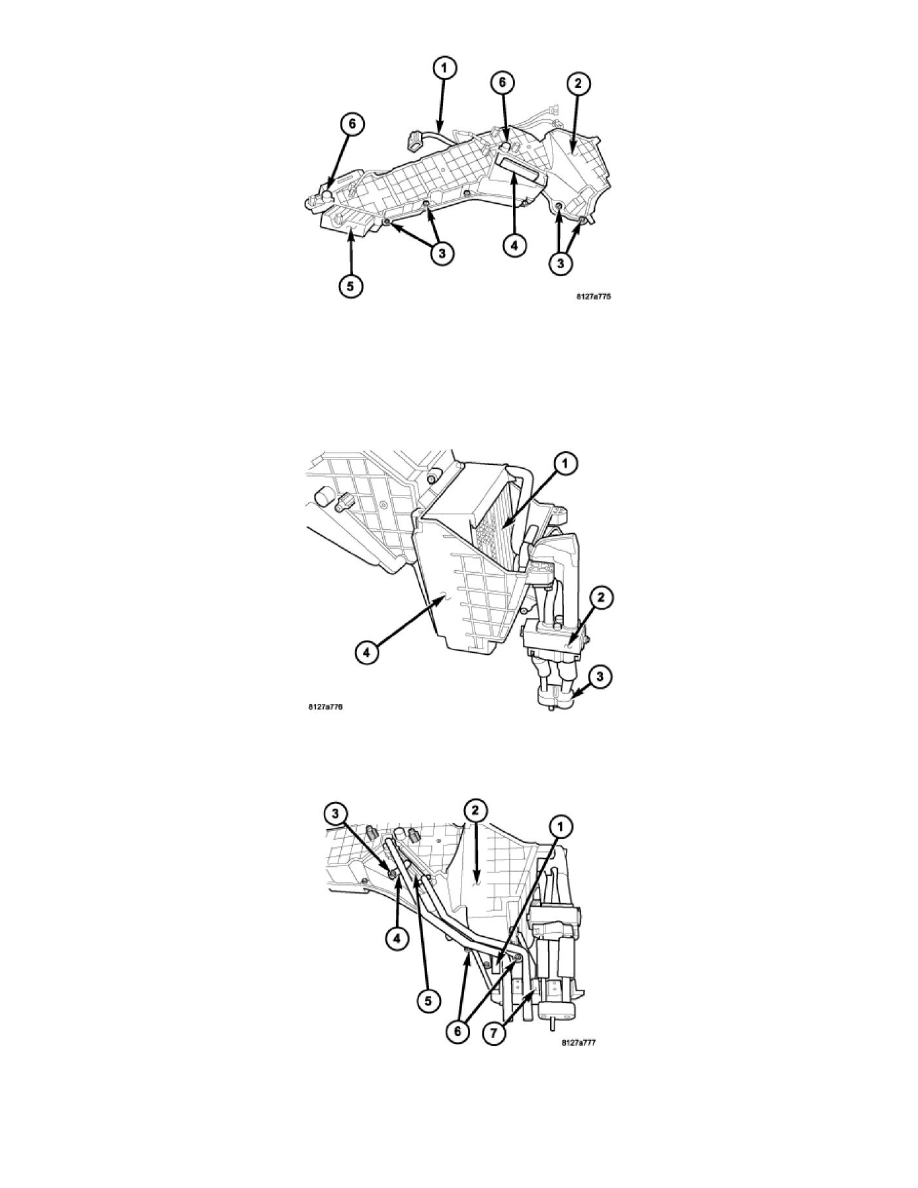
3. Align the pivot shafts of the blend-air door (4) and the mode-air door (5) to the actuator couplers (6) and install the two halves of the rear HVAC
housing (2) together.
4. Install the screws (3) that secure the two halves of the rear HVAC housing together. Tighten the screws to 2 Nm (17 in. lbs.).
5. Install the HVAC wire harness (1). Make sure the harness is routed through all wiring retainers.
6. Install the rear A/C evaporator (1), rear expansion valve (2) and the rear extension line bracket (3) as an assembly into the top of the rear HVAC
housing (4). Make sure that the evaporator drain is clean and unrestricted and that the evaporator insulator is properly installed.
7. Install the two screws (6) that secure the rear extension line flange bracket (7) to the bottom of the rear HVAC housing (2). Tighten the screws to 2
Nm (17 in. lbs.).
8. Install the rear heater core (5) into the side of the rear HVAC housing. Make sure that the insulator is properly installed.