
Aspen 2WD V8-4.7L Flex Fuel (2009)
7. Reconnect the new booster push rod clip (1) and install the rod (2) to the pedal (3).
8. Install the steering column (2) to the vehicle.See: Steering and Suspension/Steering/Steering Column/Service and Repair/Steering Column -
Installation.
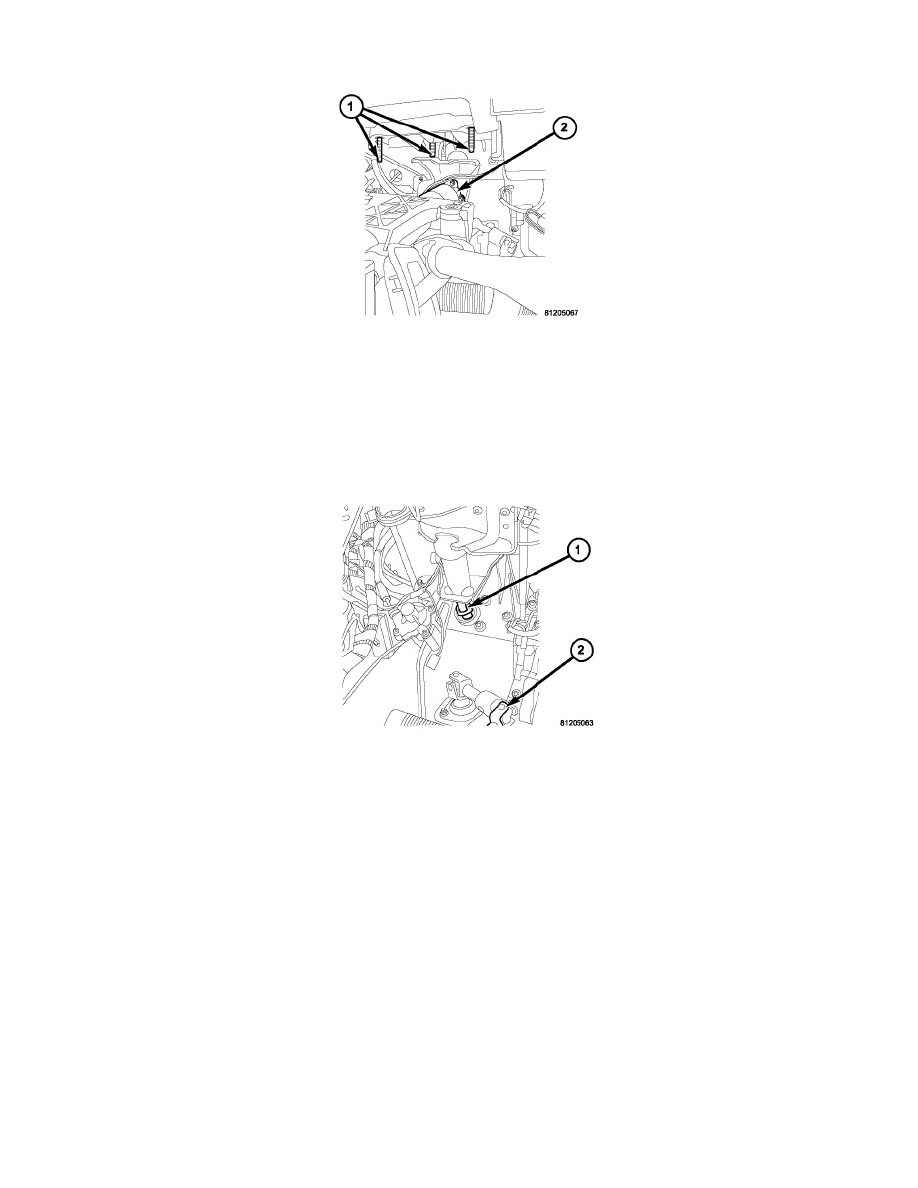
9. Raise the column (2) upwards on the mounting studs and then install the mounting nuts (1). Tighten to 28 Nm (250 in. lbs.).
CAUTION: Do not reuse the original stop lamp switch. Anytime a switch has been removed or its position compromised, a new switch must be
installed and adjusted. Do not attempt to readjust the switch.
10. Install and adjust a NEW stop lamp switch. See: Lighting and Horns/Brake Light Switch/Service and Repair/Stop Lamp Switch - Installation.
11. Install the upper coupling to the steering column (1) then install the pinch bolt to the upper coupling (2). Tighten to 38 Nm (28 ft. lbs.).
12. Install the steering column opening coverSee: Body and Frame/Interior Moulding / Trim/Dashboard / Instrument Panel/Service and
Repair/Steering Column Opening Cover - Removal.
13. Install the steering column opening cover reinforcement.
14. Install the upper and lower shrouds.
15. Reconnect the negative battery cable.