
Aspen 2WD V8-4.7L Flex Fuel (2009)
Turn Signal Bulb: Service and Repair
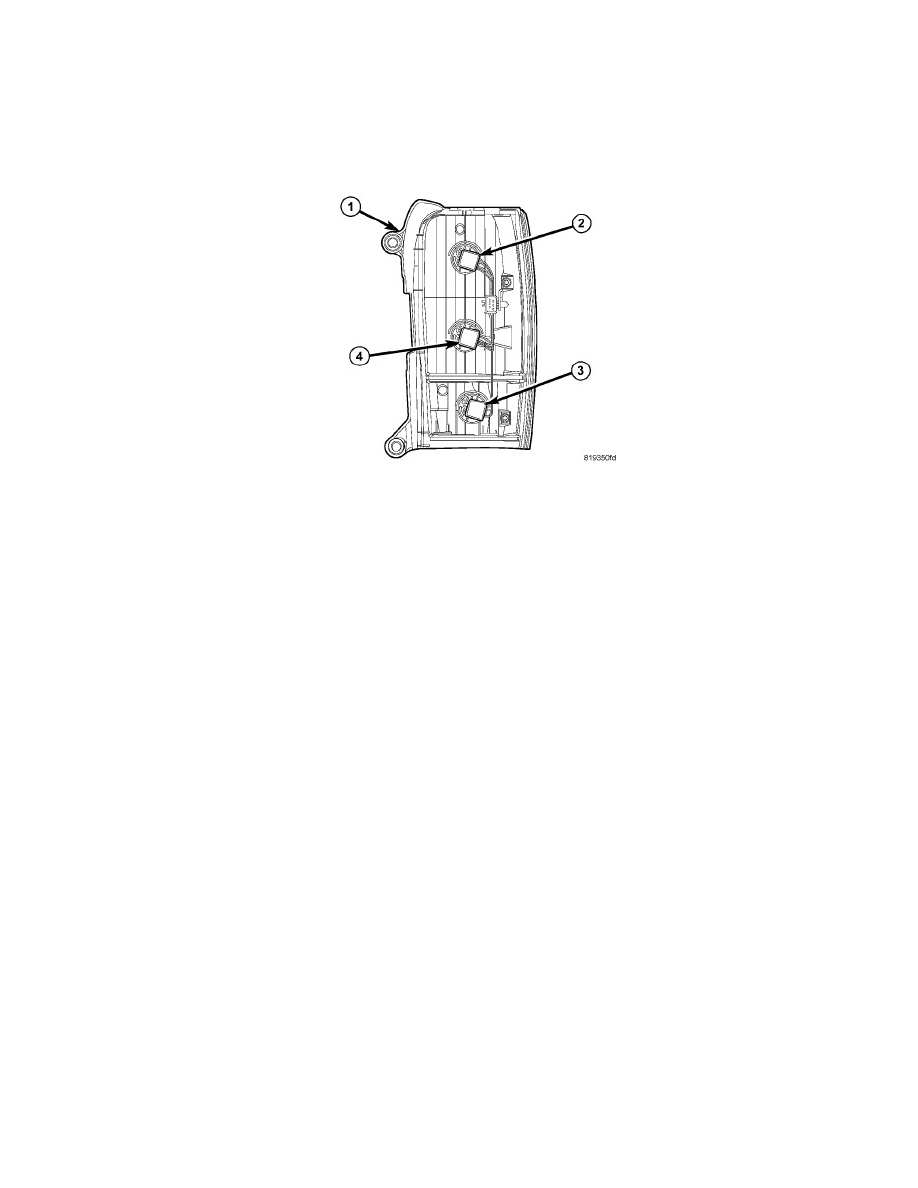
Tail Stop Turn Lamp Bulb - Installation
BULB - CHRYSLER
CAUTION: Always use the correct bulb size and type for replacement. An incorrect bulb size or type may overheat and cause damage to the
lamp, the socket or the lamp wiring.
NOTE: The rear lamp unit contains three bulbs: tail/brake/rear side marker (4), tail/turn (2), and backup (3). The service procedures for each
bulb are the same, only the bulb sizes and types may differ.
1. Align the base of the bulb with the appropriate lamp socket (2, 3, or 4).
2. Push the bulb straight into the socket until the base is firmly seated.
3. Align the socket and bulb with the keyed opening on the back of the rear lamp unit (1) housing.
4. Insert the socket and bulb into the housing until the socket is firmly seated.
5. Rotate the socket clockwise about 30 degrees to lock it into place.
6. Reinstall the rear lamp unit onto the end of the quarter panel. See: Brake Lamp/Service and Repair/Tail Stop Turn Lamp - Installation.
7. Reconnect the battery negative cable. On vehicles equipped with the optional Hybrid Electric Vehicle (HEV) system, a technician trained in
proper HEV service safety procedures must also reinstall the high voltage service disconnect into the high voltage battery pack.