
Aspen 2WD V8-4.7L Flex Fuel (2009)
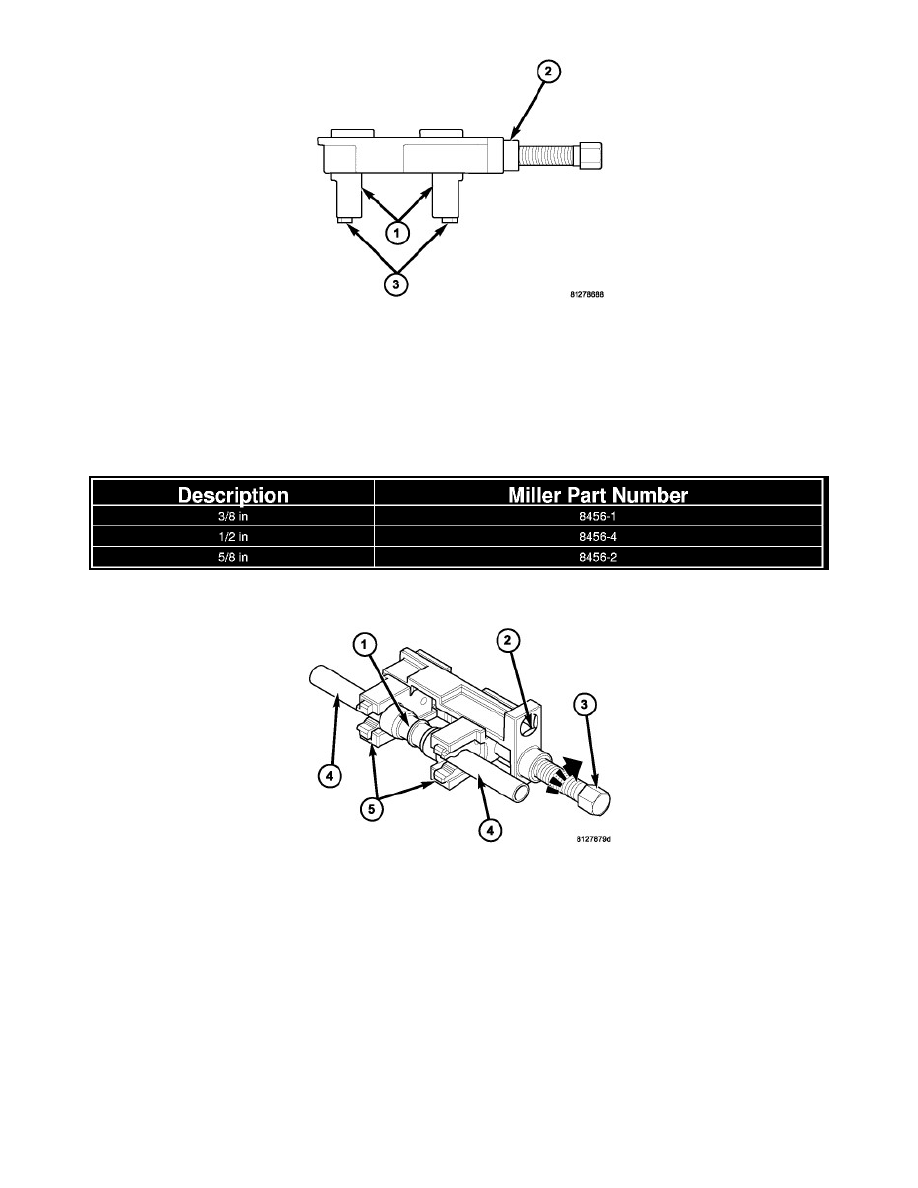
13. Select the proper size jaws (1) for the line being repaired from the A/C Line Repair Tools 8456A. Refer to the Jaw Size chart.
14. Assemble the jaws into Tool Body 8456-3 (2) (in Kit 8456A).
a. For standard installation, install the jaws with the rubber gripping pads (3) facing outward. See the Tube Length chart.
b. For reversed installation, remove the rubber gripping pads and install the jaws with the rubber gripping pad area facing inward. See the Tube
Length chart.
JAW SIZE
NOTE: The connector fitting ends must be positioned into the counterbore of the jaws in order for the connector fitting to properly seal the
repair area.
15. Install the connector fitting (1) and the line ends (4) into the counterbore of the jaws (5).
16. Hold Tool Body 8456-3 (2) with a 3/8 inch breaker bar and turn the forcing screw (3) clockwise.