
Aspen 2WD V8-5.7L (2007)
Catalytic Converter: Service and Repair
Installation
5.7L ENGINE
NOTE: The band clamps are not reusable. After removal, the must be replaced.
1. Raise and support the vehicle.
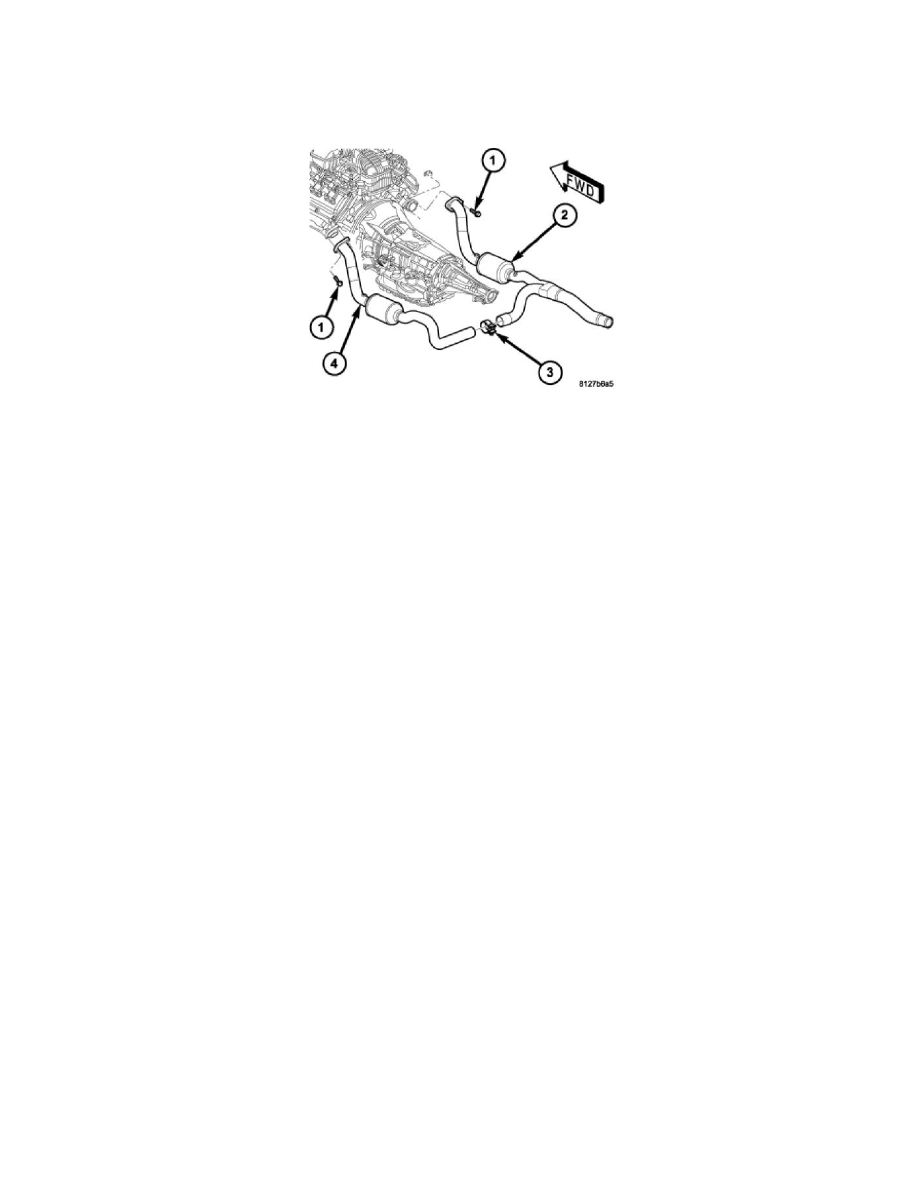
2. Remove any burrs from the RH (2) and LH (4) catalytic converter.
3. Position new RH catalytic converter-to-exhaust pipe clamp on exhaust pipe. Insert the RH (2) catalytic converter into the exhaust pipe. Do not
tighten clamp at this time.
4. Make sure the alignment tang is seated in the alignment slot.
5. Position new RH catalytic converter-to-LH catalytic converter clamp on RH catalytic converter. Insert the LH catalytic converter (4) into the RH
catalytic converter (2). Do not tighten clamp at this time.
6. Make sure the alignment tang is seated in the alignment slot.
7. Install the LH and RH catalytic converters (2 and 4) to the exhaust manifold. Install bolts. Do not tighten at this time.
8. Connect the oxygen sensor electrical connectors.
9. Make sure the catalytic converter assembly (2 and 4) are correctly positioned and the properly aligned. The minimum clearance between
components is 25 mm (1 inch). Ensure that the exhaust crossover has at least 15 mm (.59 in.) clearance at transmission crossmember. Ensure that
muffler isolators are not stretched. Measurement between insulator rods is approximately 42 mm (1.65 in.). Make the necessary adjustments, if
necessary.
10. Tighten manifold flange bolts to 34 Nm (24 lbs. ft.). Tighten the new exhaust clamps to 61 Nm (45 lbs. ft).
11. If other sections of the exhaust system where loosened in removal, refer to that information for the tightening procedures.
12. Lower the vehicle.
13. Start the engine, inspect for exhaust leaks. Repair exhaust leaks as necessary.