
Aspen 4WD V8-5.7L Hybrid (2009)
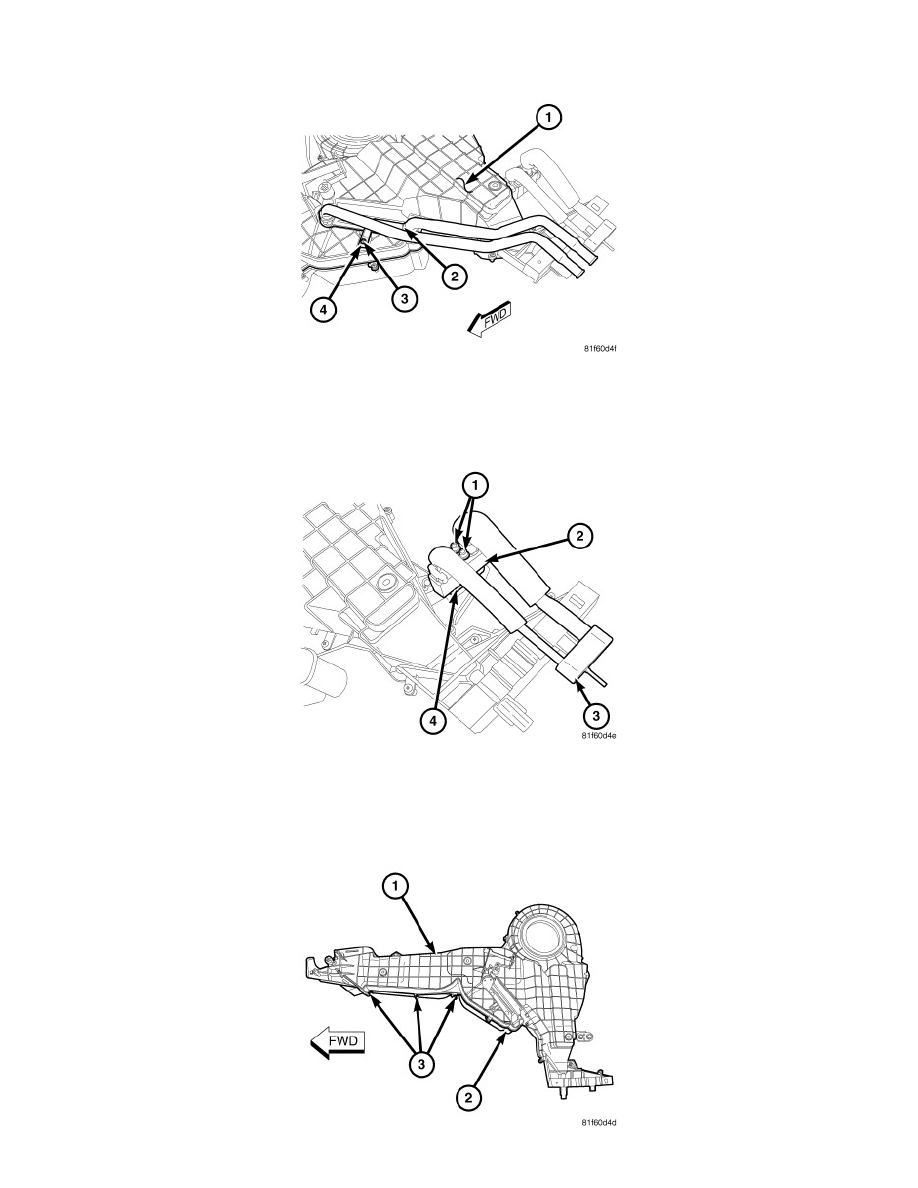
10. Disengage the retaining tab (1) that secures the rear heater core tube and evaporator line flange to the rear heater-A/C housing and remove the
flange.
11. Remove the screw (3) that secures the rear heater core retaining bracket (4) to the rear heater-A/C housing (1) and remove the bracket.
NOTE: If a foam seal around the heater core is deformed or damaged, the seal must be replaced.
12. Carefully pull the rear heater core (2) out of the inboard side of the rear heater-A/C housing.
13. Remove the two bolts (1) that secure the rear evaporator extension lines (3) and the rear A/C expansion valve (2) to the rear evaporator tapping
block (4).
14. Disconnect the rear evaporator extension lines from the rear A/C expansion valve (2) and remove the lines from the rear heater-A/C housing.
15. Disconnect the rear A/C expansion valve from the rear evaporator tapping block.
16. Remove and discard the O-ring seals and install plugs in, or tape over the opened extension line fittings and expansion valve and evaporator ports.