Cirrus V6-2.5L VIN H (1995)

1. Wipe seal area of tank clean. Place a new 0-ring on the ledge between the tank threads and the pump module opening.
2. Position fuel pump module in tank.
-
Make sure the alignment tab on the underside of the pump module flange sits in the corresponding notch in the fuel tank.
CAUTION: Over tightening the pump lock ring may result in a leak.
3. While holding the pump module in position, install locknut. Tighten locknut to 40 ft lb torque using special tool #6856.
4. Install fuel tank and fuel filter. Refer to Fuel Tank/Service and Repair.
5. Fill fuel tank with clean fuel. Check for leaks.
6. Install negative cable to auxiliary jumper terminal.
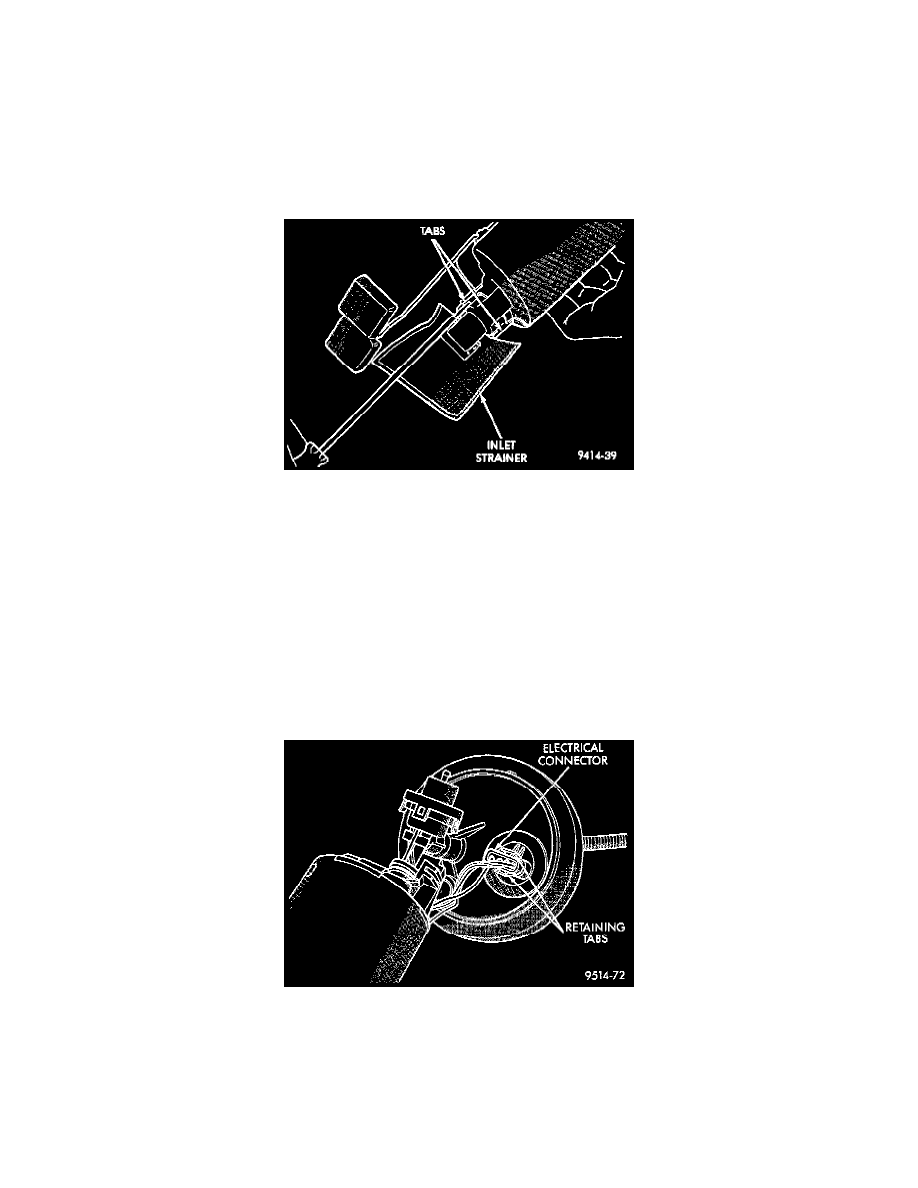
Fig. 12 Inlet Strainer Removal
FUEL PUMP INLET STRAINER SERVICE - REMOVAL
1. Remove fuel pump module. Refer to Fuel Pump Module Removal in this section.
2. Using a thin straight blade screwdriver, carefully pry back the locking tabs on fuel pump reservoir and remove the strainer Fig. 12.
3. Remove strainer 0-ring from the fuel pump reservoir body.
4. Remove any contaminants by washing the inside of the fuel tank.
INSTALLATION
1. Lubricate the strainer 0-ring with clean motor oil.
2. Insert strainer 0-ring into outlet of strainer so that it sits evenly on the step inside the outlet.
3. Push strainer onto the inlet of the fuel pump reservoir body. Make sure the locking tabs on the reservoir body lock over the locking tangs on the
strainer.
4. Install fuel pump module. Refer to Fuel Pump Module Installation in this section.
Fig. 14 Fuel Pump/Level Sensor Electrical Connector
FUEL LEVEL SENSOR
The fuel level sensor attaches to the side of the fuel pump module. Remove the fuel pump module to replace the fuel level sensor. Refer to Fuel
Pump Module Removal .
