
Cirrus V6-2.5L VIN H (1995)
Drive/Propeller Shaft: Service and Repair
1. Loosen, but do not remove, stub axle to hub/bearing retaining nut while vehicle is on floor and brakes applied, then raise and support vehicle and
remove front wheel and tire assembly.
2. Remove brake caliper and support aside, then the brake disc.
3. Remove tie rod end attaching nut, then the tie rod end stud from steering knuckle using remover tool No. MB-991113, or equivalent.
4. Remove vehicle speed sensor cable routing bracket.
5. Remove cotter pin and castle nut from stud of lower ball joint at steering knuckle.
6. Turn steering knuckle so front of knuckle is facing as far outboard in wheelwell as possible. Lightly tap boss on steering knuckle to separate from
stud of lower ball joint.
7. Pull steering knuckle assembly out and away from outer CV joint.
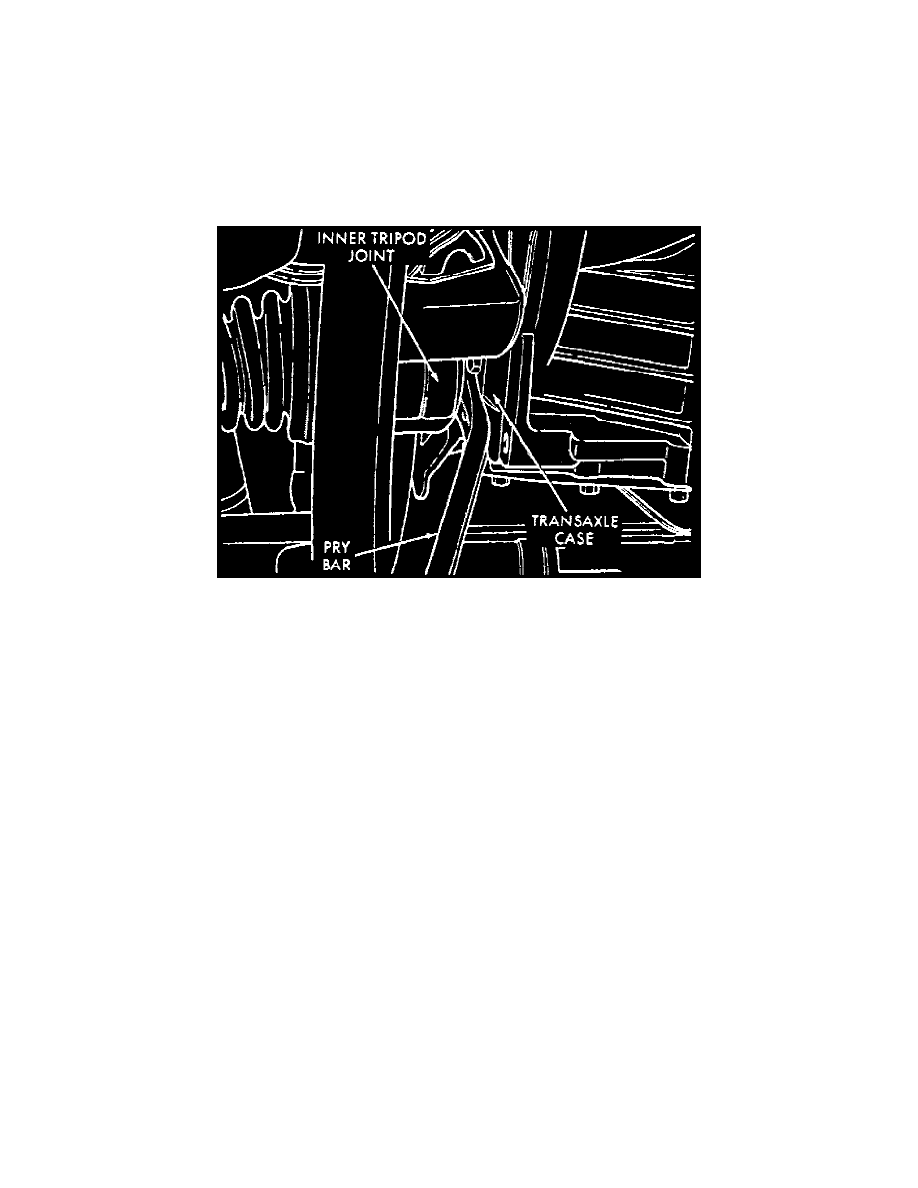
Fig. 3 Inner Tripod Joint Removal
8. Support outer end of driveshaft assembly, then insert a pry bar between tripod joint and transaxle case side gear as far as possible by hand.
9. Hold inner tripod joint and interconnecting shaft of driveshaft assembly.
10. Remove inner tripod joint from transaxle by pulling it straight out of transaxle side gear.
11. Reverse procedure to install. Tighten all nuts and bolts to specifications.