
Concorde V6-2.7L VIN R (1998)
Camshaft: Service and Repair
Removal and Installation
Camshaft
REMOVAL
1. Remove the primary timing chain.
2. Remove secondary chain tensioner mounting bolts.
NOTE: Camshaft bearing caps have been marked during engine manufacturing. For example, number one exhaust camshaft bearing is marked "1
E".
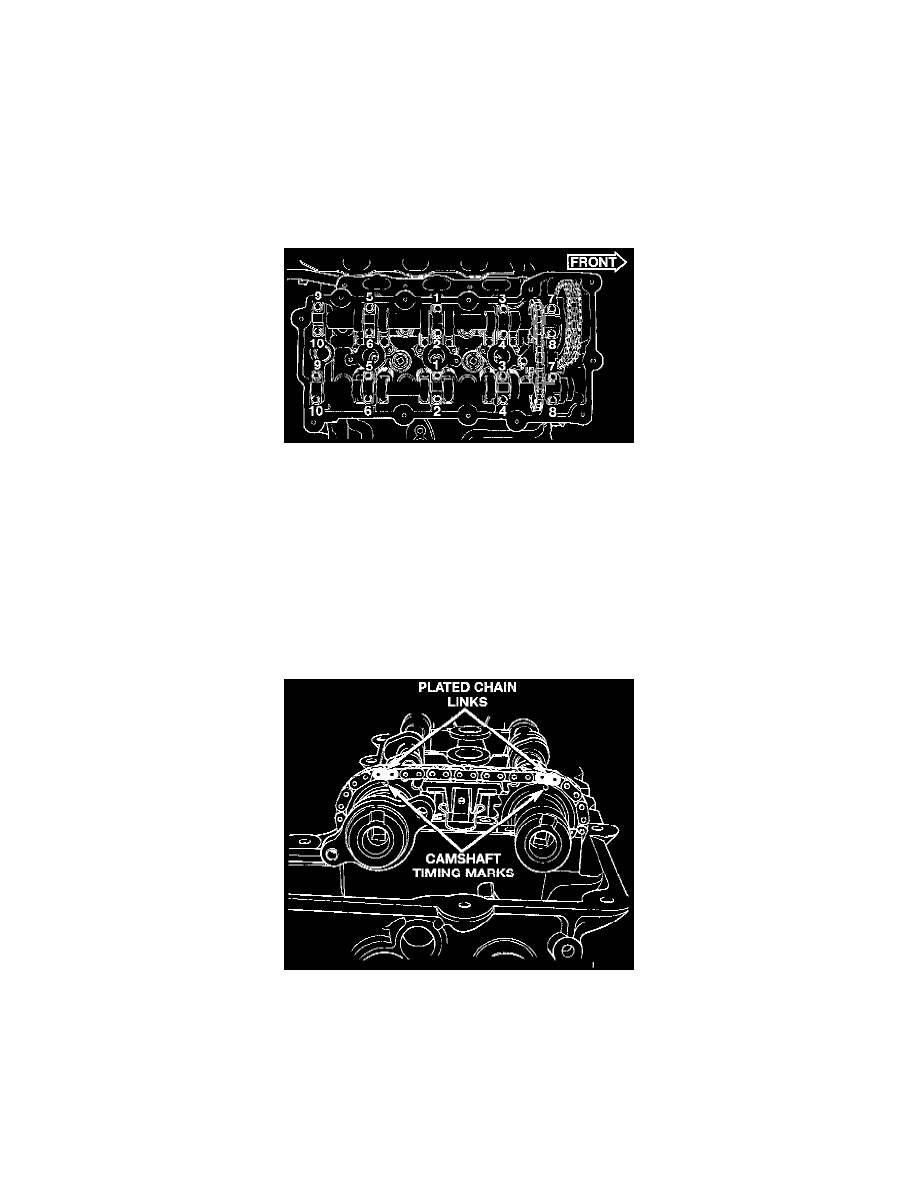
Figure 36-Camshaft Bearing Cap Tightening Sequence
3. Slowly loosen camshaft bearing cap bolts in reverse order of installation.
4. Remove camshaft bearing caps.
5. Remove camshafts, secondary chain, and tensioner together as an assembly.
6. Remove tensioner and camshaft chain from camshafts.
7. Inspect camshafts.
INSTALLATION
CAUTION: When the timing chain is removed and the cylinder heads are installed, DO NOT rotate the camshafts or crankshaft without first locating
the proper crankshaft position. Failure to do so will result in valve and/or piston damage.
Figure 40-Camshaft Chain Timing, Figure 41-Camshaft End Play Measuring
1. Assemble camshaft chain on the cams. Ensure that plated links are facing toward the front. Align the plated links to the dot on the camshaft
sprockets.
NOTE: Two styles of camshaft (Secondary) chain tensioners will be used the Early Build tensioners will separate into subcomponents, the Later
Build tensioners will not.
2. If camshaft chain tensioner is already in the compressed and locked position, proceed to step (4).