
Concorde V6-2.7L VIN R (1998)
4.
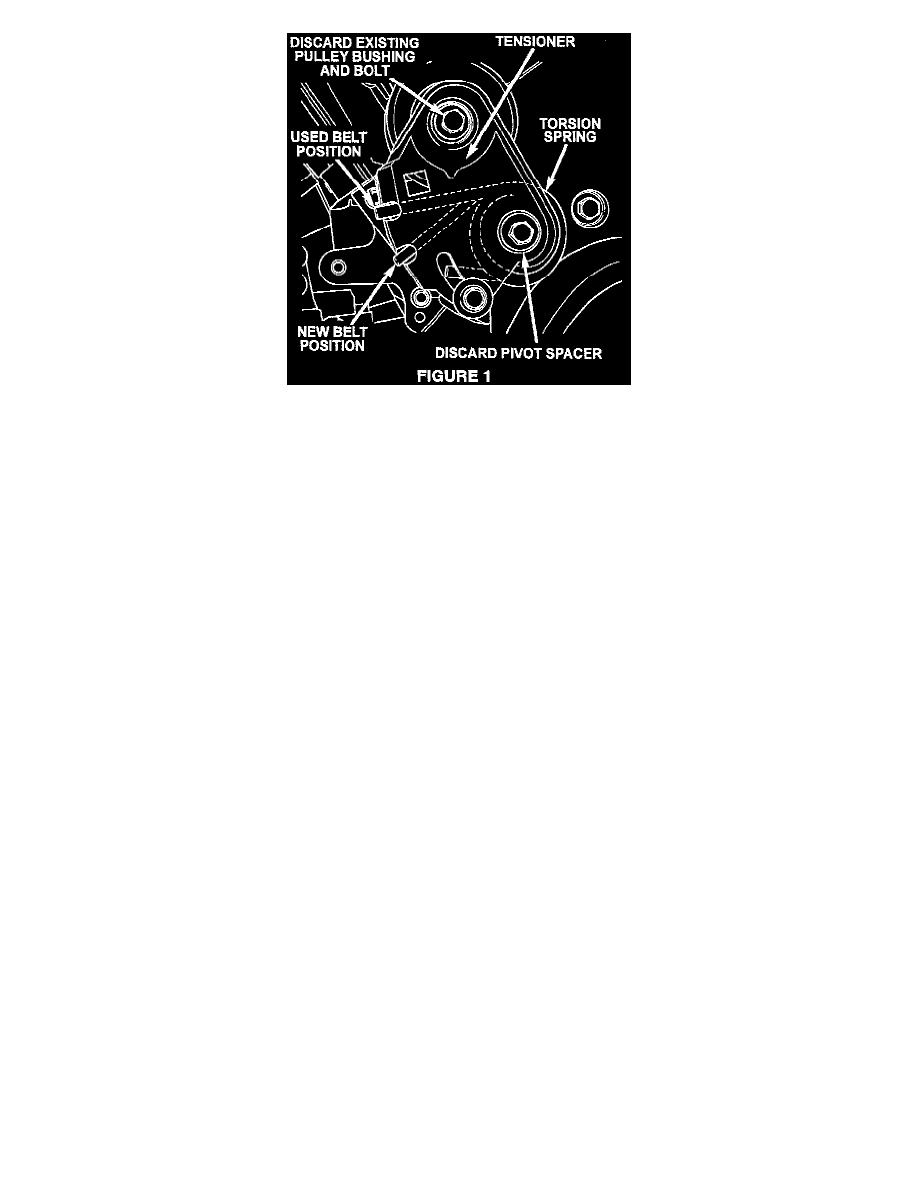
Remove the tensioner pulley from the bracket. Discard the existing bracket, pulley bushing and bolt and the pivot bolt spacer (Figure 1).
5.
Install the tensioner pulley onto the new bracket, p/n 04792578AA, using new bushing, p/n 04792577AA and bolt, p/n 06101436.
6.
Insert the existing spring into appropriate position on the new bracket. Use the new belt position if installing a new belt or the used belt position if
installing a used belt.
7.
Install the spring tensioner and the pivot bolt to the front cover. Tighten the pivot bolt only finger tight to hold the bracket in place using a 13 mm
socket.
8.
Using a 1/2" drive breaker bar, apply counterclockwise pressure until the locking bolt can be installed.
9.
Rotate the tensioner counterclockwise until the belt can be installed on the pulleys.
10.
Release the tension, tighten the pivot bolt and locking bolt to 28 Nm (250 in.lbs.) using a 13 mm socket.
POLICY: Reimbursable within the provisions of the warranty.
TIME ALLOWANCE:
Labor Operation No:
07-20-20-92 Tensioner/Pulley Replace
0.2 Hrs.
07-20-20-93 Tensioner/Pulley & A/C Belt Replace
0.3 Hrs.
FAILURE CODE: P8 - New Part