
Concorde V6-2.7L VIN R (1998)
Suspension Strut / Shock Absorber: Testing and Inspection
Front
1. Inspect for damaged or broken coil springs.
2. Inspect for torn or damaged strut assembly dust boots.
3. Lift dust boot and inspect strut assembly for evidence of fluid running from the upper end of fluid reservoir. (Actual leakage will be a stream of
fluid running down the side and dripping off lower end of unit). A slight amount of seepage between the strut rod and strut shaft seal is not unusual
and does not affect performance of the strut assembly. Also inspect jounce bumpers for signs of damage or deterioration.
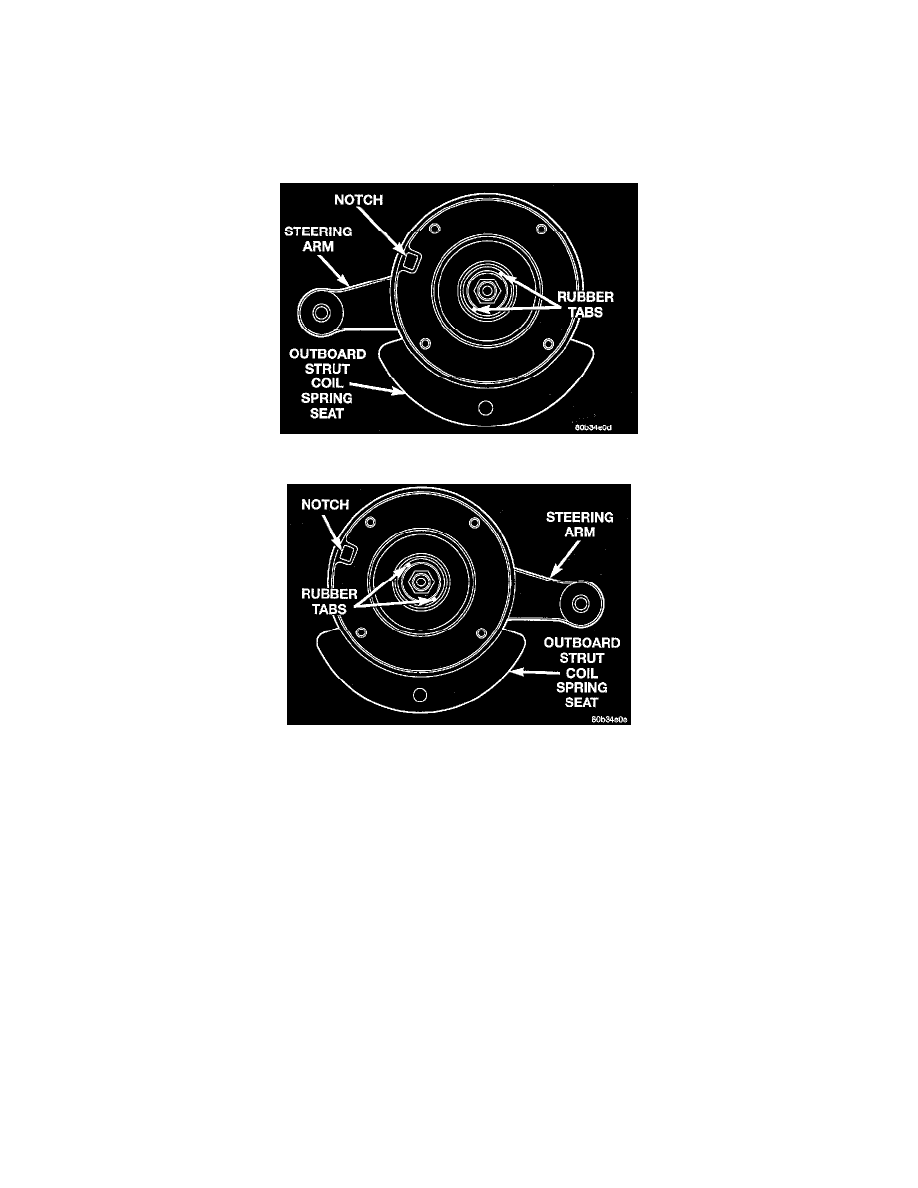
Left Front Strut Upper Mount
Right Front Strut Upper Mount
4. Inspect the upper strut mount assembly. Make sure the correct mount is on the correct side of the vehicle. Looking down at the top of the upper
mount, 2 tabs can be seen, down inside the mount center well. The positioning of these tabs is critical to vehicle ride and sound. DO NOT install a
right mount on the left front strut or a left mount on a right front strut.
5. If the strut is off the vehicle, a rectangular hole can be seen on the edge of the mount mounting surface. This is always in the 10 o'clock position
when observing rubber tab positioning, whether a left or right mount is being observed.