
Concorde V6-201 3.3L VIN T FI (1993)
Front Door Panel: Service and Repair
FRONT DOOR TRIM REMOVAL
CAUTION: Do not pry on door trim panel, damage to trim panel will result.
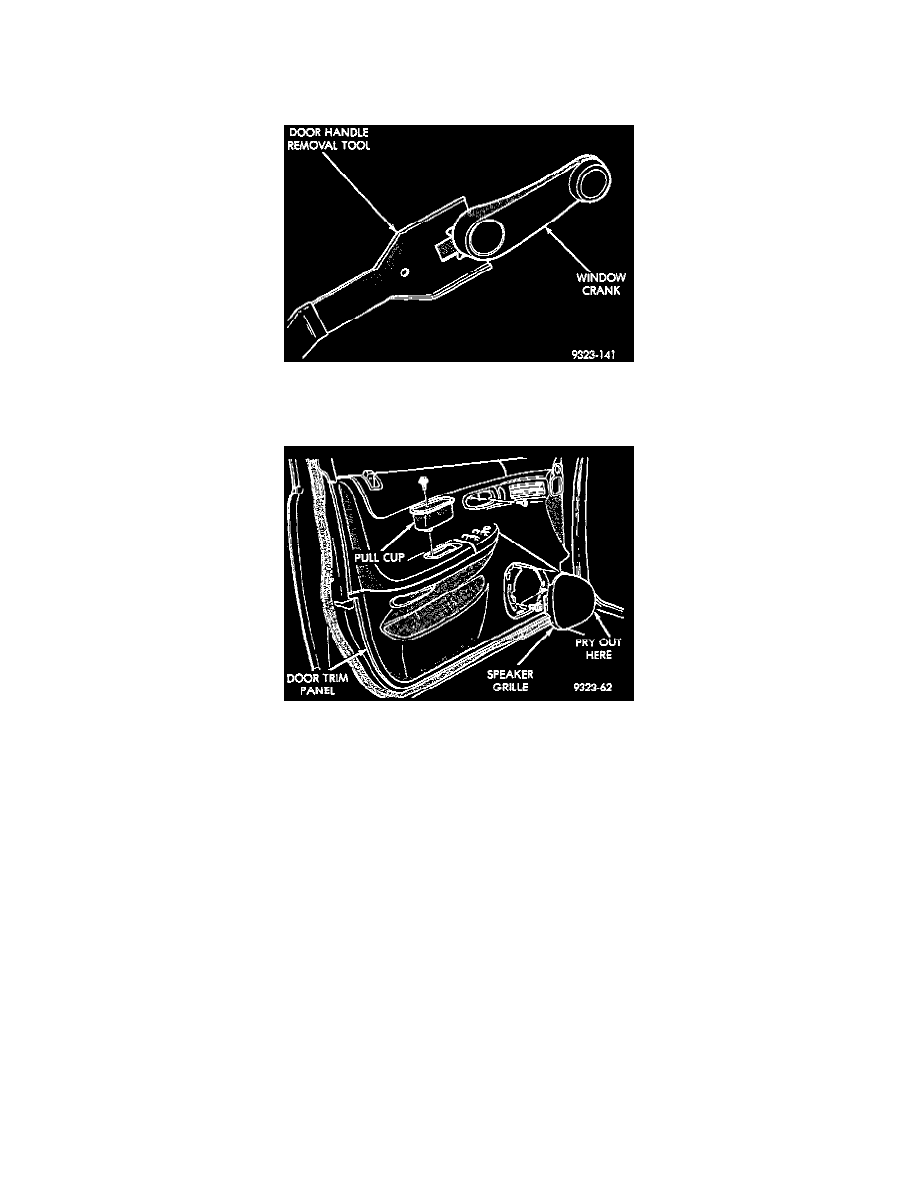
Window Crank
1. Using a door handle removal tool, disengage clip holding window crank to regulator and separate crank from door, if equipped.
Front Door Trim Panel
2. Disengage clips holding front of door speaker grille to trim panel and separate grille from trim panel.
3. Remove screws holding trim panel to door from inside speaker opening.
4. Remove screw holding pull cup to trim panel and separate pull cup from door. When installing pull cup, index arrow outward and snap pull cup
into trim panel.
5. Remove screw holding trim panel to door from behind inside latch handle.
6. If wire harness must remain with door, disengage clips holding power window switch panel to trim panel and separate switch panel from door.
Disconnect wire connector from switch, if equipped.
7. If wire harness must remain with door, disengage clips holding power mirror switch to trim panel and pull switch rearward out of trim panel.
Disengage wire connector from mirror switch, if equipped.
8. If wire harness is to remain with door trim panel, disconnect door jamb connector. Remove fasteners holding wire harness close-out cover to door
end frame. Disengage push-in retainers holding door opening weatherstrip to door end frame. Pull harness from under weatherstrip.
9. Lift trim panel upward to disengage channel retainer at top of trim and tilt trim panel outward.
10. Disengage wire connector from power door lock switch, if equipped.
11. Disengage wire connector from speaker, if equipped.