
Concorde V6-215 3.5L SOHC (1996)
4.
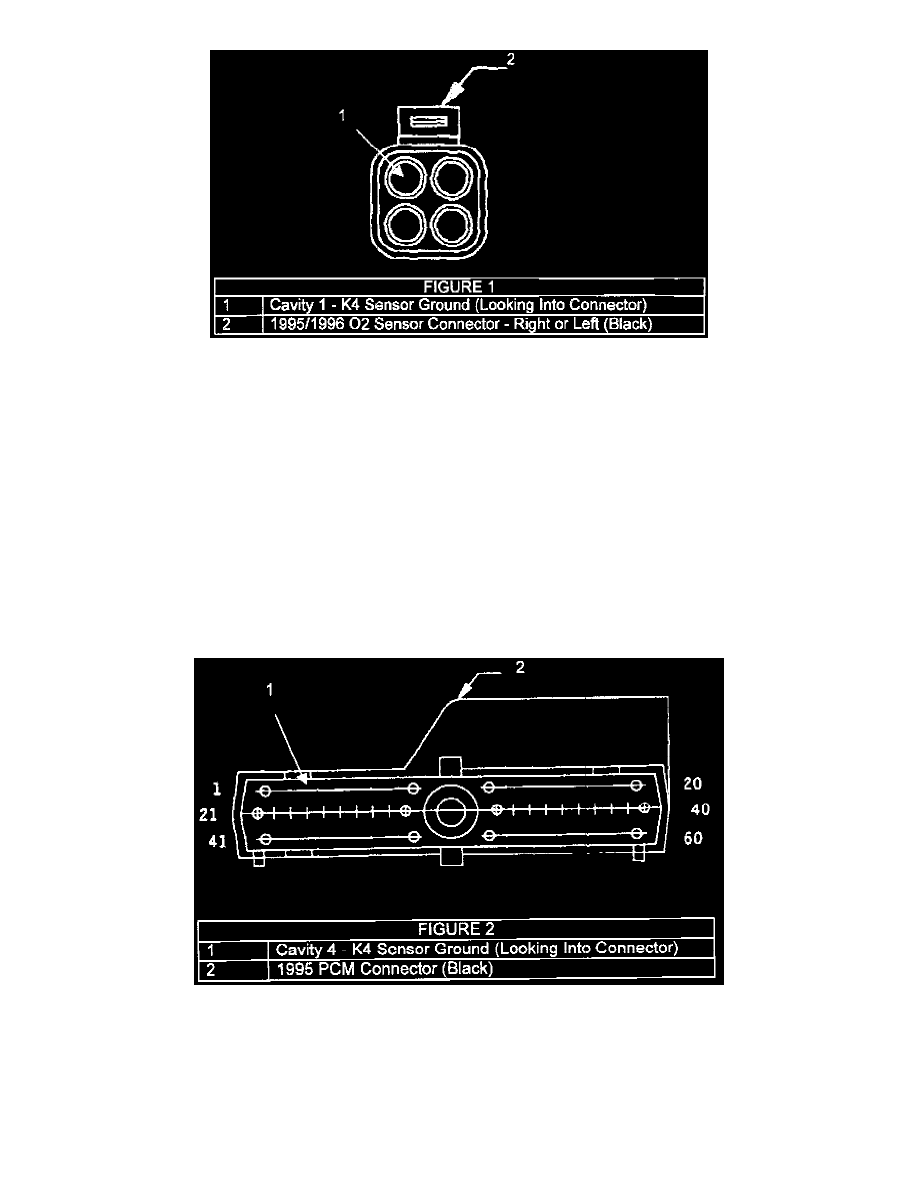
Identify the sensor ground terminal. This terminal is the No. 1, K4 circuit, 20 gauge black with a light blue tracer (Figure 1).
5.
Use a terminal pick or large paper clip and depress the latch while carefully pulling the rear secondary cap off the connector. Remove terminal No.
1 by carefully pulling from the rear while spreading the locking finger(s).
6.
Choose the shortest terminal lead from the appropriate repair jumper. Insert the new terminal, and wire lead into the vacant cavity (# 1) of the right
oxygen sensor connector. Re-assemble the connector by reversing the connector disassembly procedure.
7.
Fold the removed oxygen sensor terminal onto itself and place a piece of heat shrink tubing p/n 04778570 over the wire end. Shrink with a heat
gun until sealant flows from both ends. Tape the removed wire out of the way.
8.
Repeat steps 4 through 7 for the left oxygen sensor K4 circuit, (Figure 1) using the other lead from the Y spliced repair jumper, route the lead from
the jumper harness by following the same path as the engine harness.
9.
On 3.3L engines, route the remaining lead across the heater hose and towards the right ABS sensor. Follow the path of the head lamp and dash
harness across the front of the vehicle. For 3.5L engines, route the lead across the back of the engine. Use tie straps p/n 04856503 to secure the
jumper to the main wiring bundle(s).