
Concorde V6-3.2L VIN J (2000)
9. Using an trim tool, disengage the retainer clips from the door trim panel to the door panel.
10. Raise trim panel up to disengage from the belt being careful to hold the panel securely.
11. Disconnect the linkage from the remote handle assembly.
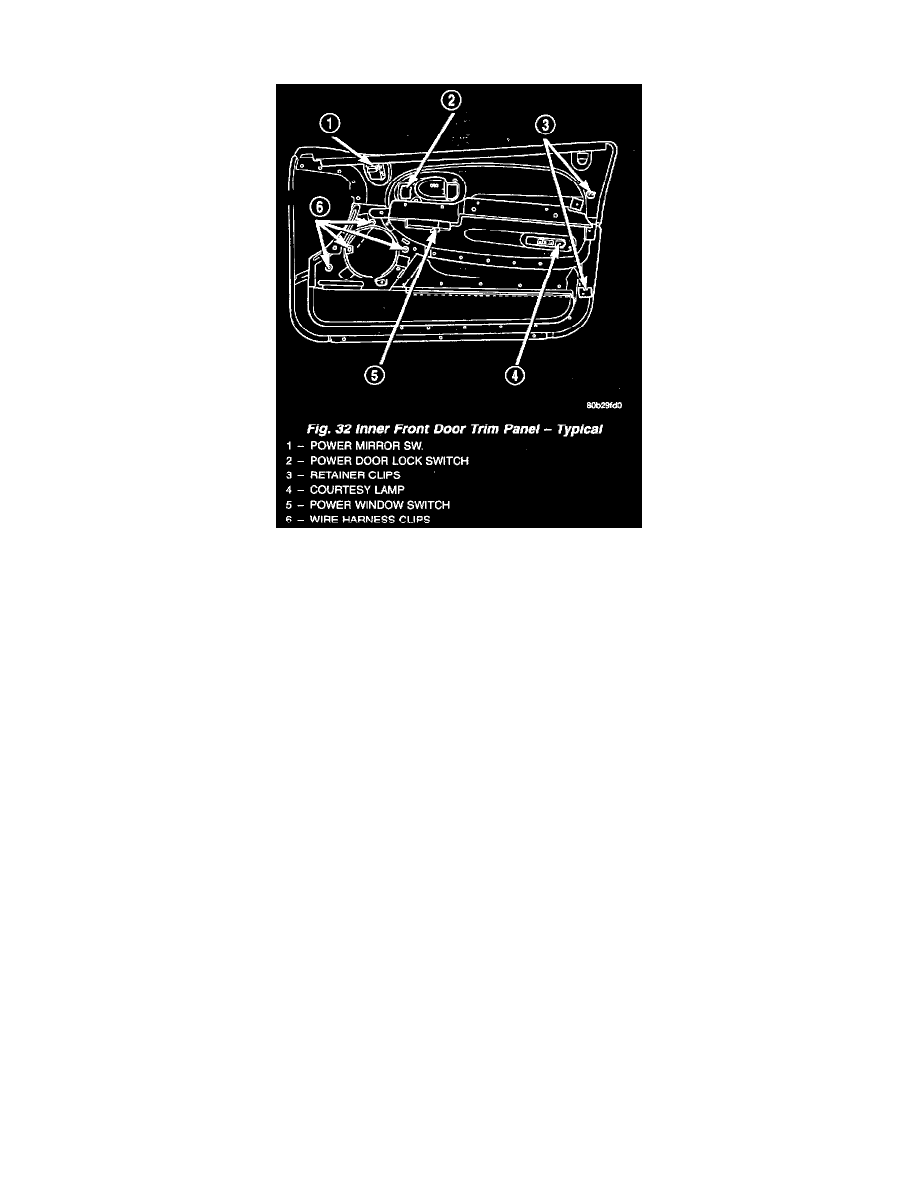
12. Disconnect the power mirror switch.
13. Disconnect the power door lock switch wire connector.
14. Disconnect the power window switch wire connector.
15. Disconnect the radio speaker wire connector
16. Disconnect wiring harness clips from trim panel.
17. Disconnect the courtesy lamp.
18. Remove trim panel from vehicle.
INSTALLATION
1. Place door trim panel in position.
2. Install wire harness clips into door trim pan
3. Connect the courtesy lamp.
4. Connect the radio speaker wire connector.
5. Connect the power window switch wire connector.
6. Connect the power door lock switch wire connector.
7. Connect the power mirror switch wire connector.
8. Connect the linkage to the handle assembly.
9. Install the water shield. Ensure that the water shield locator holes align. Ensure that the shield sealed.
10. Insert trim panel into channel retainer at top door.
11. Insert the forward four way alignment guide into position. Insert the rearward two way alignment guide into position.
12. Install new retaining clips to attach door trim panel to door panel.
13. Install three screws in the speaker area.
14. Install two screws in the instrument panel interface area.
15. Install screw in the remote bezel.
16. Install screw in pull cup. Tighten screw to 1.7 to 2.3 Nm (15 to 20 in. lbs.) torque.
17. Install three screws to the bottom of the door. Tighten screws to 1.7 to 2.3 Nm (15 to 20 in. lbs.) torque.
18. Install pull cup and remote bezel trim plug, if equipped.
19. Place speaker grille in position on trim panel. Attach door speaker clips to trim panel.
Lower Quarter Trim Panel
LOWER QUARTER TRIM
REMOVAL