
Concorde V6-3.5L VIN G (2002)
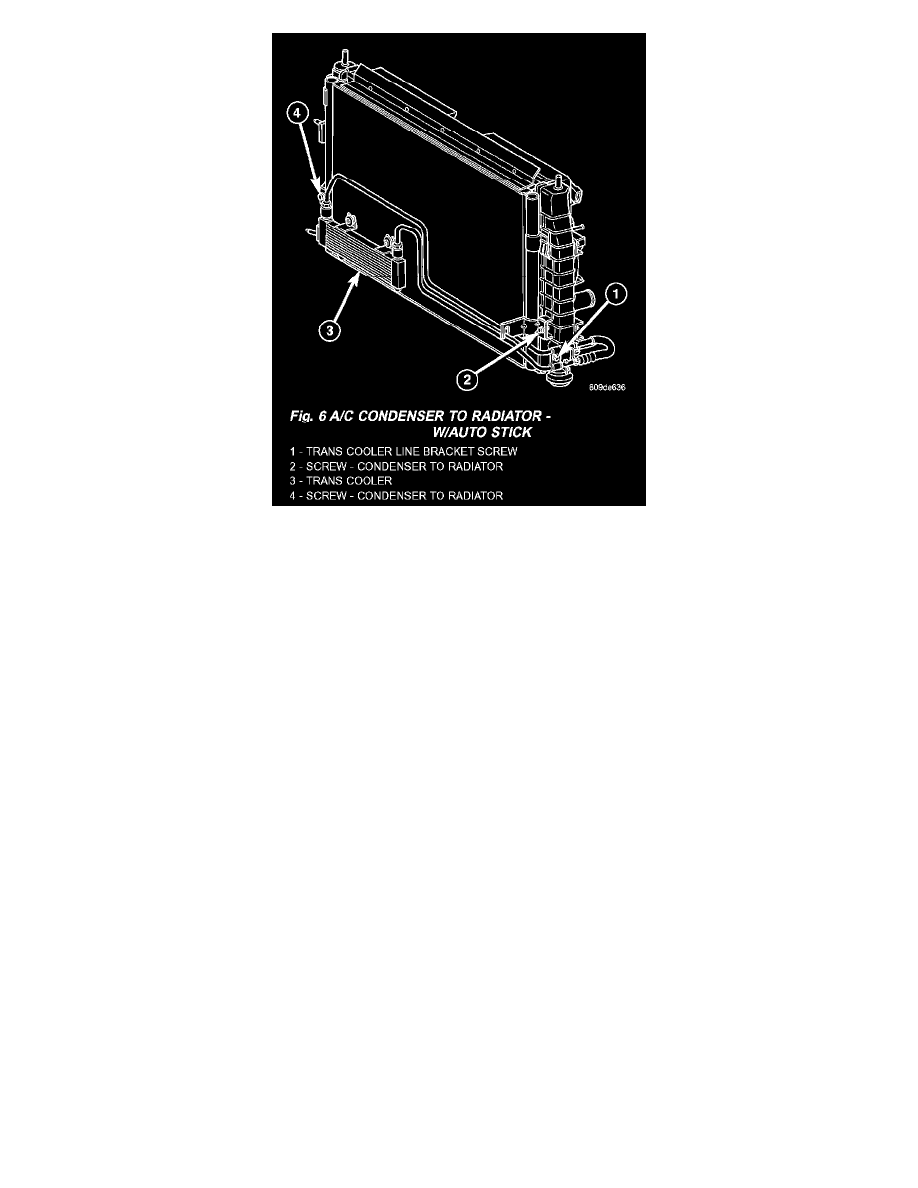
Fig. 6 A/C Condenser To Radiator - 3.2/3.5L & 2.7L W/Auto Stick
4. Undo the auxiliary transmission cooler hose fittings (Do not open the fittings at the Cooler) or.
5. Remove the screw and retainer bracket for the auxiliary transmission cooler lines.
6. Remove the discharge line fastener at condenser.
7. Remove the liquid line fastener at condenser.
8. Remove two screws retaining the condenser to the radiator.
9. Separate the condenser from the radiator.
10. Remove the condenser (with auxiliary transmission cooler attached) from the vehicle.
11. Cut the auxiliary transmission cooler retaining straps.
NOTE: The new condenser will include new retaining straps for the auxiliary transmission cooler attachment to new condenser assembly.
CAUTION: Avoid bending or breaking condenser inlet tube when lifting radiator/condenser assembly from the vehicle.
INSTALLATION
WARNING: REVIEW THE WARNINGS IN THE FRONT OF THIS SECTION BEFORE PERFORMING THE FOLLOWING
OPERATION.
Any kinks or sharp bends in the refrigerant plumbing will reduce the capacity of the entire air conditioning system. Kinks and sharp bends reduce the
flow of refrigerant in the system. A good rule for the flexible hose refrigerant lines is to keep the radius of all bends at least ten times the diameter of
the hose. In addition, the flexible hose refrigerant lines should be routed so they are at least 80 millimeters (3 inches) from the exhaust manifold.
High pressures are produced in the refrigerant system when the air conditioning compressor is operating. Extreme care must be exercised to make sure
that each of the refrigerant system connections is pressure-tight and leak free. It is a good practice to inspect all flexible hose refrigerant lines at least
once a year to make sure they are in good condition and properly routed.
1. Install the auxiliary transmission cooler in the same position on the condenser with new retaining straps.
2. Install the condenser in the vehicle.
3. Install the two screws retaining the condenser to the radiator. Tighten the screws to 10.5 Nm (95 in. lbs.).
4. Connect the liquid line to the condenser inlet. Tighten the retaining nut to 23 Nm (17 ft. lbs.).
5. Connect the discharge line to the condenser outlet. Tighten the retaining nut to 23 Nm (17 ft. lbs.).
6. Install the retainer bracket and screw for the auxiliary transmission cooler lines.
7. Connect the auxiliary transmission cooler hose fittings.
8. Install the upper radiator core support.
9. Connect the negative battery cable remote terminal to the remote battery post.