
Crossfire V6-3.2L VIN L (2004)
Rocker Arm Assembly: Service and Repair
DISASSEMBLY
REMOVAL
1. Remove the camshaft bearing bridge.
Note: Wear protective gloves, protective clothing, and eye protection.
Note: If shaft is tapped too hard there is a risk of distorting the camshaft bearing bridge and damaging the hollow rocker arm shaft.
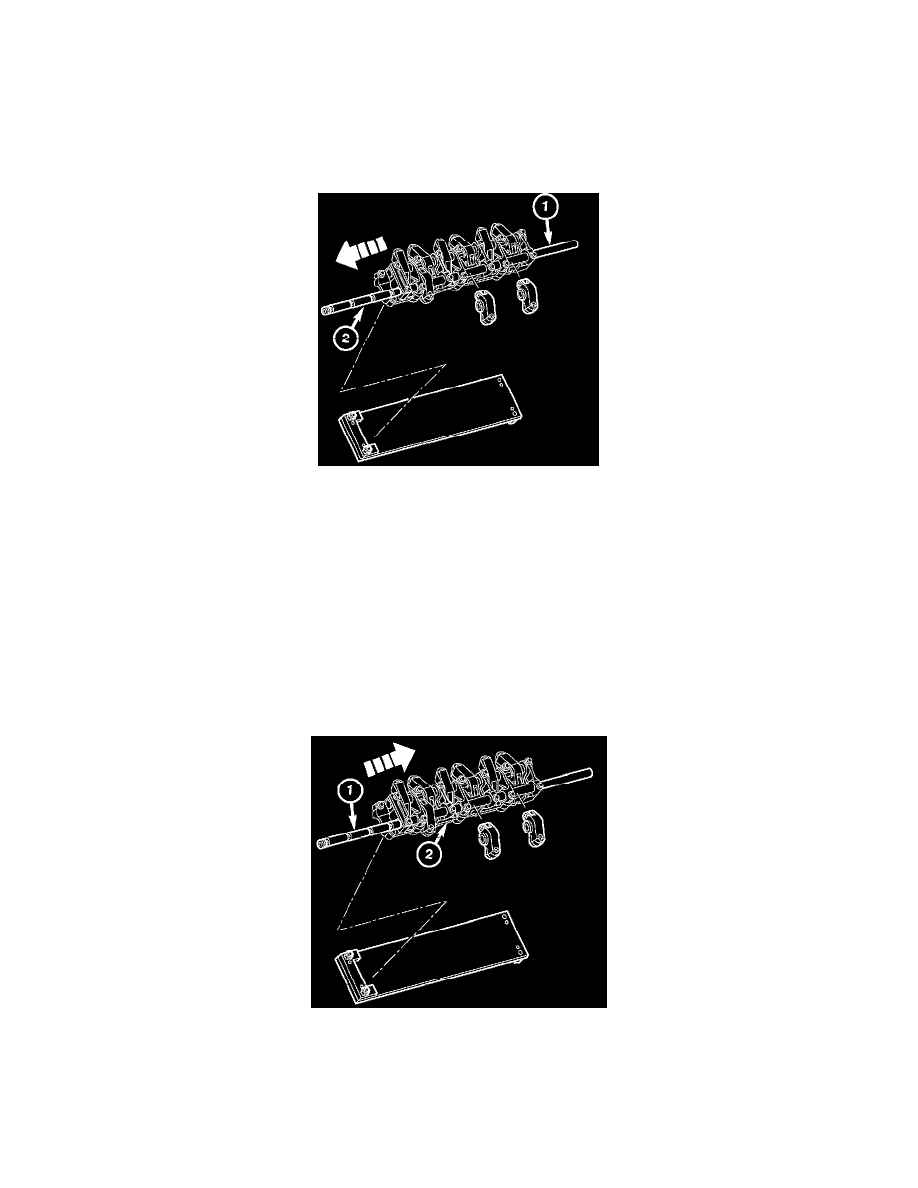
2. Use a 16 mm drift (1) to drive out the rocker shaft (2).
Note: If resistance is encountered while driving rocker shaft out of the camshaft bearing bridge, the bearing must be heated. Do not exceed 160 °C.
3. Remove the rocker arms and inspect the bearing surfaces.
4. If longitudinal scoring is present on rocker arm bearing, replace the rocker arm.
5. Clean all the parts thoroughly.
ASSEMBLY
INSTALLATION
CAUTION: Risk of injury to skin and eyes from handling hot or glowing objects.
Note: Wear protective gloves, protective clothing, and eye protection.
Note: If resistance is encountered while driving rocker shaft out of the camshaft bearing bridge, the bearing must be heated. Do not exceed 160 °C.
1. Cool the rocker arm shaft.
2. Insert the rocker arm shaft (1) into the camshaft bearing bridge (2) and through the rocker arms by tapping it gently with a mallet. Ensure that the
rocker arms are not crooked.
3. Insert two camshaft bearing bridge bolts through the attachment holes in the camshaft bearing bridge to align and secure the rocker arm shaft. The
oil supply holes in the rocker arm shaft points downward (toward the cylinder head).
4. Install the camshaft bearing bridge.