
Crossfire V6-3.2L VIN L (2004)
Fuel Level Sensor: Service and Repair
REMOVAL
1. Disconnect the negative battery cable.
2. Drain the fuel tank.
3. Remove the cargo area interior trim panels.
4. Remove the fuel tank partition retaining bolts and remove the fuel tank partition.
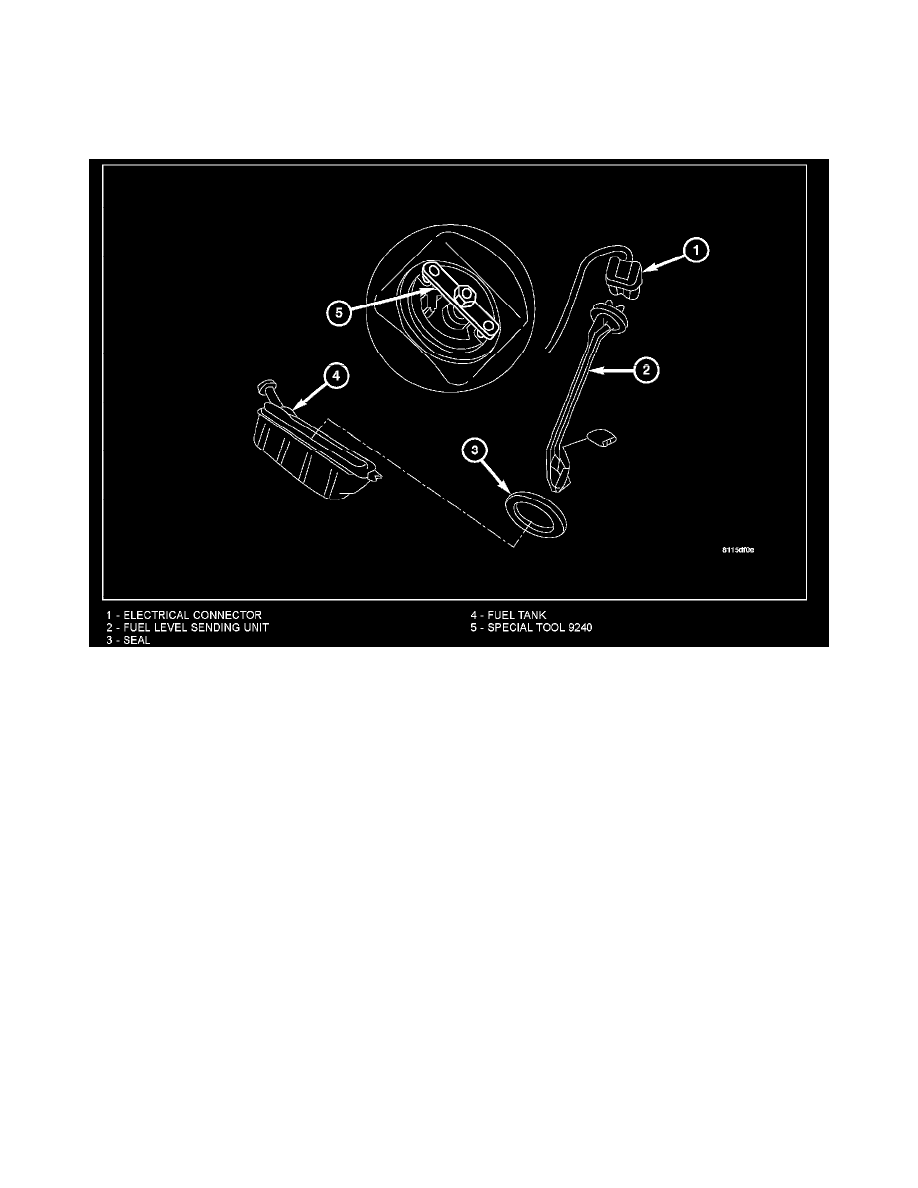
5. Disconnect the fuel level sending unit/sensor harness connector (1).
Note: Place a shop towel around the fuel level sending unit/sensor to catch any excess fuel during disassembly.
6. Install Special Tool 9240 (5) and rotate the fuel level sending unit/sensor (2) counterclockwise.
7. Remove the fuel level sending unit/sensor (2) from the fuel tank (4).
INSTALLATION
1. Install the fuel level sending unit/sensor into the fuel tank.
2. Install Special Tool 9240 and rotate the fuel level sending unit/sensor clockwise fully to stop. Remove the Special Tool.
3. Connect the fuel level sending unit/sensor harness connector.
4. Install the fuel tank partition into the cargo area, then install the retaining bolts and torque to 10 N.m (7 ft. lbs.).
5. Install the cargo area interior trim panels.
6. Restore the fuel level.
7. Connect the negative battery cable.