
Crossfire SRT-6 V6-3.2L SC VIN N (2005)
Trim Panel: Service and Repair
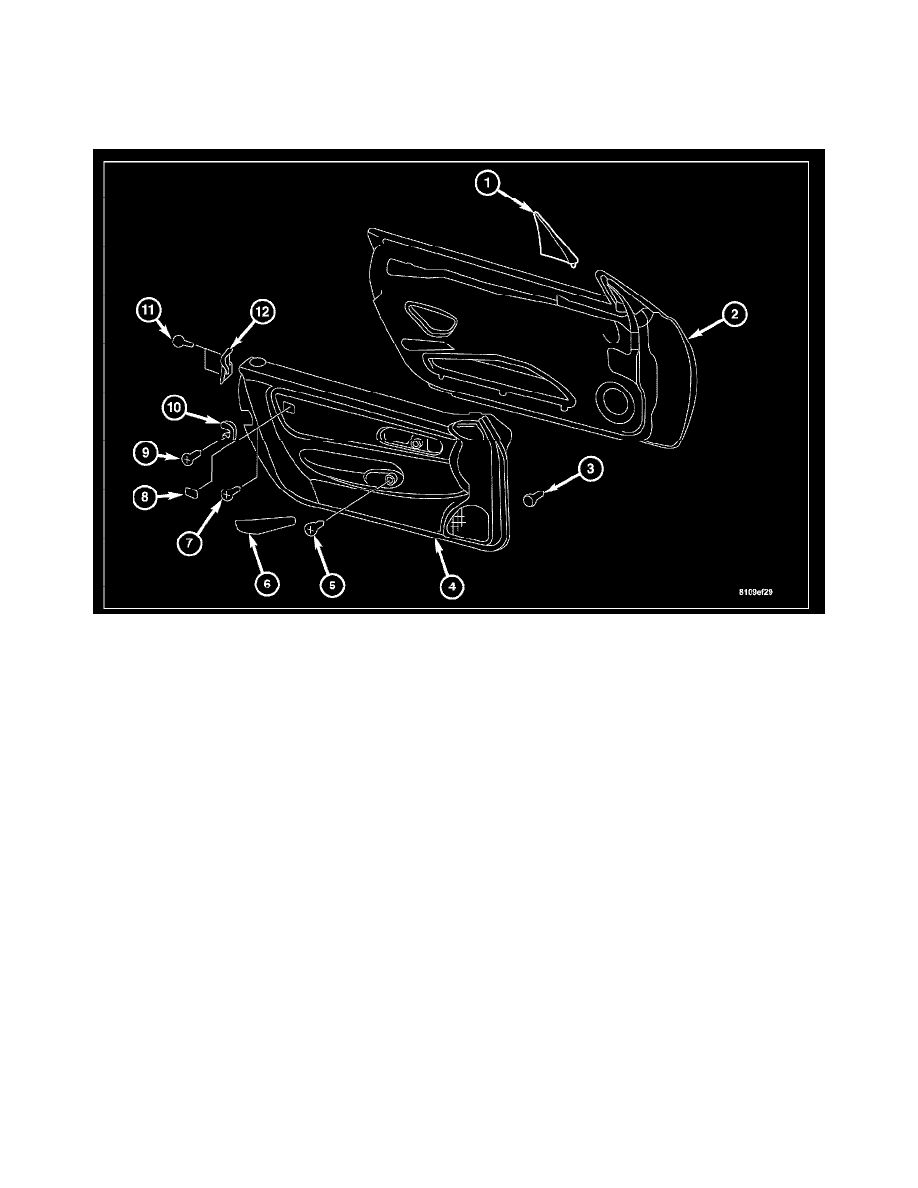
Front Door Trim Panel
TRIM PANEL
REMOVAL
1. Open the window.
2. Remove the pull handle cover (6) from the trim panel (4) by pressing out the cover from the bottom using a plastic wedge.
3. Remove the screw (5) behind the upper portion of the door handle pull (6).
4. Remove the escutcheon cover (1) using a plastic wedge.
5. Remove the chrome door end cover (12) by removing the two screws (11) attaching it to the door frame.
6. Remove the SRS cover (8) and remove the screw (7) behind the cover.
7. Remove the door trim panel (4) off inner door from the bottom, front and back using a plastic wedge.
8. Lift the top of the door trim panel upwards and out of the clips at the sealing rail using a plastic wedge and at the same time pull away from the
inner door.
9. Disconnect the front door speaker connector.
10. Disconnect the door lock cable from the plastic retainer clip located on the back side of the inside of the trim panel.
11. Remove the door trim panel (4) and place in a clean dry place.
12. Check the sheet-metal clip nuts (3) on the door trim panel. If necessary replace any damaged sheet-metal clip nuts.
13. Check the door foil on the door and the clips on the door lining. If necessary replace any damaged door foil or clips.
INSTALLATION