Crossfire SRT-6 V6-3.2L SC VIN N (2005)

CAUTION: Do not get brake fluid on any painted surfaces. Brake fluid can damage paint.
1. Disconnect the negative battery cable.
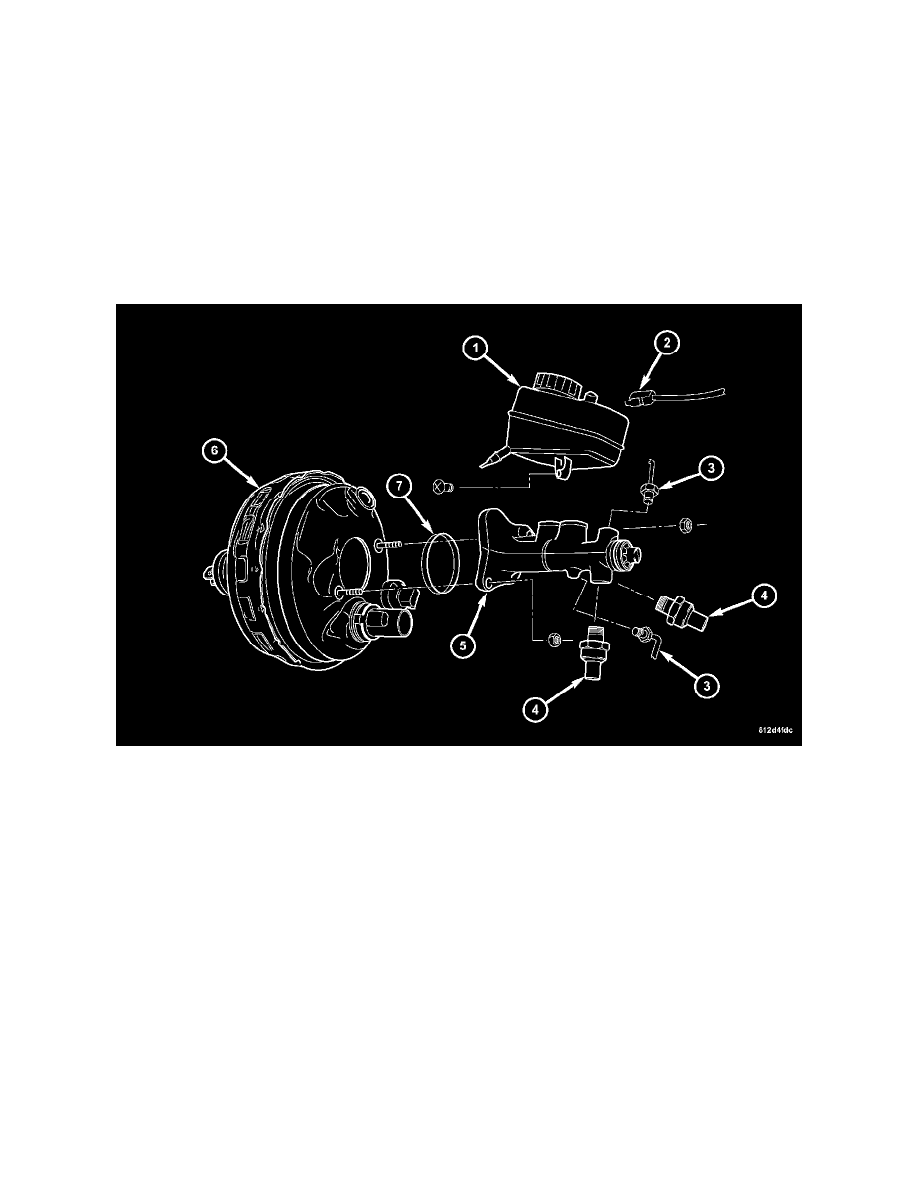
2. Disconnect the brake fluid level sensor harness connector (2) from the reservoir (1).
3. Disconnect the master cylinder brake fluid pressure sensor (4) harness connectors.
4. Remove brake lines (3) from master cylinder (5).
5. Remove the nuts that attach the master cylinder (5) to the booster studs.
WARNING: DO NOT TILT THE MASTER BRAKE CYLINDER WHEN REMOVING FROM THE BRAKE BOOSTER. IF TILTED,
THE BRAKE ROD CAN BE DISCONNECTED FROM THE MASTER CYLINDER.
6. Remove the master cylinder (5) from the booster (6).
INSTALLATION - RHD
1. Bleed the master cylinder on a bench.
2. Install the master cylinder (5) to the booster (6). Install the mounting nuts and tighten to 20 Nm (15 ft. lbs.).
3. Install the brake lines (3) to the master cylinder (5). Tighten to 14 Nm (10 ft. lbs.).
4. Connect the brake fluid level sensor harness connector (2) to the fluid reservoir (1).
5. Connect the negative battery cable.
6. Fill and bleed the brake system.
^
Manual bleeding:
^
Pressure bleeding:
