
Crossfire SRT-6 V6-3.2L SC VIN N (2005)
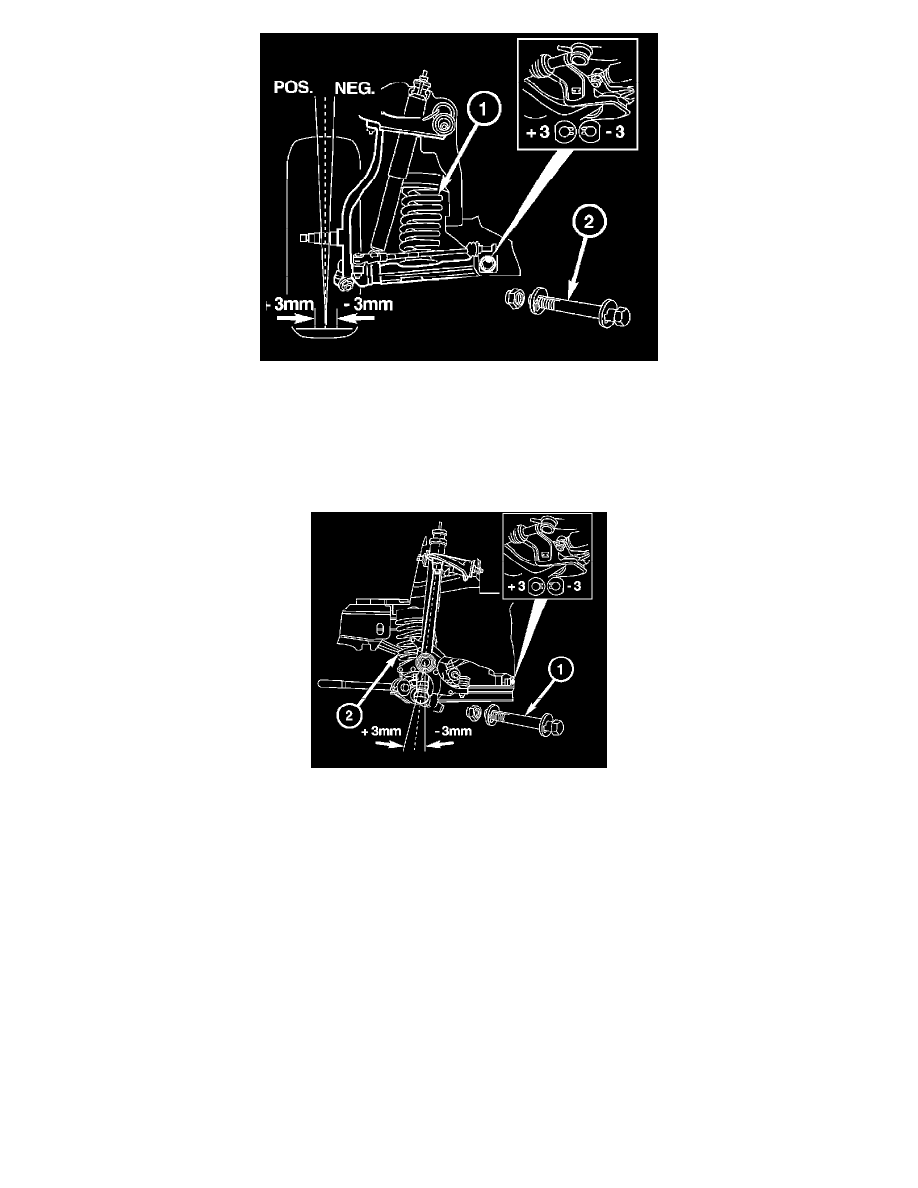
3. For camber, compress the front spring (1).
4. Install the repair bolt (2). Screw on the nut from the repair kit as far as it will go, but do not tighten it so that the rubber mount on the wishbone can
turn when the suspension is compressed and rebounded.
5. Release the front spring (1).
6. Lower the vehicle and settle the suspension by pulling and pushing firmly several times.
Note: Inspect for prior installation of the alignment bolt.
7. For caster, compress the front spring (2).
8. Install the repair bolt (1). Screw on the nut from the repair kit as far as it will go, but do not tighten it so that the rubber mount on the wishbone can
turn when the suspension is compressed and rebounded.
9. Release the front spring (2).
10. Lower the vehicle and settle the suspension by pulling and pushing firmly several times.
Note: The vehicle level must correlate with the dimension established on the initial measurement.
11. Recheck the vehicle level at the front axle after adjusting the camber and caster.
-
Vehicle level at the front axle.
-
With an electronic inclinometer.
Note: After repairing, the adjusting screw must not be turned by the shims, and must be countered when tightening the hexagon nut.
12. Tighten the nut from the repair kit to 120 Nm (88 ft. lbs.).
13. Adjust the rear axle toe.
14. Adjust the front axle toe.
Checking and Adjusting Front Toe-In
STANDARD PROCEDURE - CHECKING AND ADJUSTING FRONT TOE-IN