
Crossfire SRT-6 V6-3.2L SC VIN N (2005)
Fluid Filter - A/T: Testing and Inspection
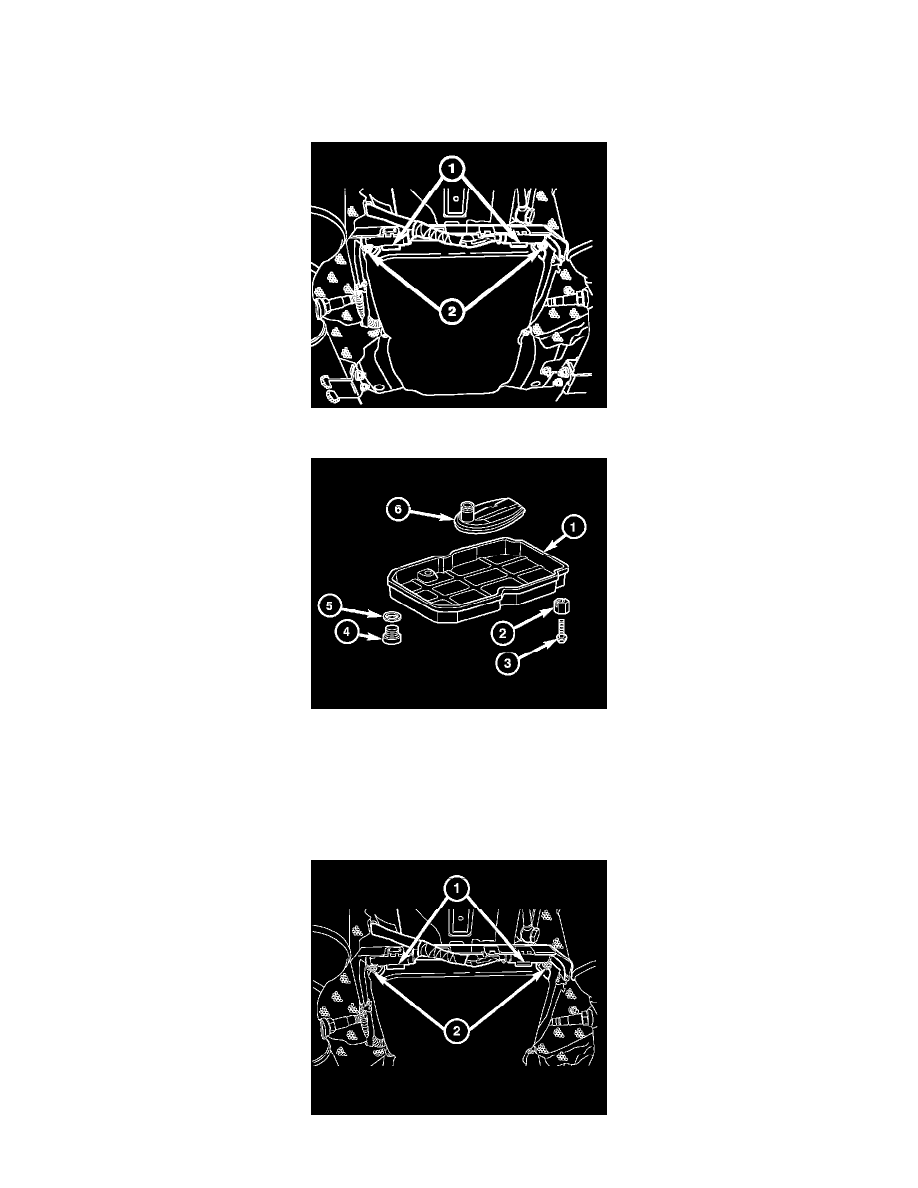
STANDARD PROCEDURE - FILTER CHANGE
1. Raise and support the vehicle.
2. Position a drain pan under the transmission drain plug. Remove the plug (2) and the gasket (1). Allow the transmission to drain thoroughly.
3. Remove the oxygen sensor wire harness (1) from the heat shield.
4. Remove the screws (2) from the heat shield and position it out of the way.
5. Remove the remaining screws (3) and the transmission pan (1).
6. Remove and discard the transmission filter (6) from the valve body.
7. Clean the transmission oil pan and the gasket surface of the transmission.
8. Install a new transmission filter (6).
9. Replace the transmission pan gasket if damaged or swollen.
10. Install the transmission pan (1) and bolts (3). Tighten the bolts to 8 Nm (71 inch lbs.).
11. Install the drain plug (2) with a new gasket (1). Tighten the drain plug to 20 Nm (15 lbs.ft.).
12. Install the heat shield and the bolts (2). Tighten the bolts to 8 Nm (71 inch lbs.).