
Laser L4-135 2.2L SOHC Turbo VIN E FI (1984)
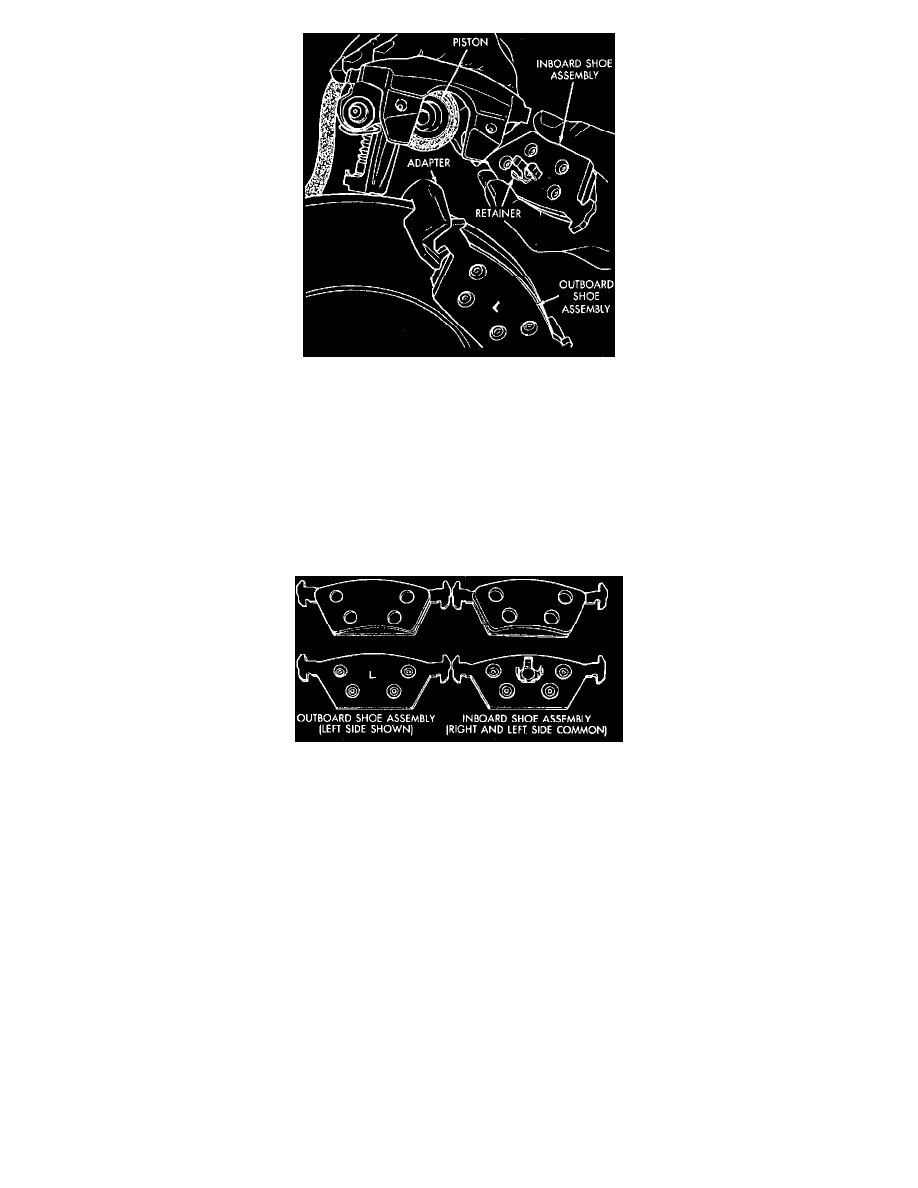
Fig. 6 Brake shoe replacement
1. Raise and properly support vehicle.
2. Remove rear wheels, then clean caliper in area of access plug.
3. Remove access plug and insert a 4 mm Allen wrench through access hole, and engage retraction shaft. Rotate retraction shaft with Allen wrench
counterclockwise to increase clearance between brake shoes and disc.
4. Remove outboard anti-rattle spring. Use care not to deform spring.
5. Back out the caliper guide pins to free caliper from adapter. Remove guide pins only if bushings or sleeve require replacement.
6. Lift caliper upward and away from disc. The inboard shoe will remain in caliper, attached to piston. Suspend caliper from a suspension member
with suitable wire. Do not allow caliper to hang by brake hose.
7. Remove inboard shoe from piston (caliper) and outboard shoe from adapter.
Fig. 7 Brake shoe identification
8. When installing shoes and the caliper, note the following:
a. It will be necessary to retract the piston further with the Allen wrench due to the thickness of the new shoes. When retracting the piston, stop
rotation of Allen wrench when slight resistance is encountered. This indicates that the piston has bottomed. Do not use excessive force since
damage to retraction and actuation shafts may occur.
b. The inboard shoes are interchangeable and may be used on either side of the vehicle. The outboard shoes are not interchangeable and are
marked "L" for left side or "R" for right side of vehicle.
c. Fit the retainer on inboard shoe into piston. Install proper outboard shoe on adapter. Lower caliper over disc and outboard shoe. Install and
torque guide pins to 18---26 ft. lbs. Be sure not to crossthread the pins. Install anti-rattle spring.
d. To set the initial clearance between the brake shoes and disc, rotate the retraction shaft with the Allen wrench clockwise until snug, then back
off 0.33 turn.
Kelsey-Hayes Single Pin Floating Caliper