
Lebaron GTS L4-153 2.5L SOHC VIN K TBI (1988)
Utilize the terminal removal procedure specified under "TYPICAL BLADE TERMINAL" section of this document.
NOTE:
THE SEALS MUST BE REINSTALLED AFTER REPAIRS ARE MADE.
PIN HEADER
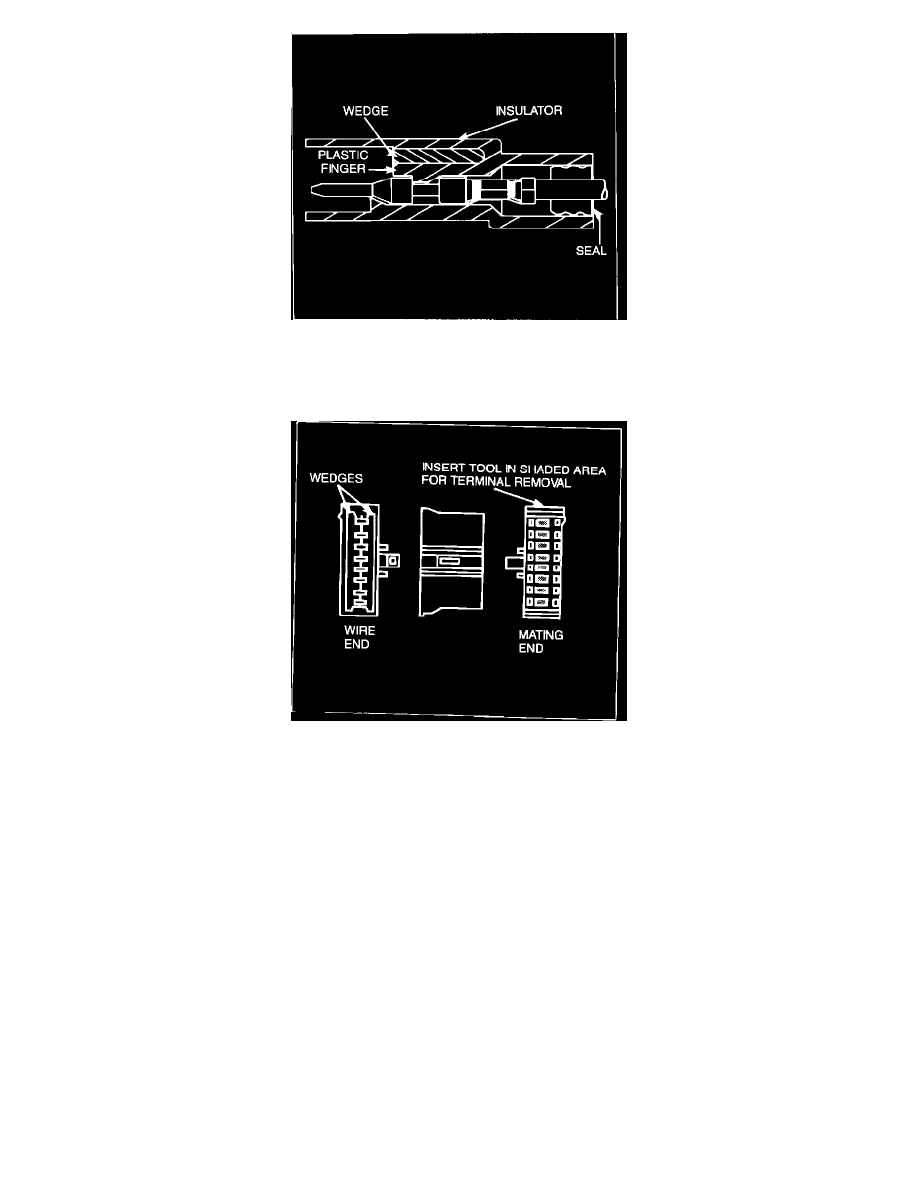
To remove the pin header terminal from the connector, first remove the locking wedge(s). Then, using the Packard Electric tool (#8913369) or
equivalent, insert tool gently into area shown to depress lock tang, until terminal can be pulled out of the connector by its wire.
a.
Removal and Installation of Terminals. When installing a new terminal, push the terminal into the connector until a "click" is felt. Pull lightly on
wire to check if the terminal is properly locked. Then, replace locking wedges simply by sliding them into the slots in the connector, until they
"click" into place.
b.
Repair Broken or Cut Wires. Slide heat shrink tubing over one end of the damaged wire. Twist the wires together, and apply rosin core solder
(60/40) or equivalent.
NOTE:
ACID FLUX OR ACID CORE SOLDER IS NOT PERMITTED.
Slide heat shrink tube over splice and apply heat until the tubing shrinks sufficiently and the sealant oozes out.
C.
Installing Wire Terminals. Using a "Super Champ FT" tool or equivalent, strip approximately 6.35 mm (1/4") of insulation to allow the terminal
wire grips to cover the wire strands.
NOTE:
FOR PIN HEADER TERMINALS STRIP LESS INSULATION FROM THE
WIRE:
APPROXIMATELY 1/8".