
Lebaron GTS L4-153 2.5L SOHC VIN K TBI (1988)
Steering Column: Service and Repair
Without Tilt
Removal/Installation
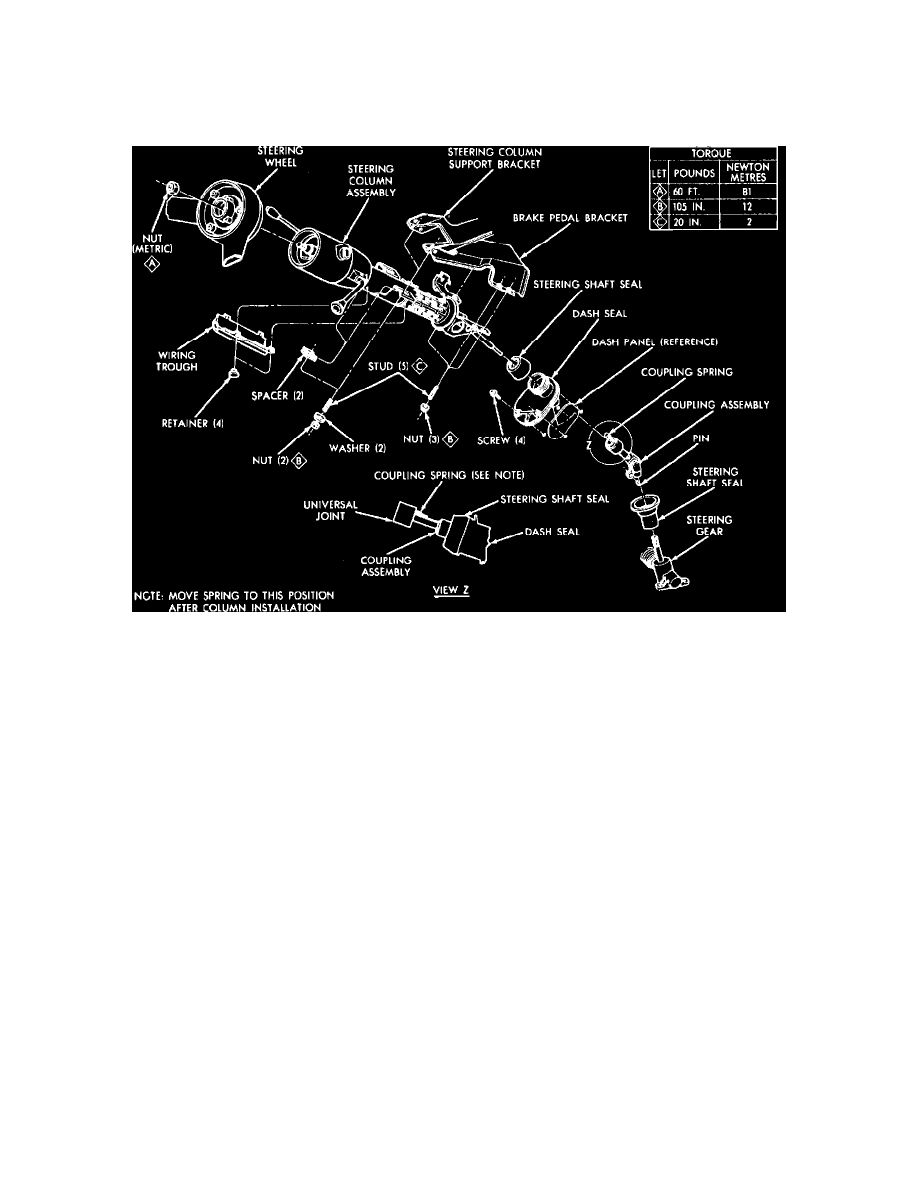
Fig. 6 Typical steering column installation. FWD w/standard column exc. Charger, Daytona, Horizon, Laser, Omni & Turismo; models w/tilt wheel similar
FWD MODELS EXC. CHARGER, DAYTONA, HORIZON, LASER, OMNI & TURISMO
REMOVAL
1. Disconnect battery ground cable.
2. On column shift vehicles, disconnect cable rod by prying rod out of grommet in shift lever.
3. Disconnect all wiring connectors at steering column jacket and remove steering wheel center pad.
4. Disconnect horn wires and horn switch.
5. Remove steering wheel.
6. Expose steering column bracket, remove instrument panel steering column cover and lower reinforcement. Remove bezel.
7. Remove indicator setscrew and shaft indicator pointer from shift housing.
8. Remove nuts attaching steering column bracket to instrument panel support, then lower the bracket support to the floor. Do not remove
roll pin to remove steering column assembly.
9. Pull steering column rearward, and disconnect lower shaft from coupling.
10. Reinstall anti-rattle clip into lower coupling tube slot.
11. Remove column assembly out through passenger compartment being careful not to damage paint or trim.